in the frame
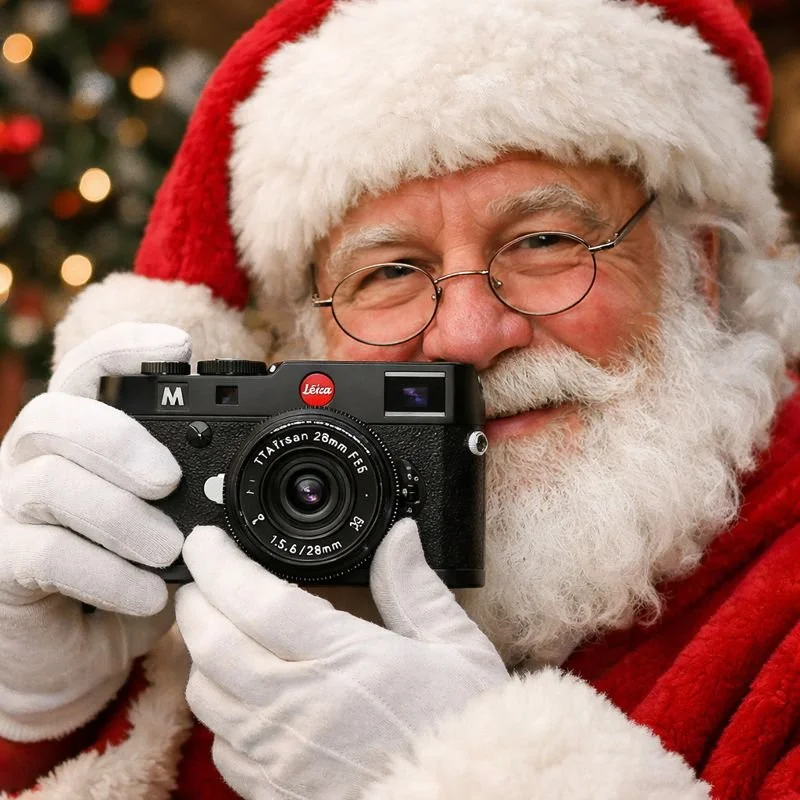
Camera Santa
Camera Santa was very kind to me this year, I was lucky to get a 28mm M mount lens for my Leica cameras.
The 28mm focal length is often called the "goldilocks" of street photography. It’s wide enough to capture the energy of a city street but tight enough to feel personal. Recently, I took my Leica M10 paired with the tiny TTArtisan 28mm f/5.6 for a spin through the heart of London to see how this modern "tribute" lens handles the grit and glamour of the capital.
I’ll be honest: 28mm is my absolute favorite focal length. I have loved this aspect since I bought the Ricoh GRII (second hand) a couple of years ago. Its also generally the focal length of smartphones, which was origins of my interest in street photography (whilst on my commute into the office, back in the day). Whilst I really enjoy both the 35mm and 50mm, there is a specific immersion you get with a 28mm that makes the viewer feel like they are standing right next to you on the pavement.
Standing on the Shoulders of Giants
Before diving into the photos, it’s worth noting that the 28mm has a legendary pedigree. Some of the most influential street photographers in history chose this perspective to document the world:
Garry Winogrand: The master of the 28mm. He used its wide field of view to pack his frames with "organized chaos," often tilting the camera to create a sense of frantic energy.
William Klein: Known for his raw, "in-your-face" style, Klein loved the 28mm because it forced him to get physically close to his subjects, creating a sense of intimacy that a longer lens just can't replicate.
Daido Moriyama: For his gritty, high-contrast snapshots of Tokyo, Moriyama famously utilized the fixed 28mm lens of the Ricoh GR series to capture the "are-bure-boke" (rough, blurred, and out-of-focus) aesthetic.
The Walk: From Embankment to the West End
The TTArtisan 28mm f/5.6 is a "pancake" lens, making the M10 incredibly pocketable and discrete. Because the maximum aperture is a modest f/5.6, this lens is designed for zone focusing. It’s kind of counterintuitive to have a F2 28mm lens, when the basis of the lens is to shoot wide and deep. I set my aperture to f/8, my focus to between 2 / 3 meters, and let the depth of field do the work.
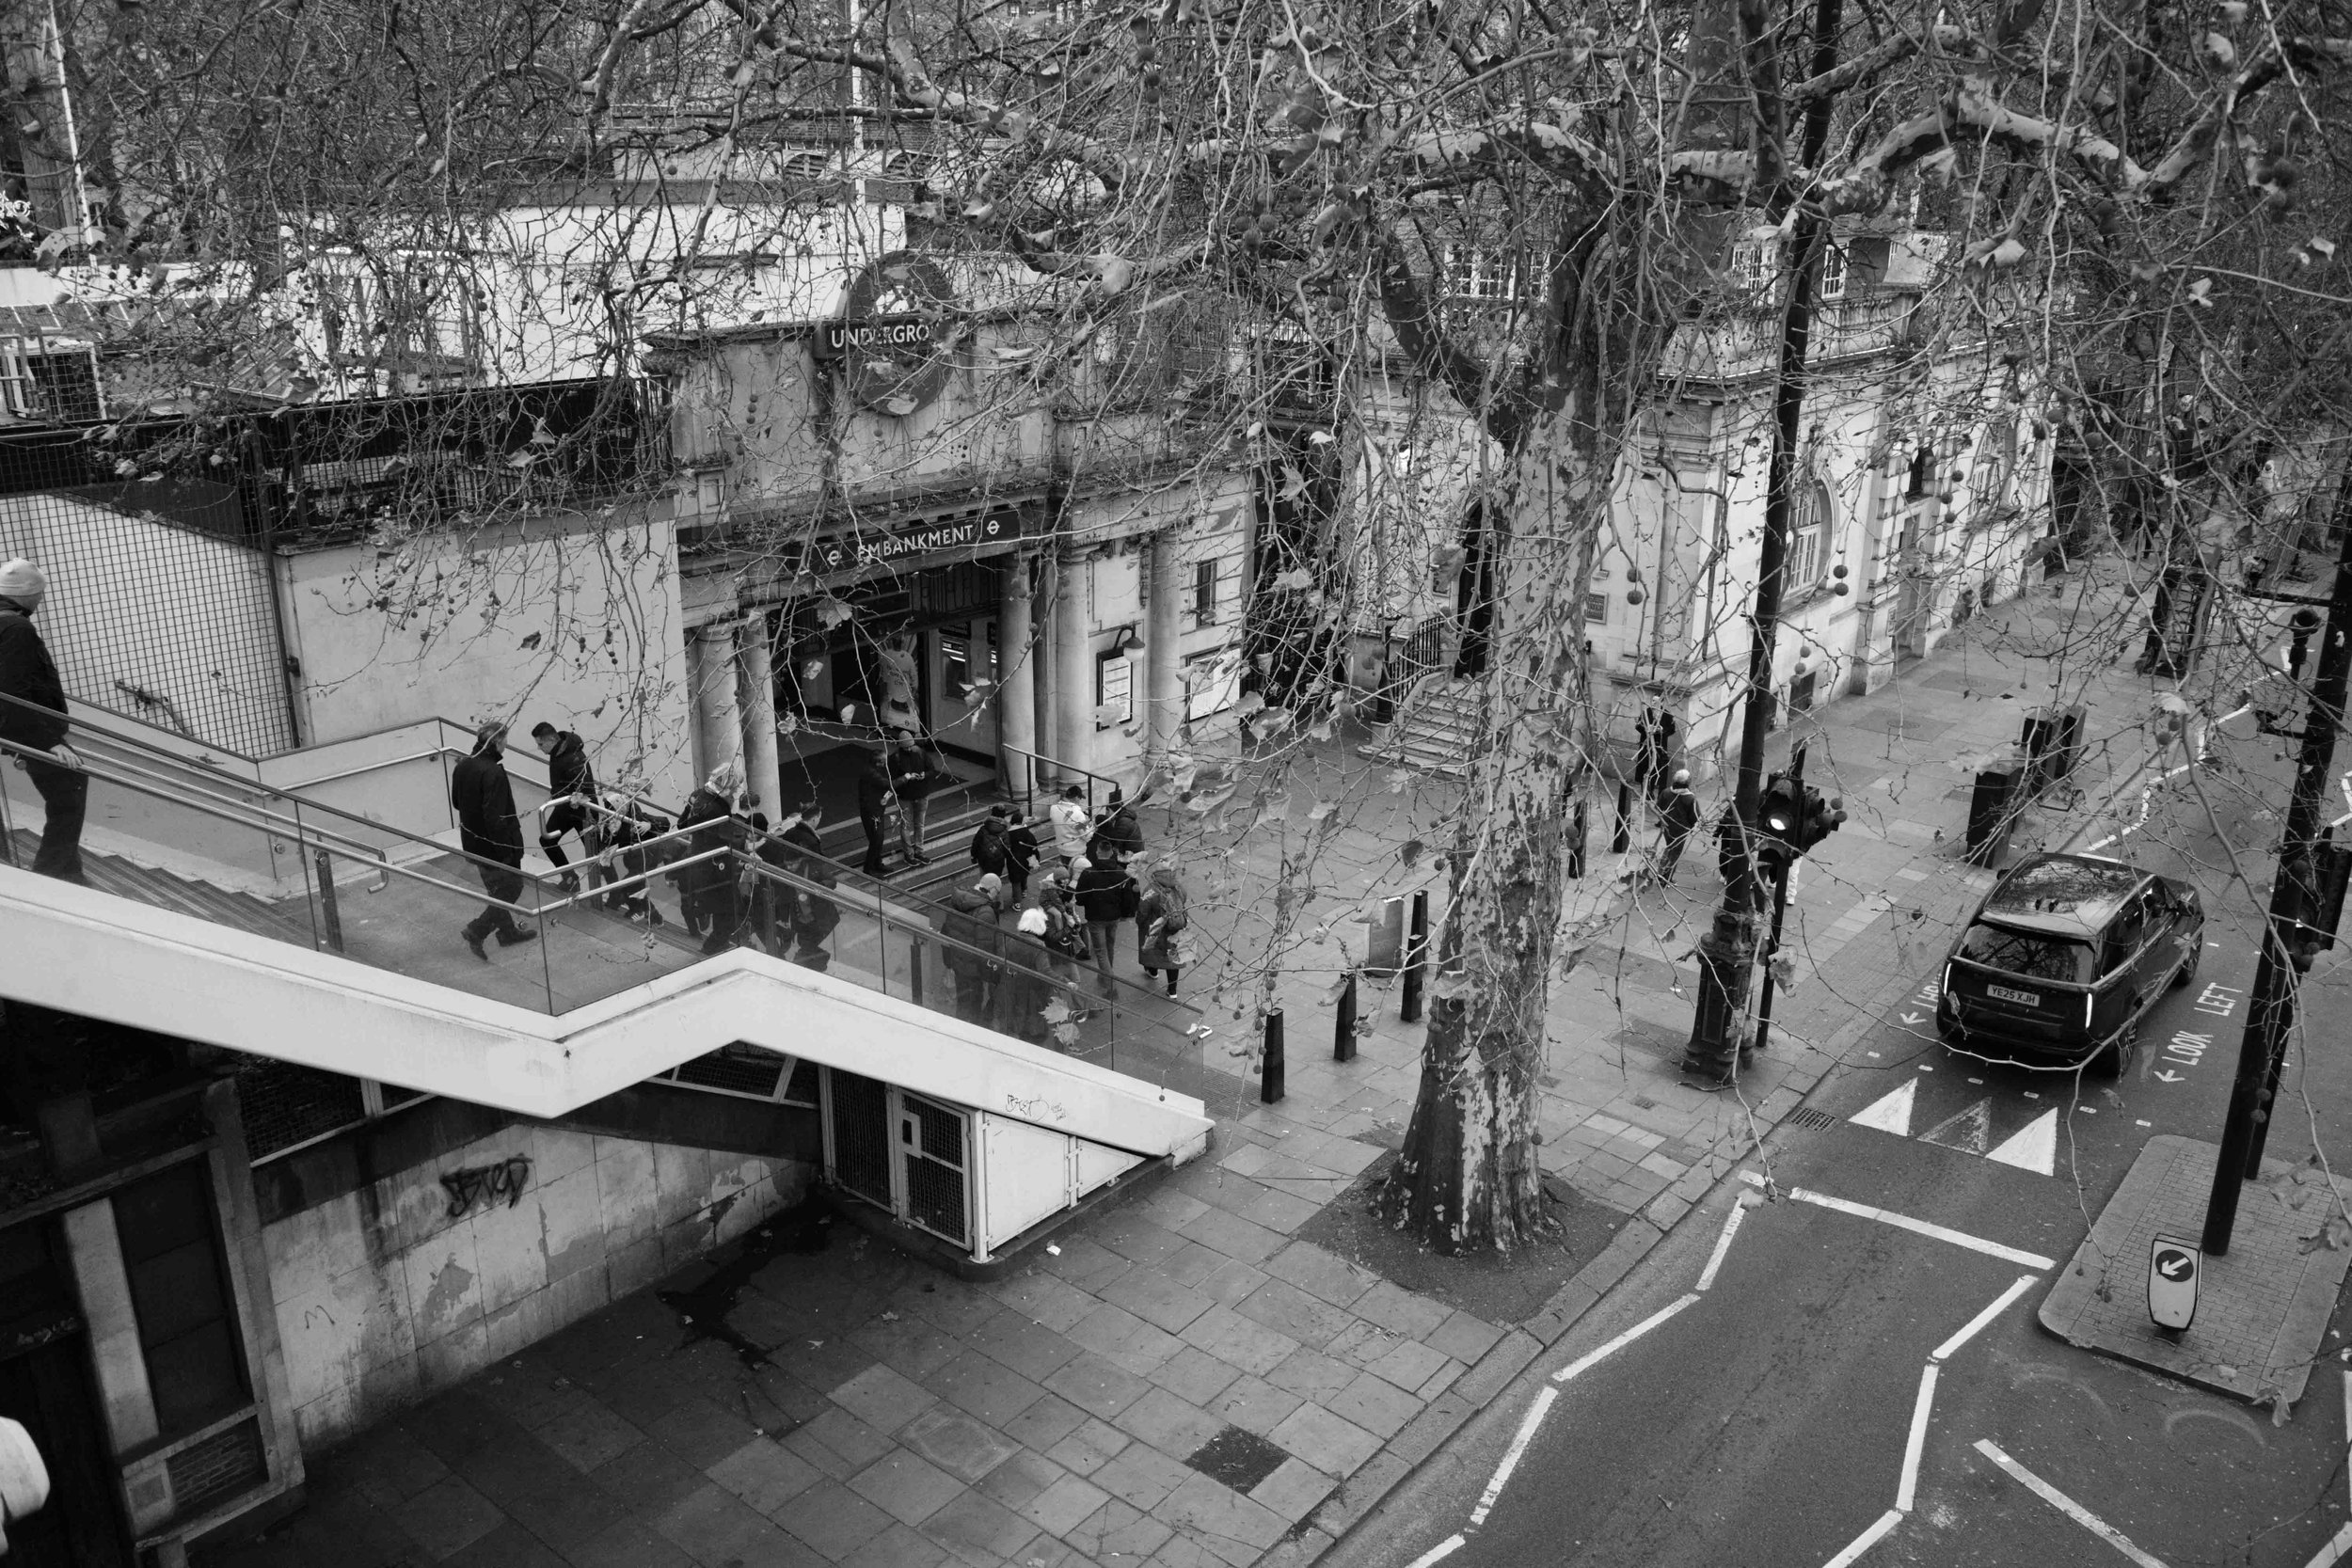
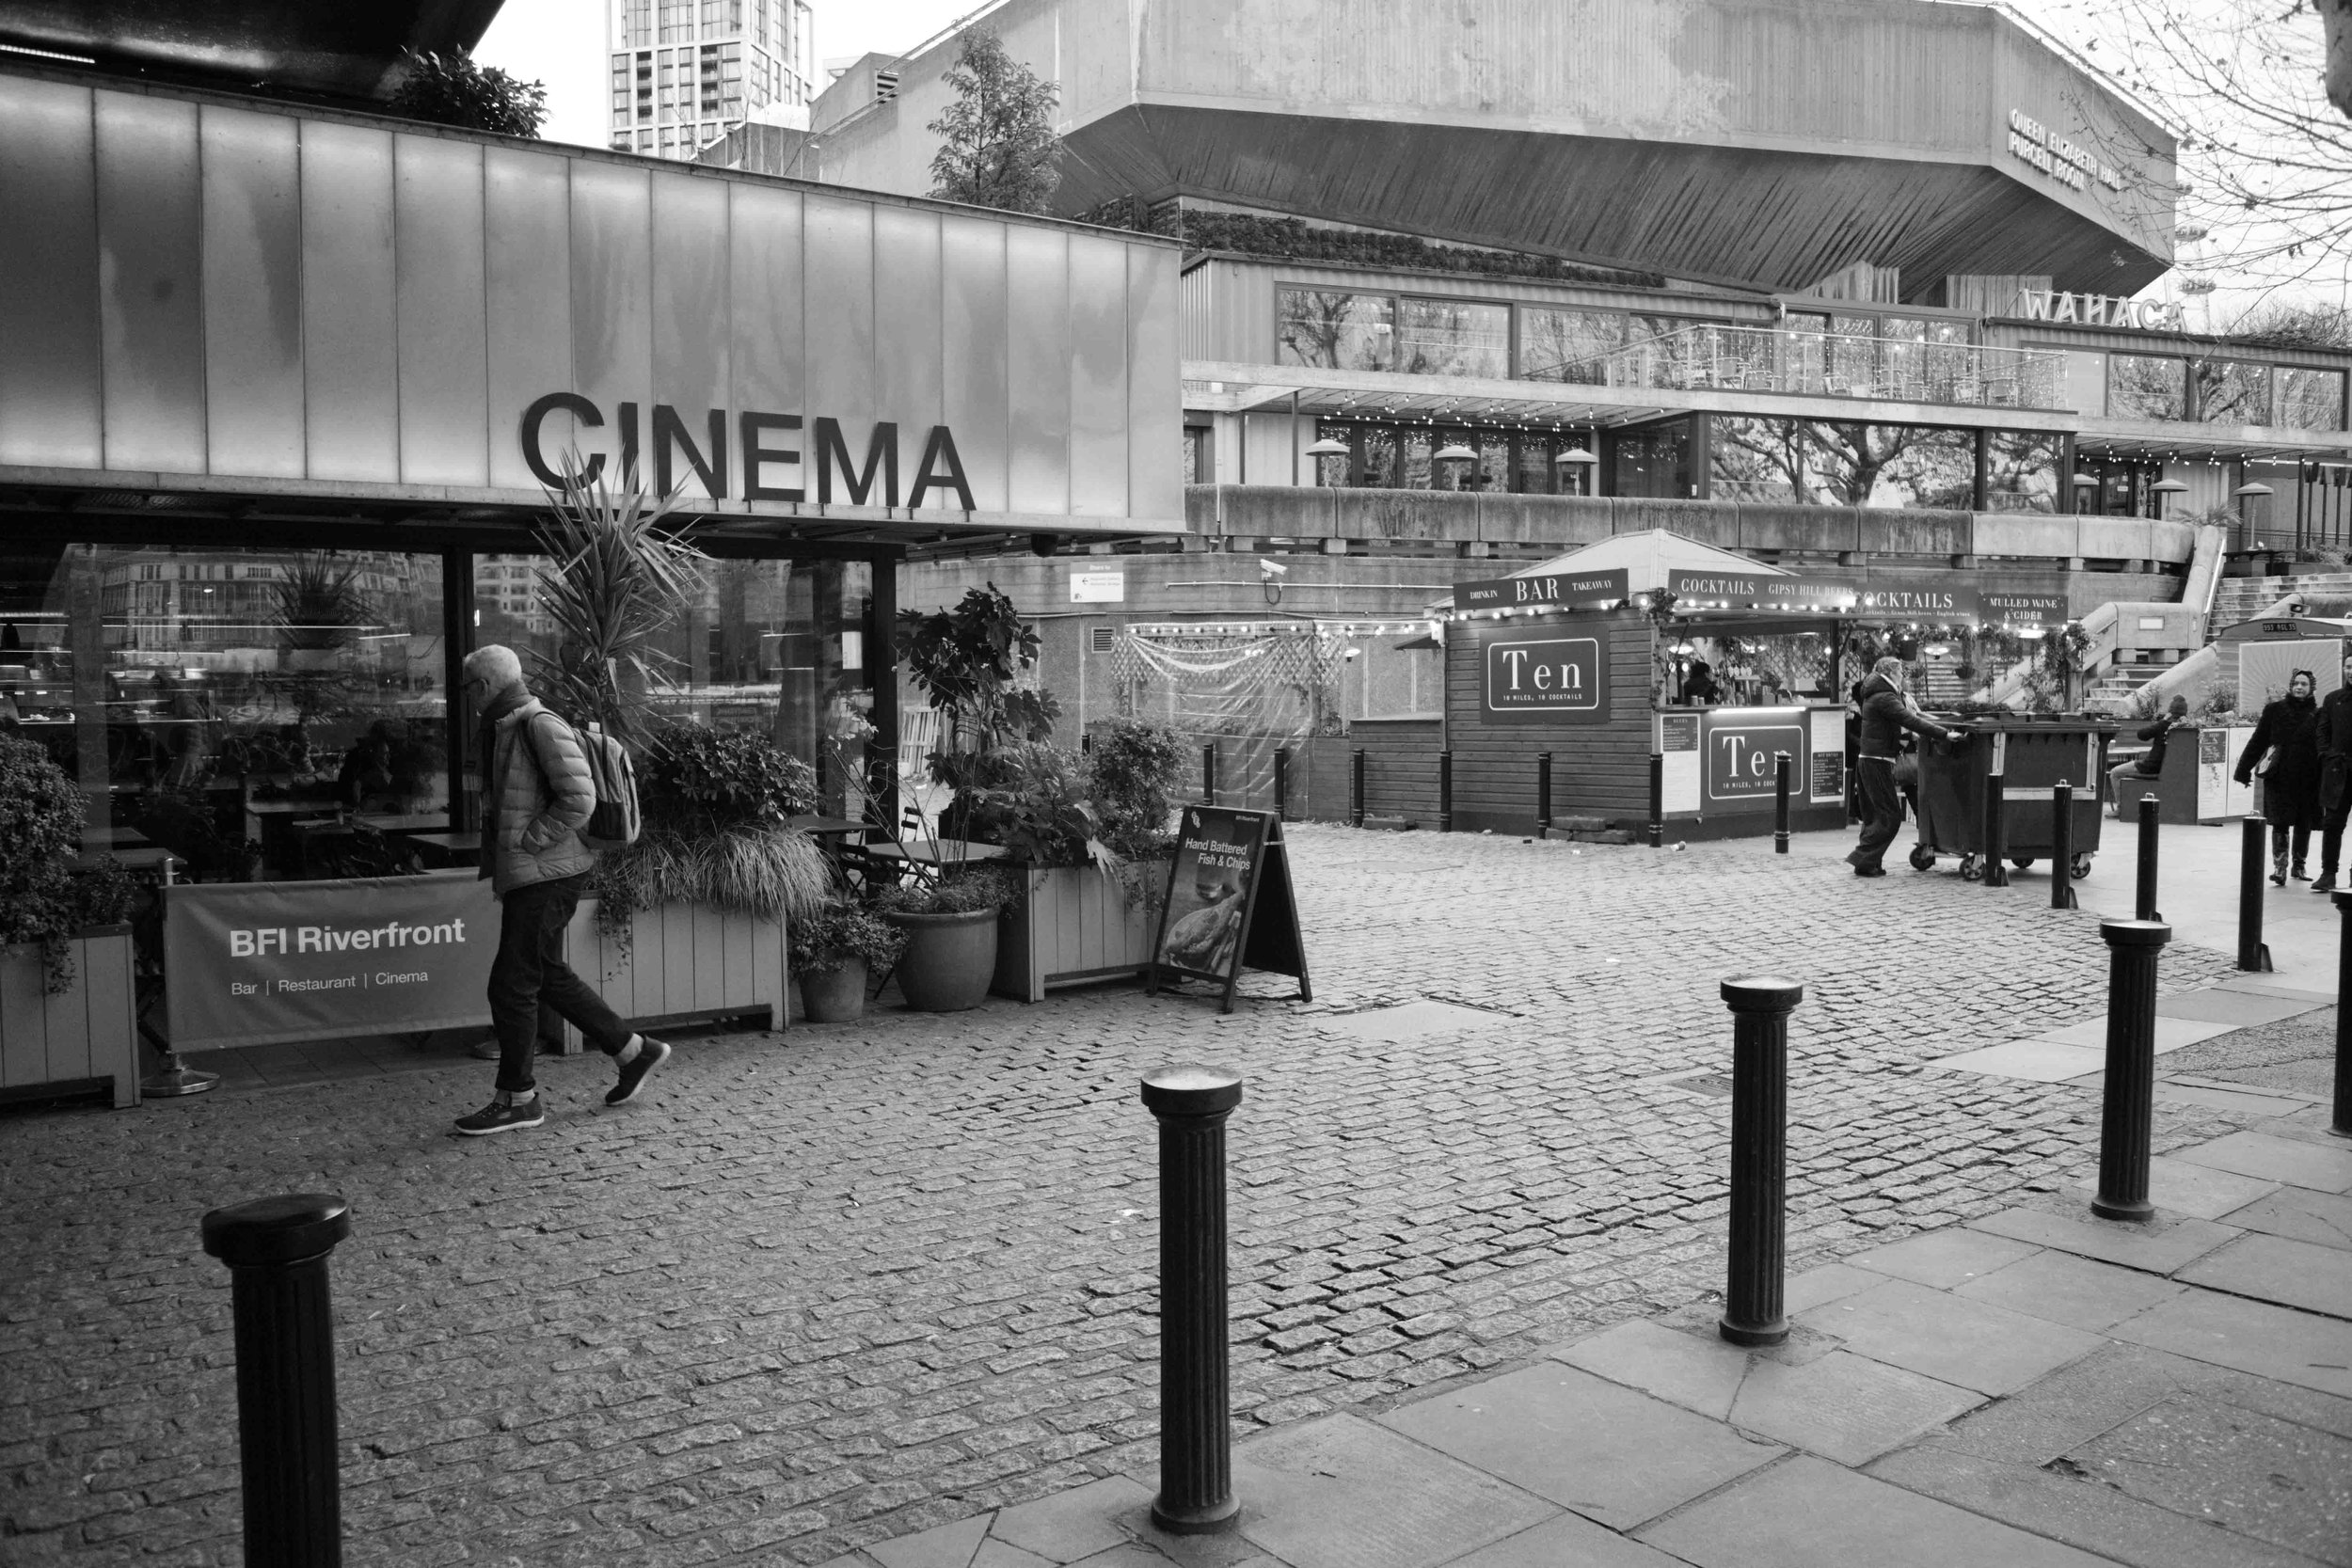
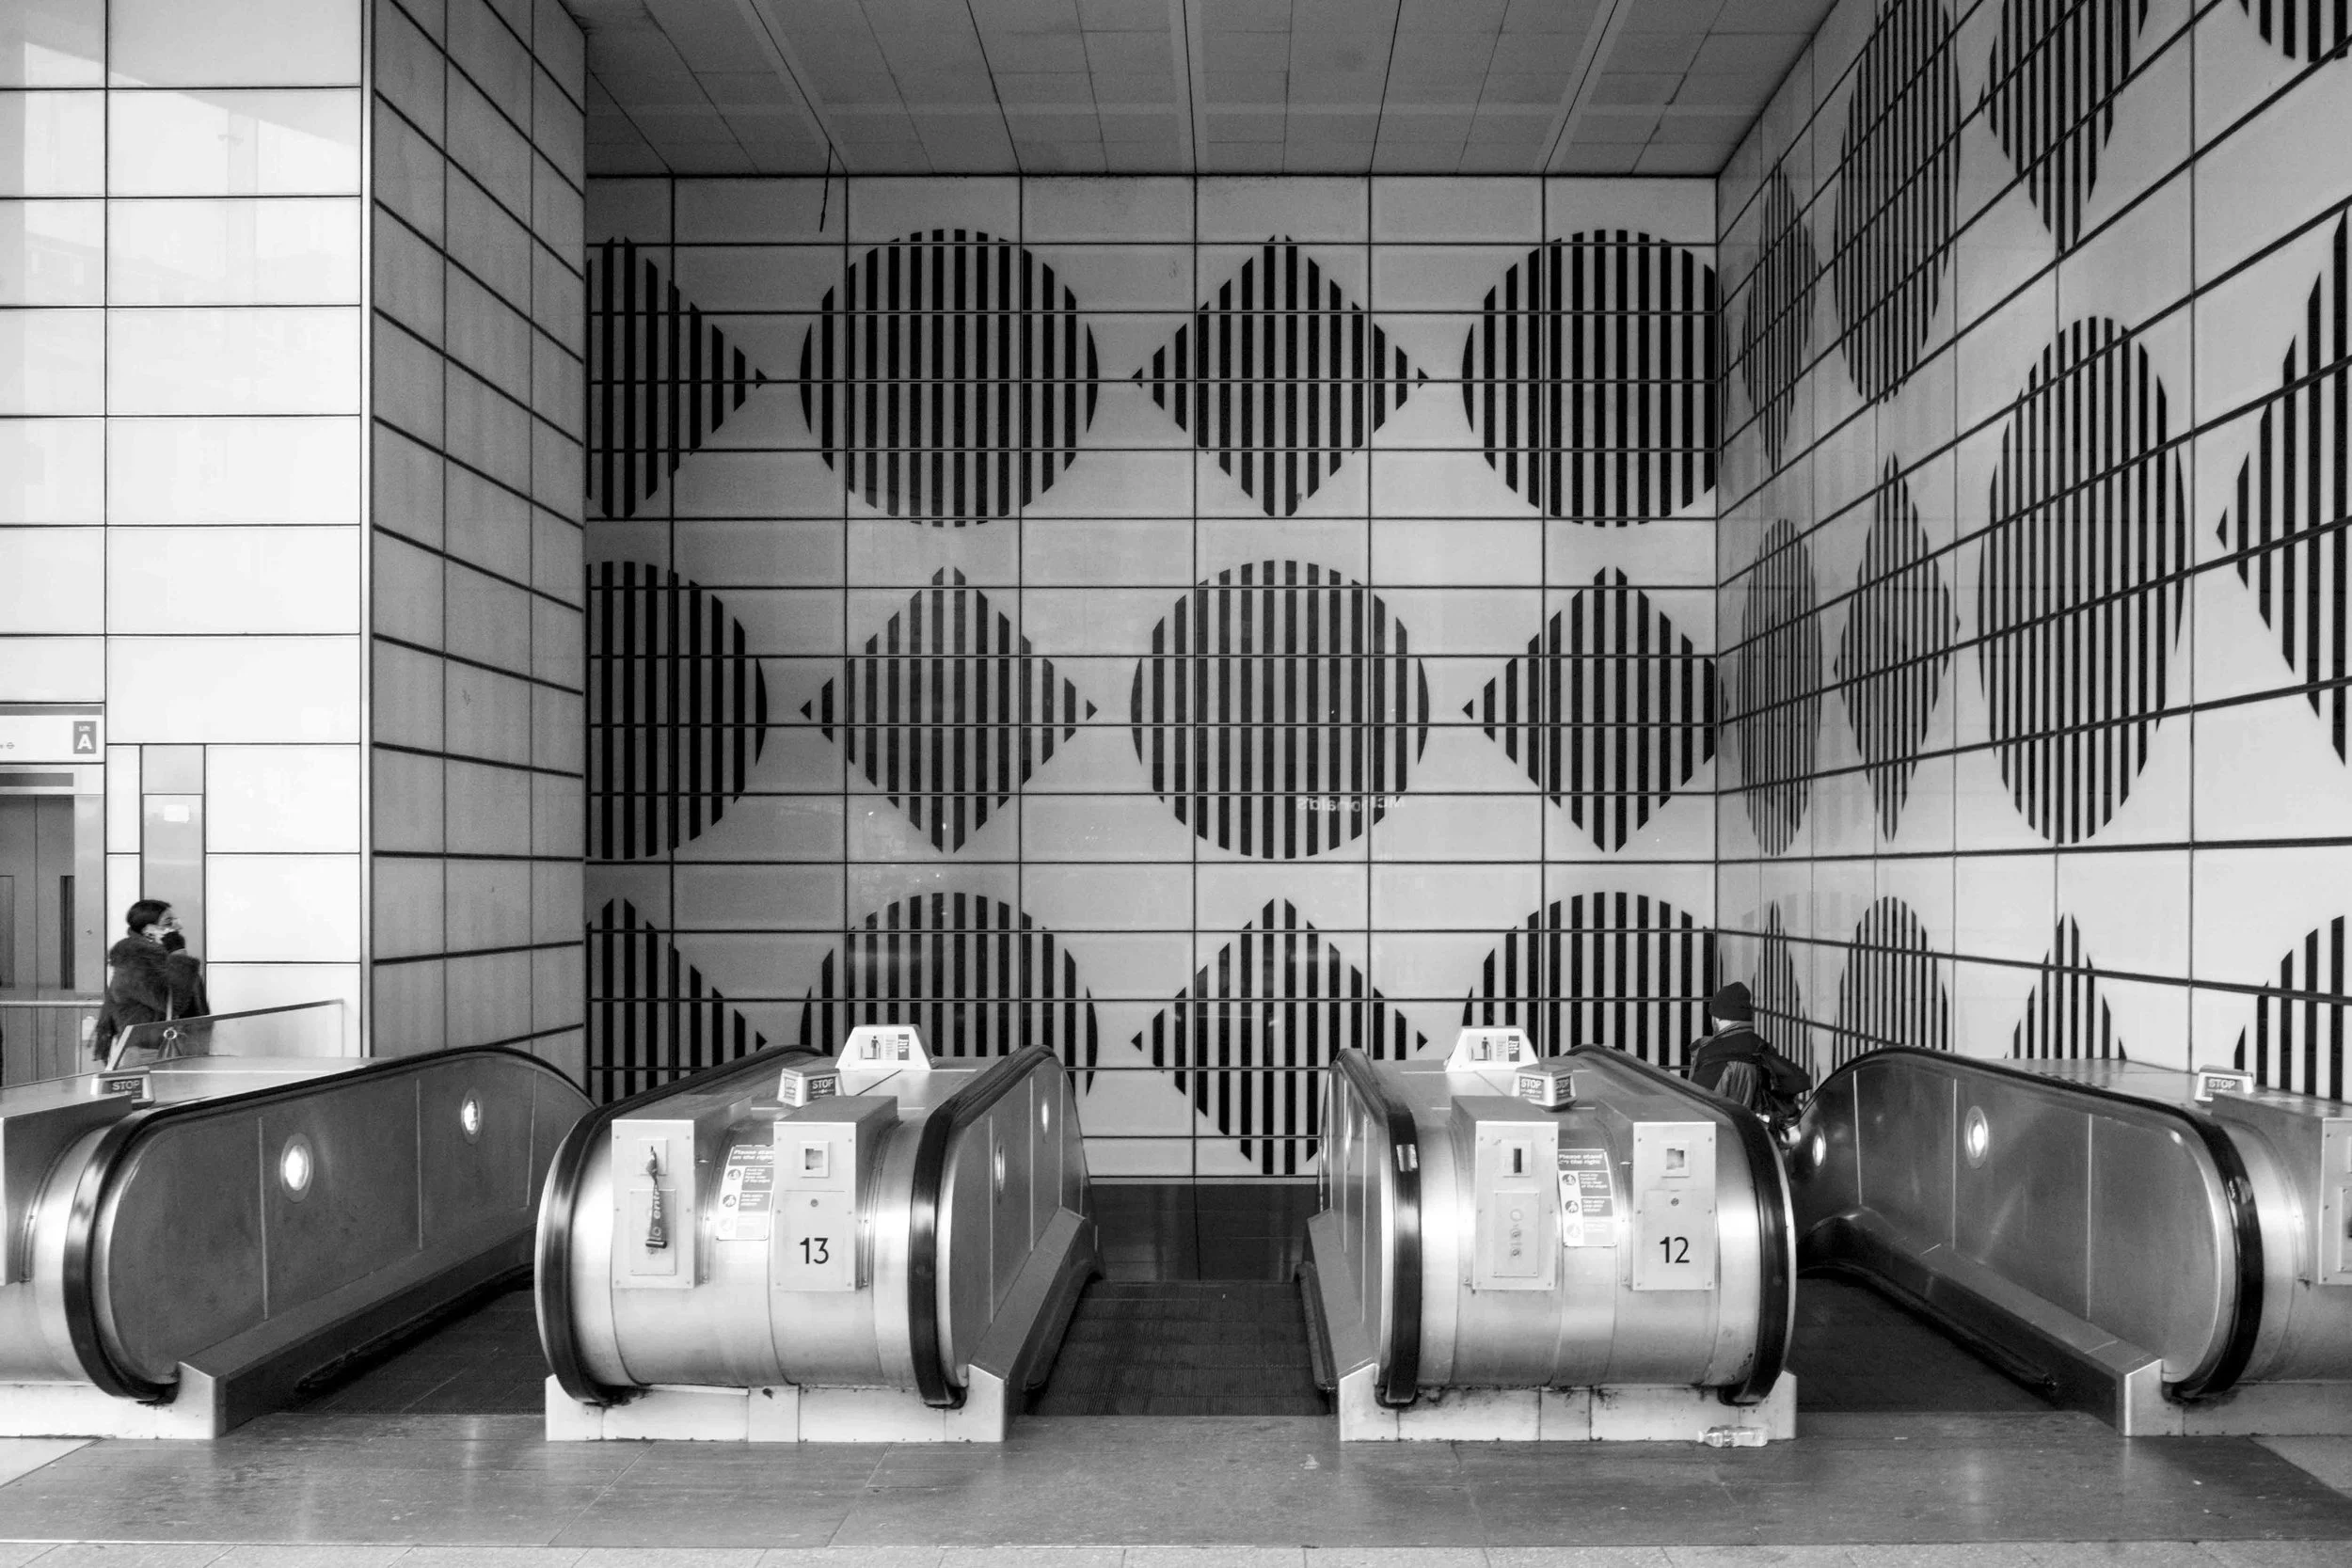
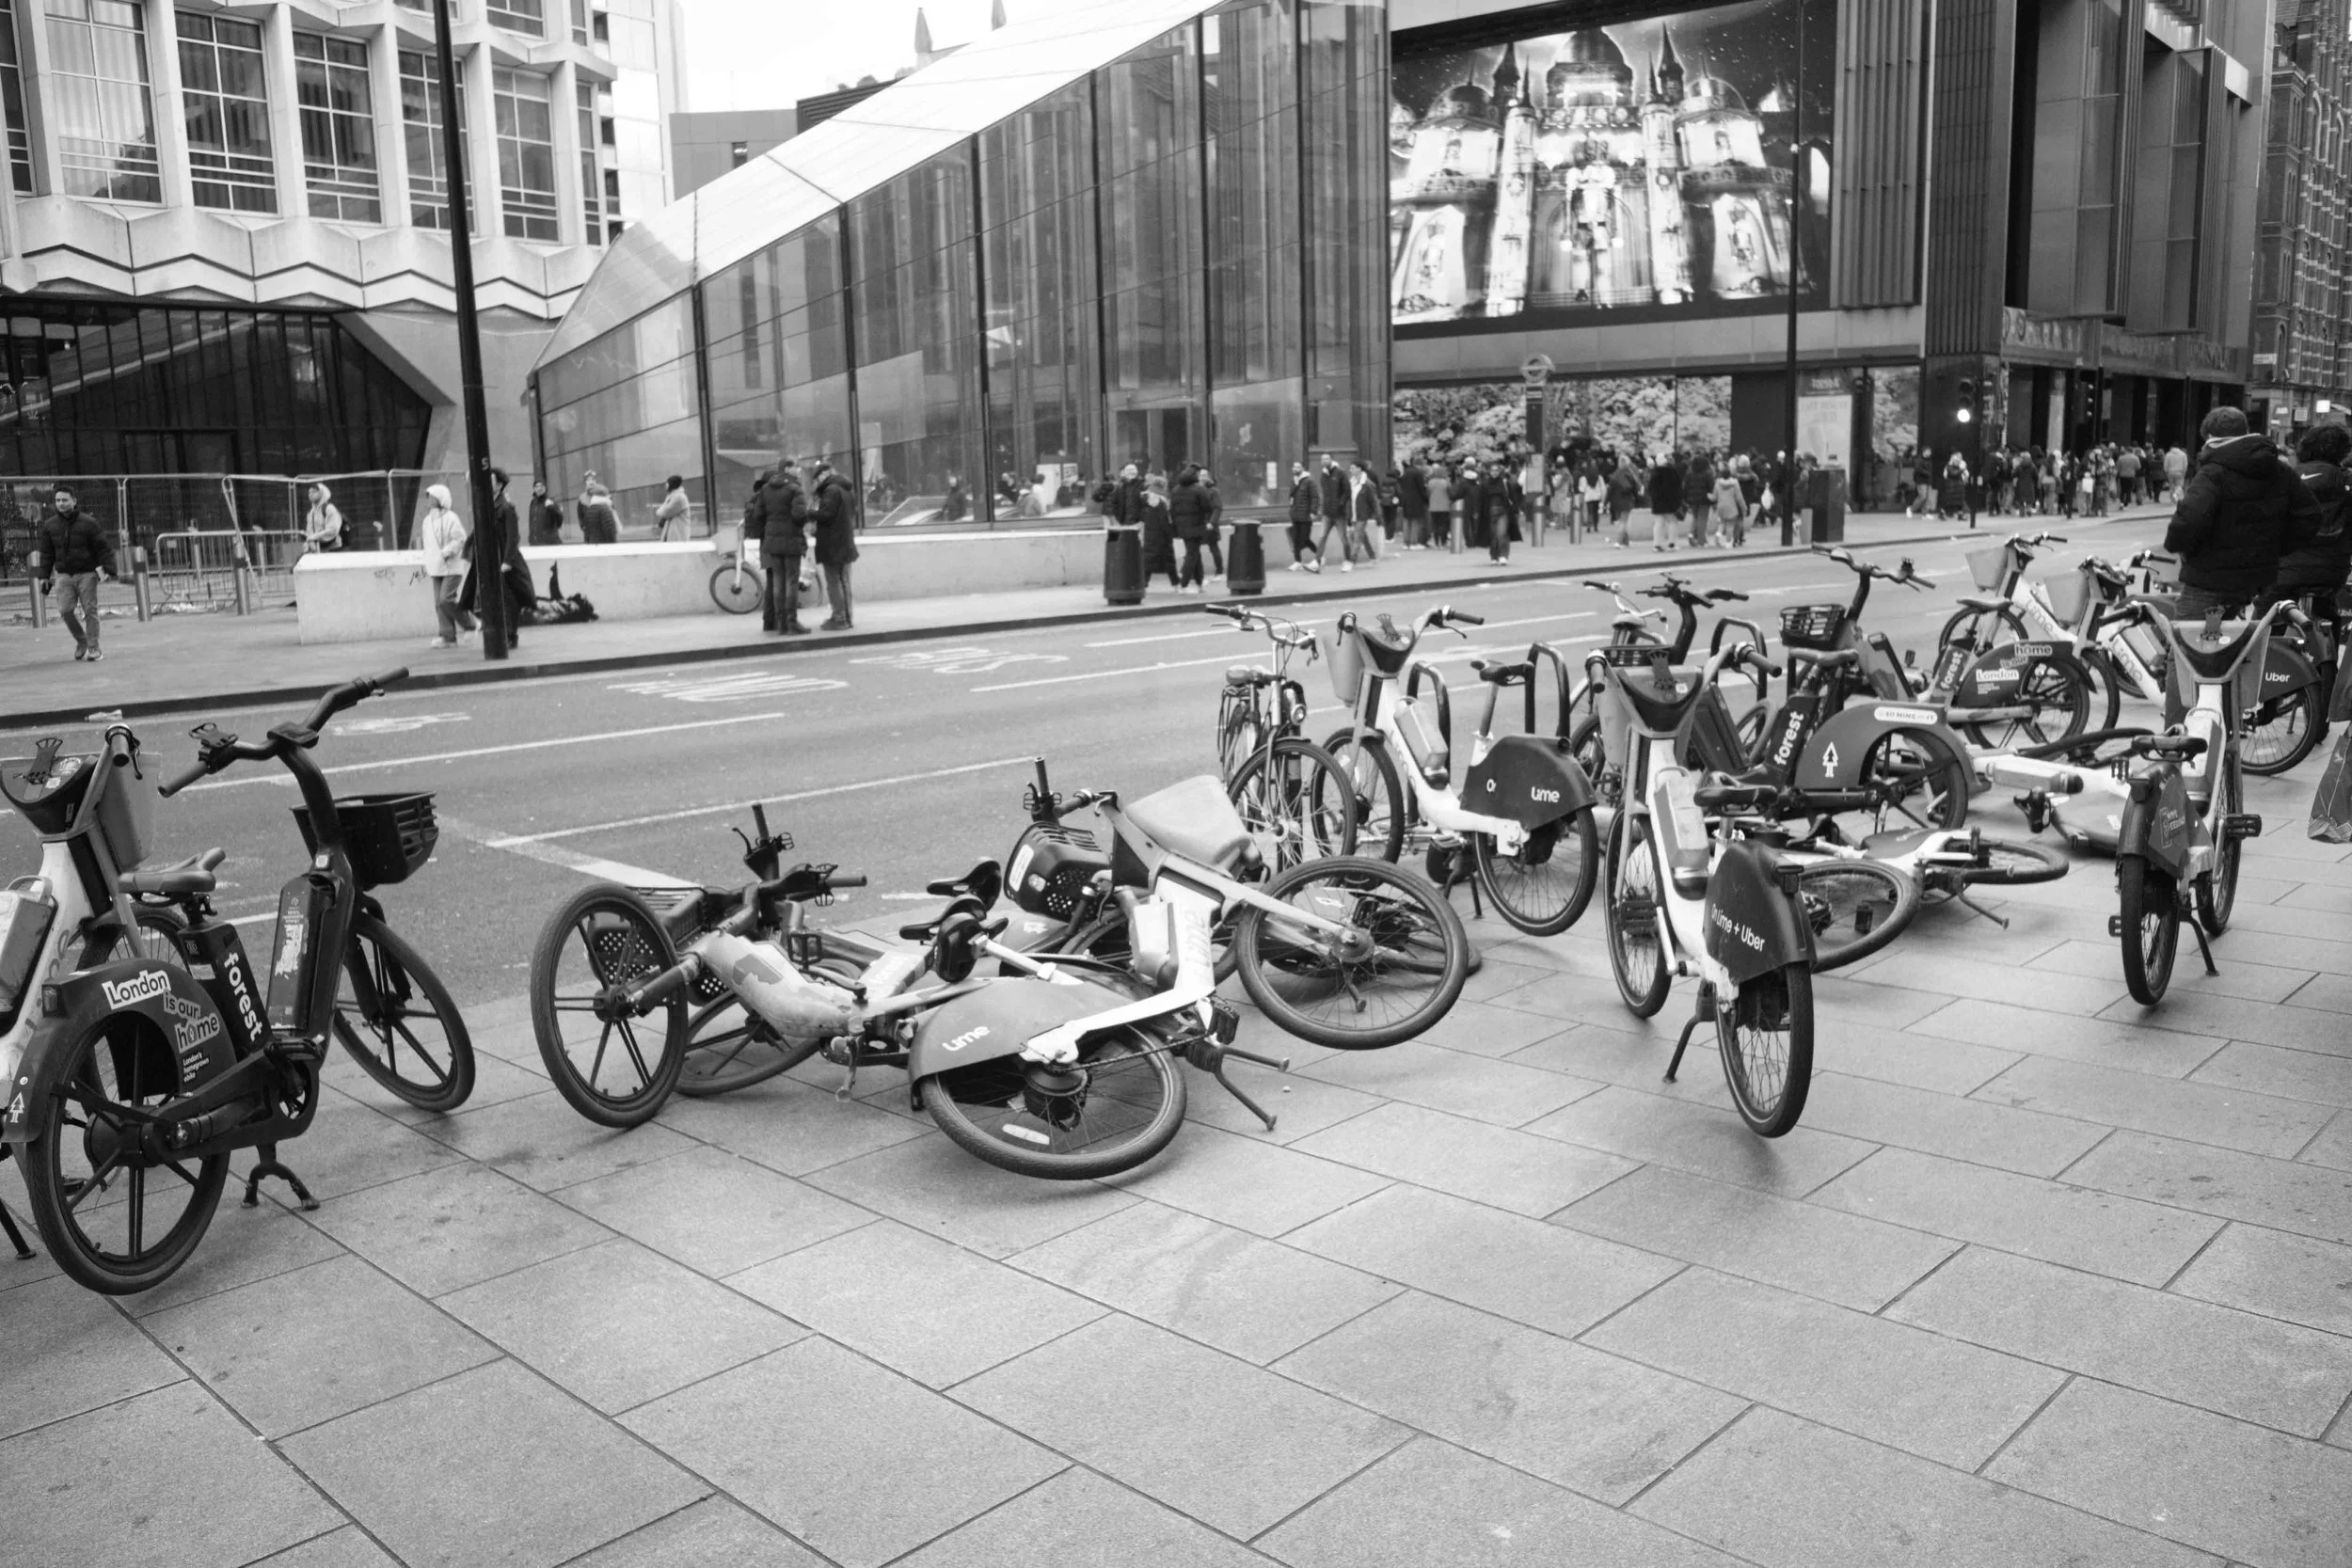
1. Embankment & Southbank
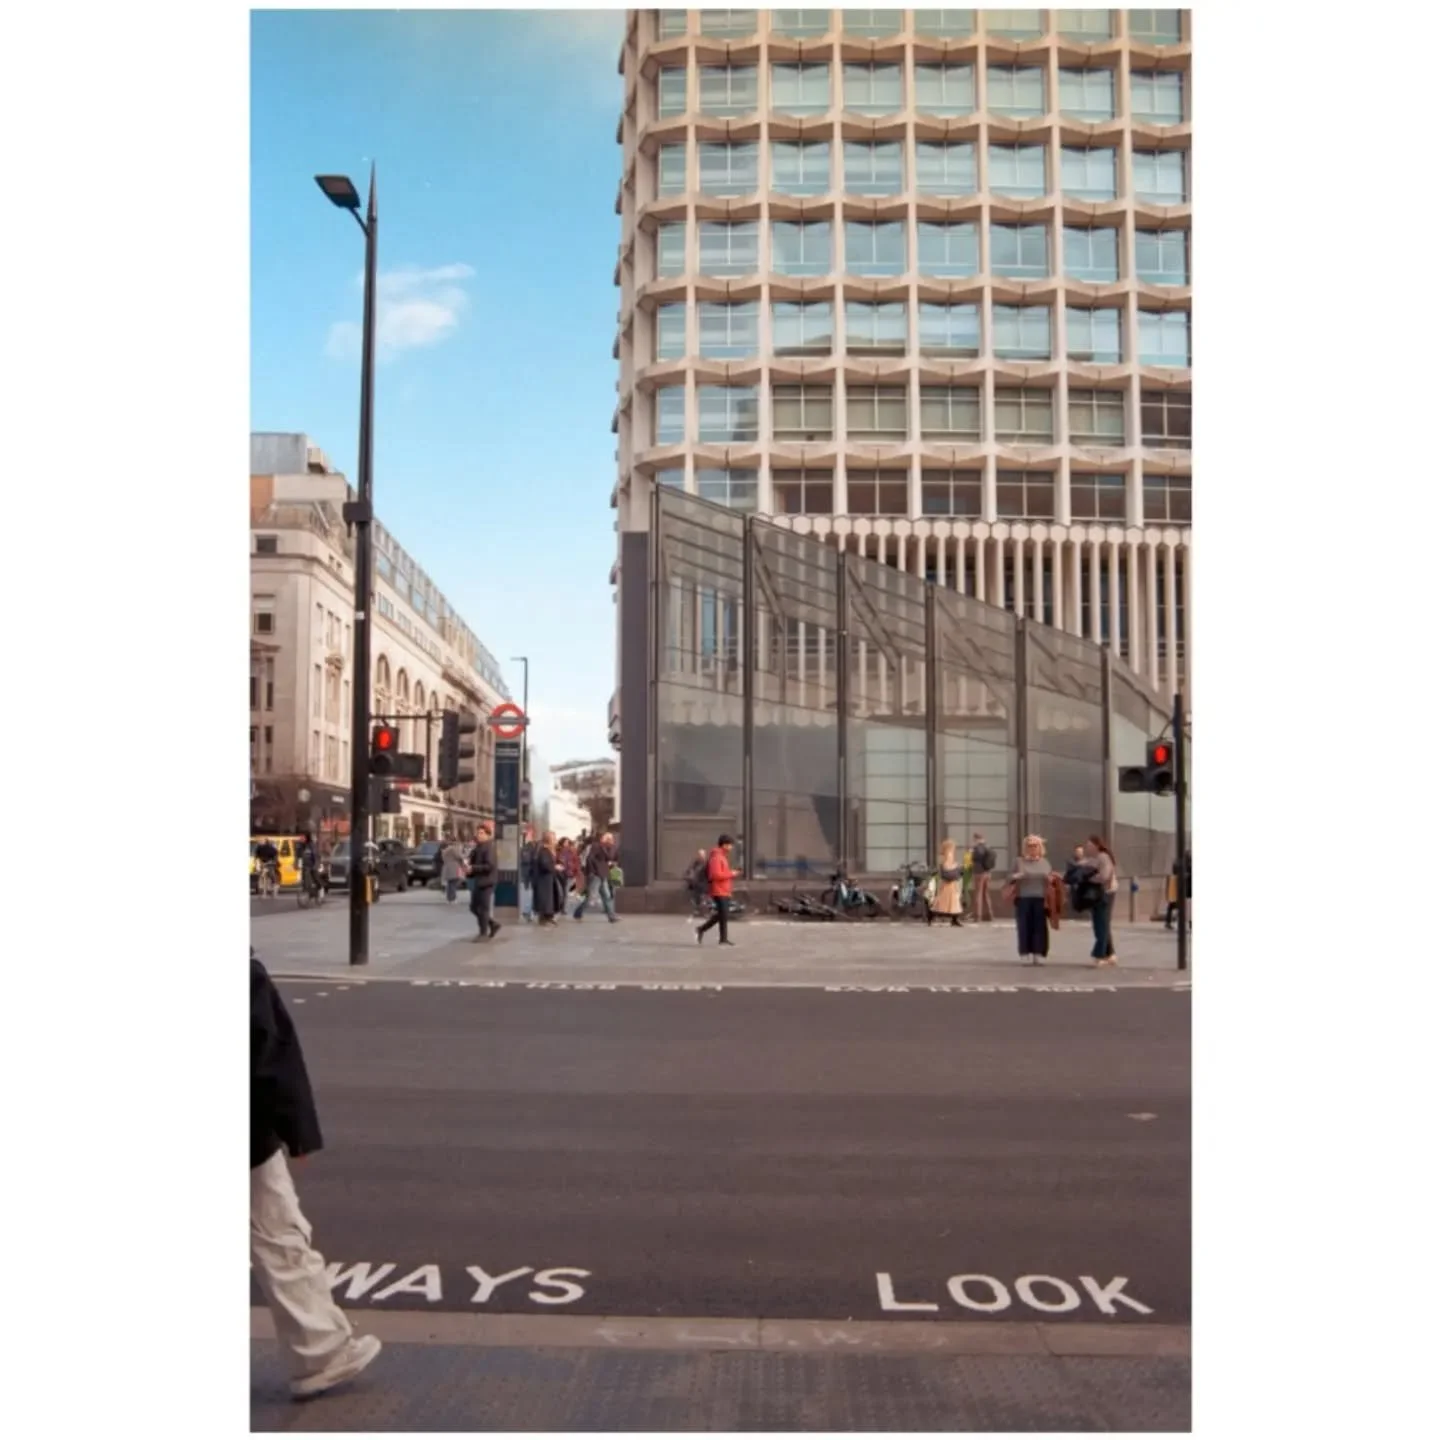
I started at Embankment. Looking down from the walkways, the 28mm allowed me to capture the geometry of the station entrance and the flow of commuters. The high-angle shots showcased how the lens handles architecture and human movement simultaneously.
Crossing over to the BFI Riverfront, the "CINEMA" sign provided a classic London backdrop. The wide angle excels here; it lets you frame a large subject like a building while still catching the candid expressions of people walking past.

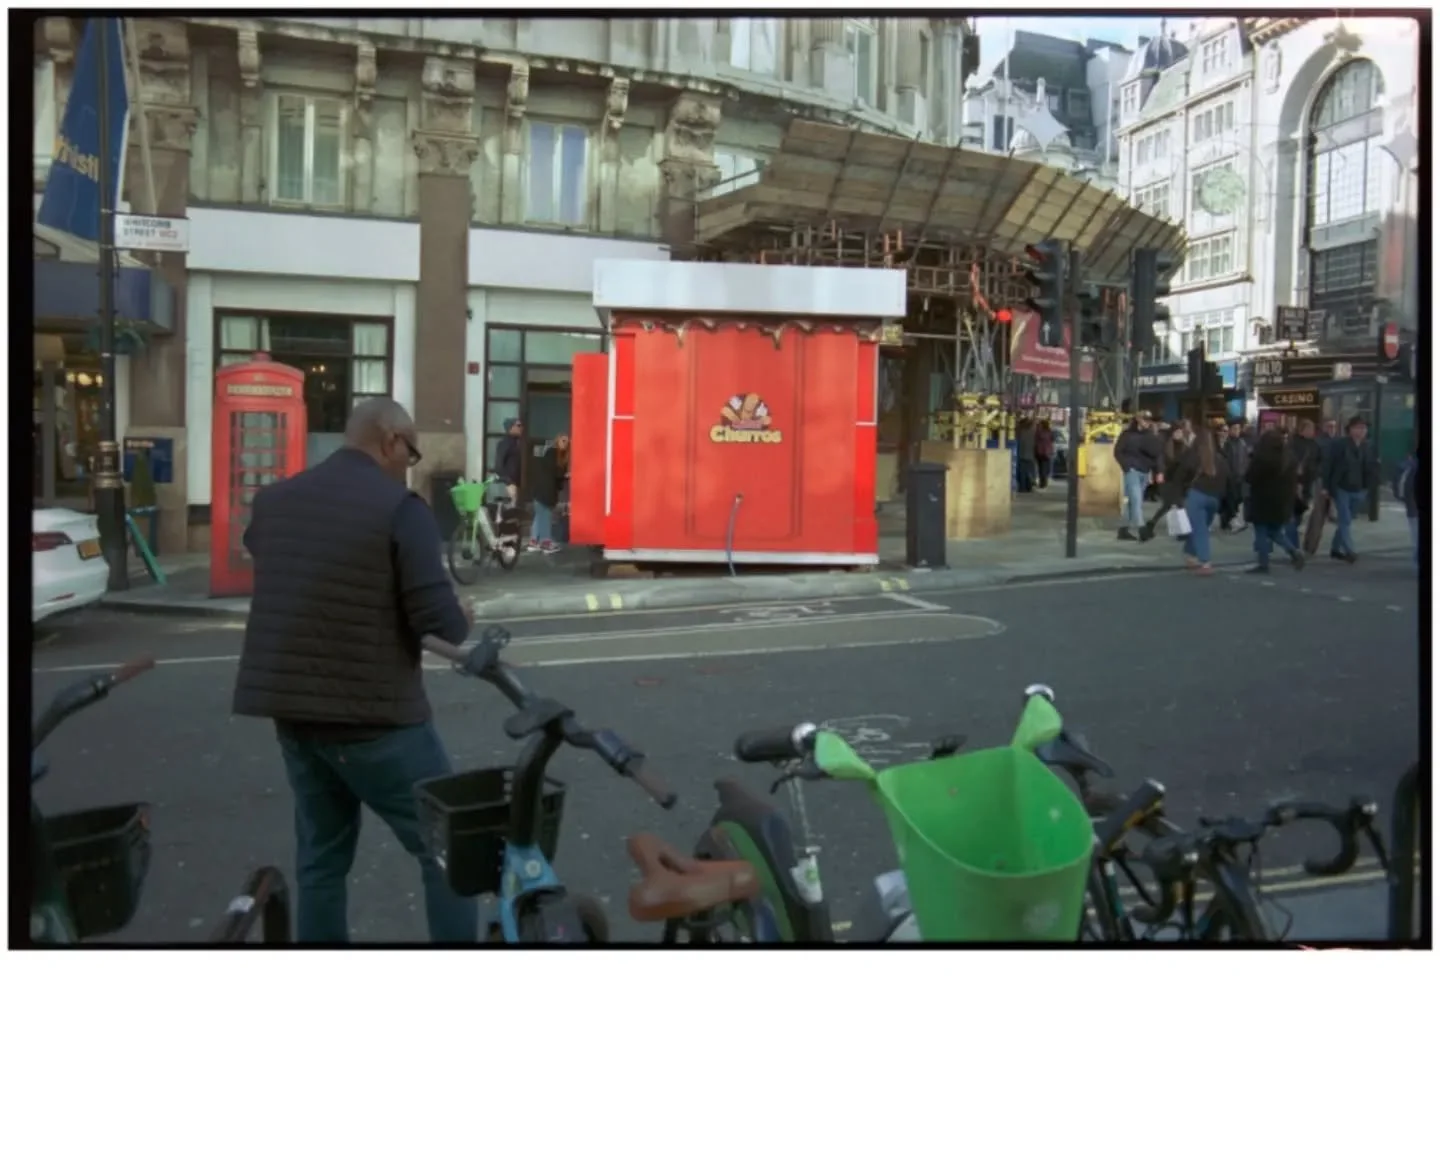
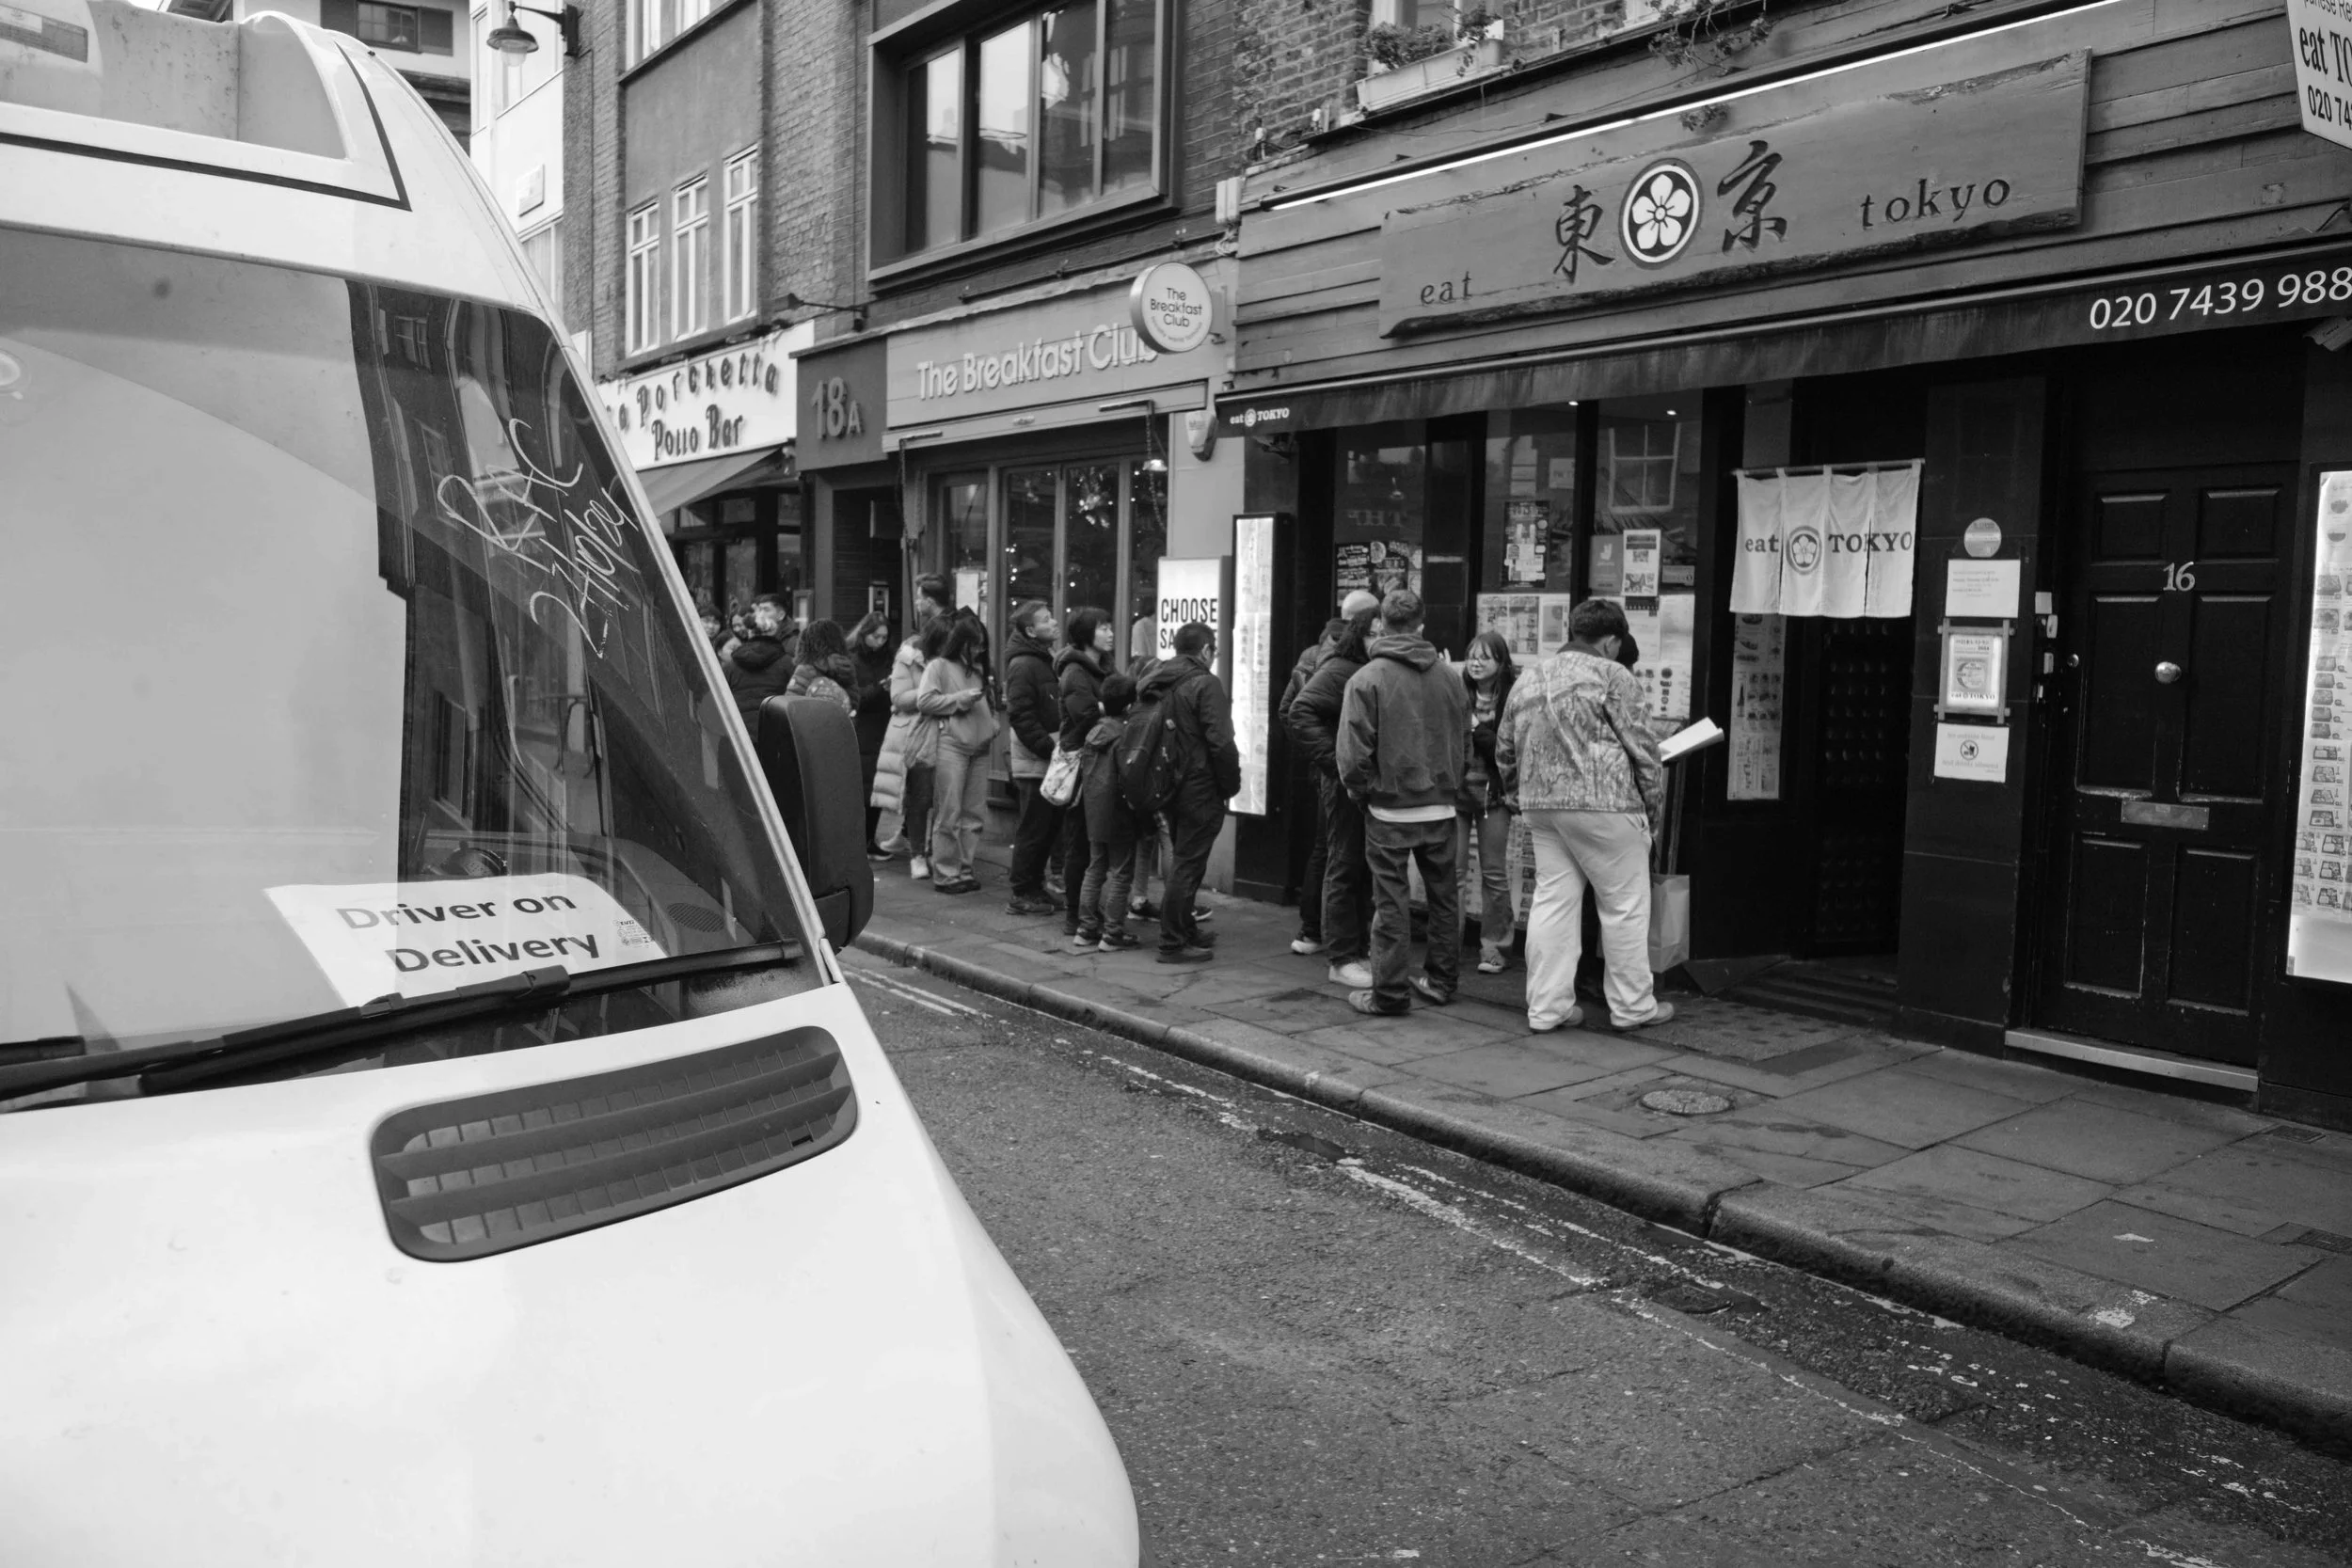
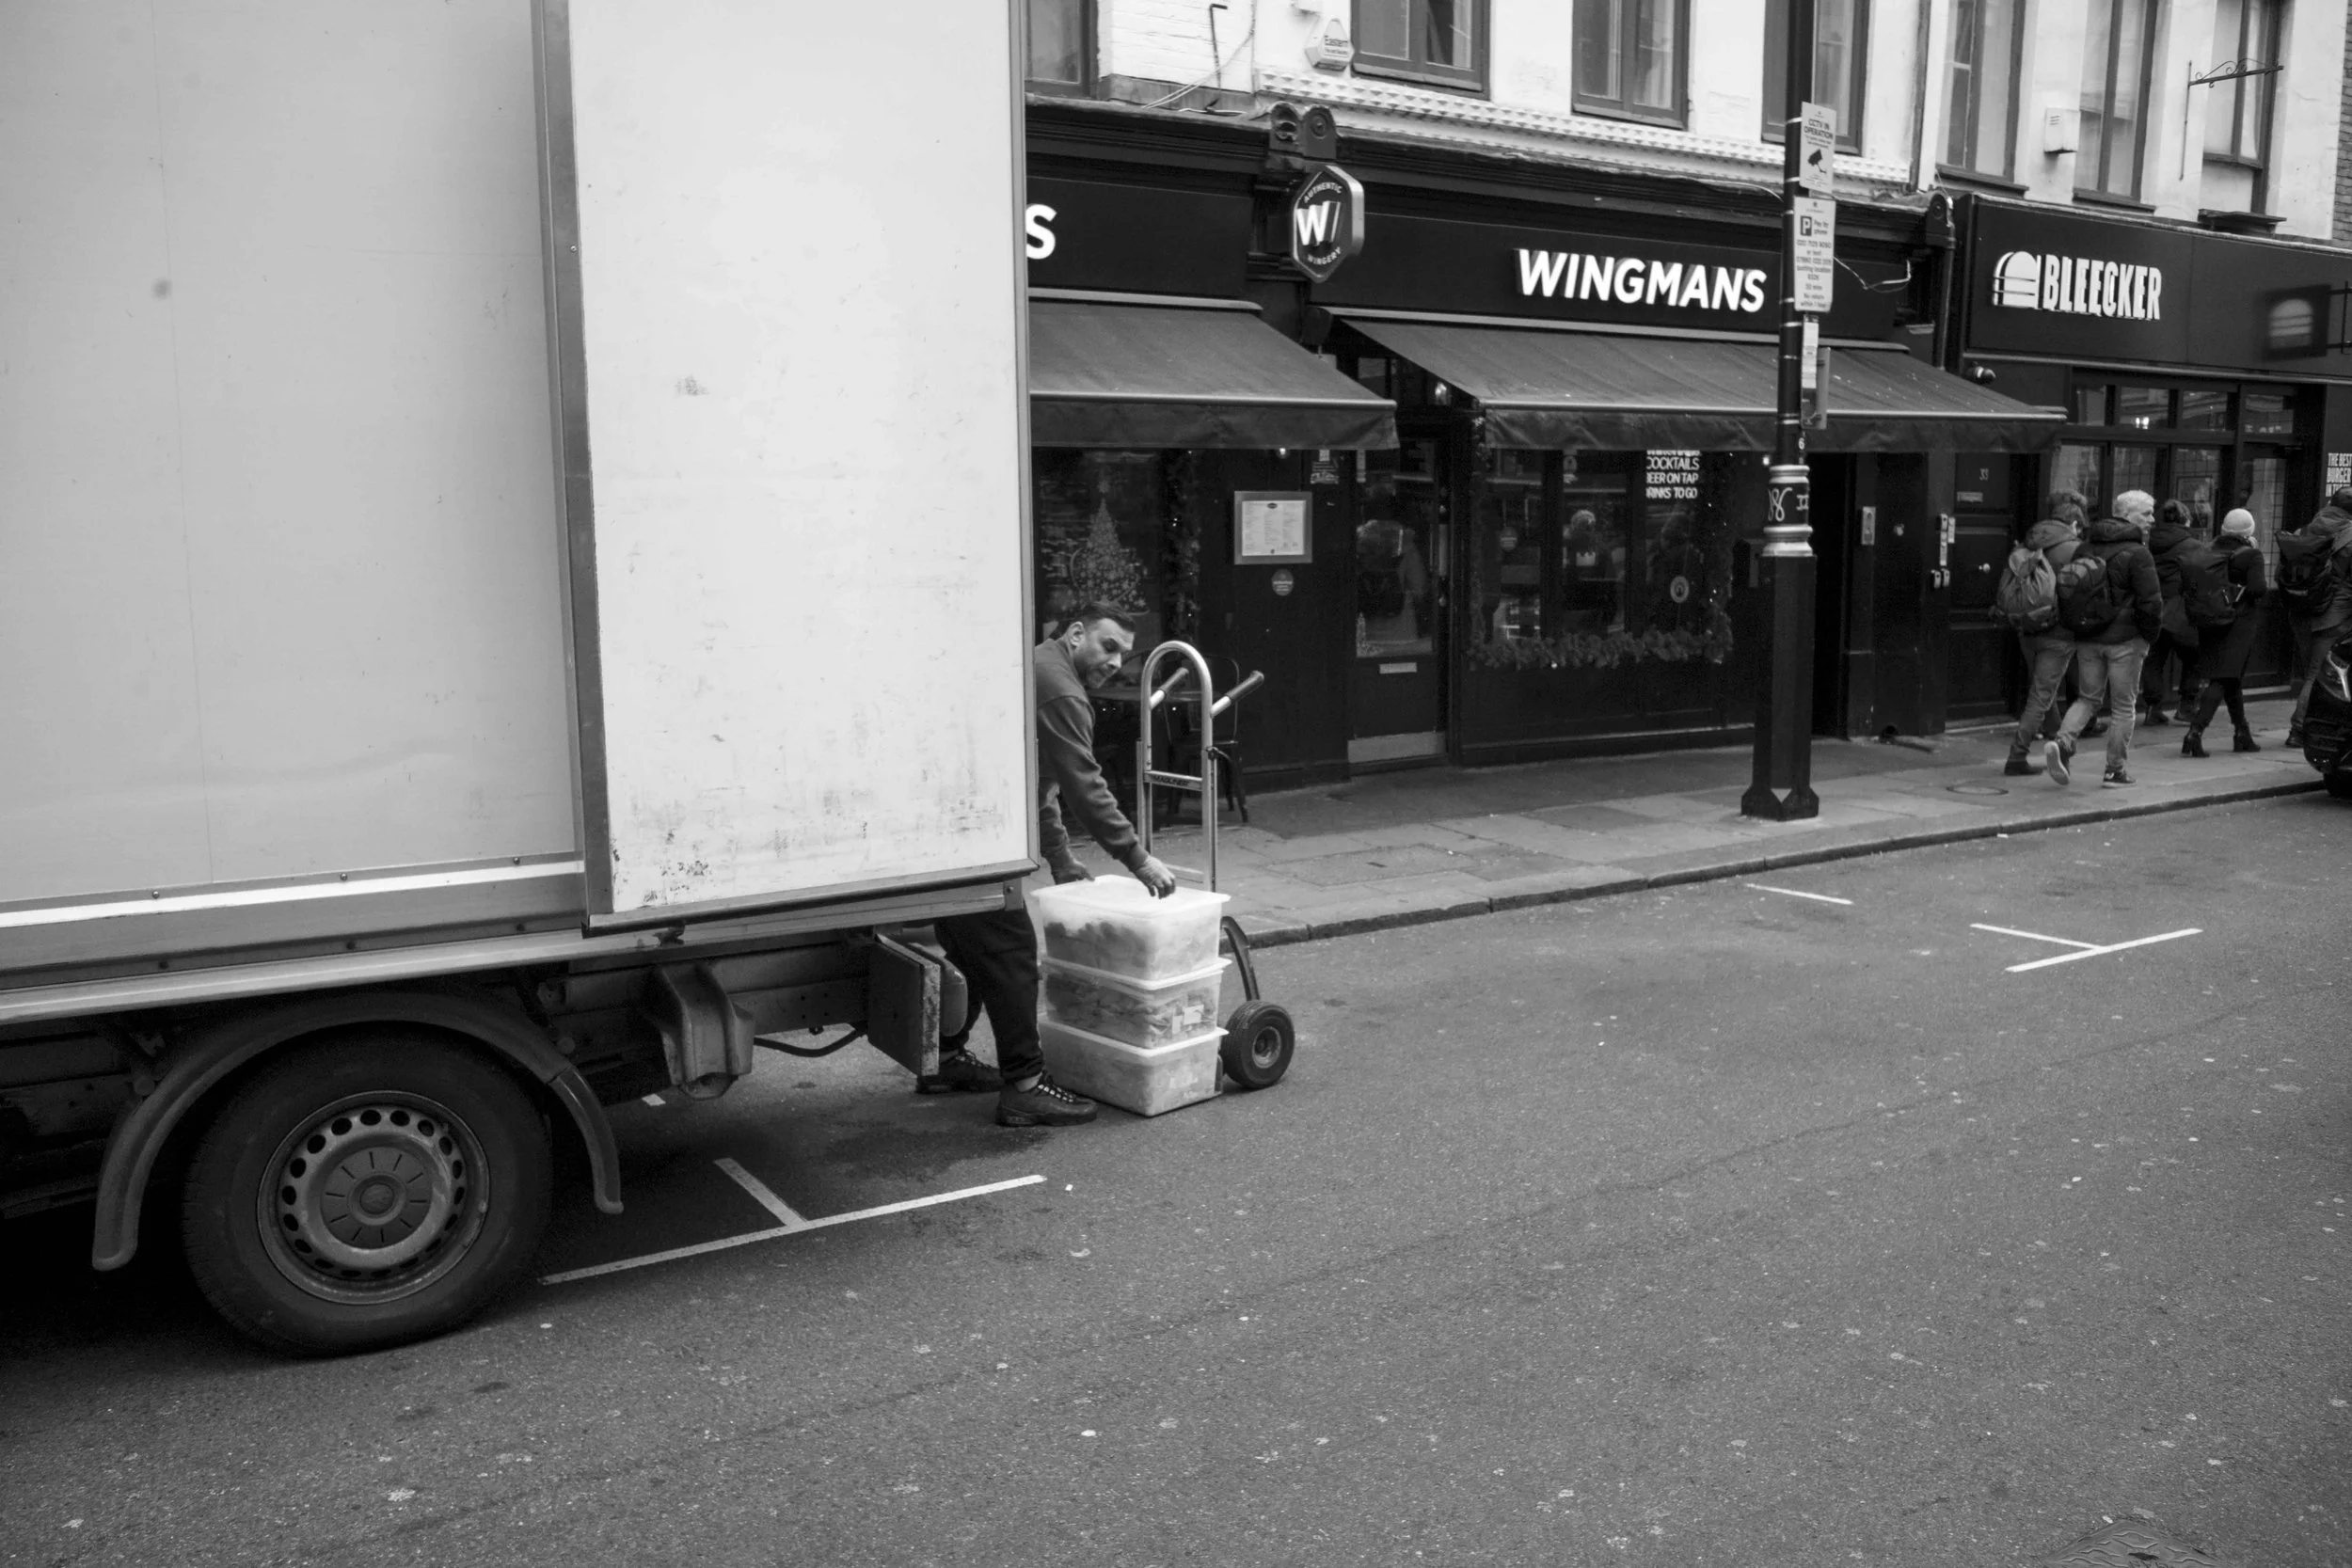
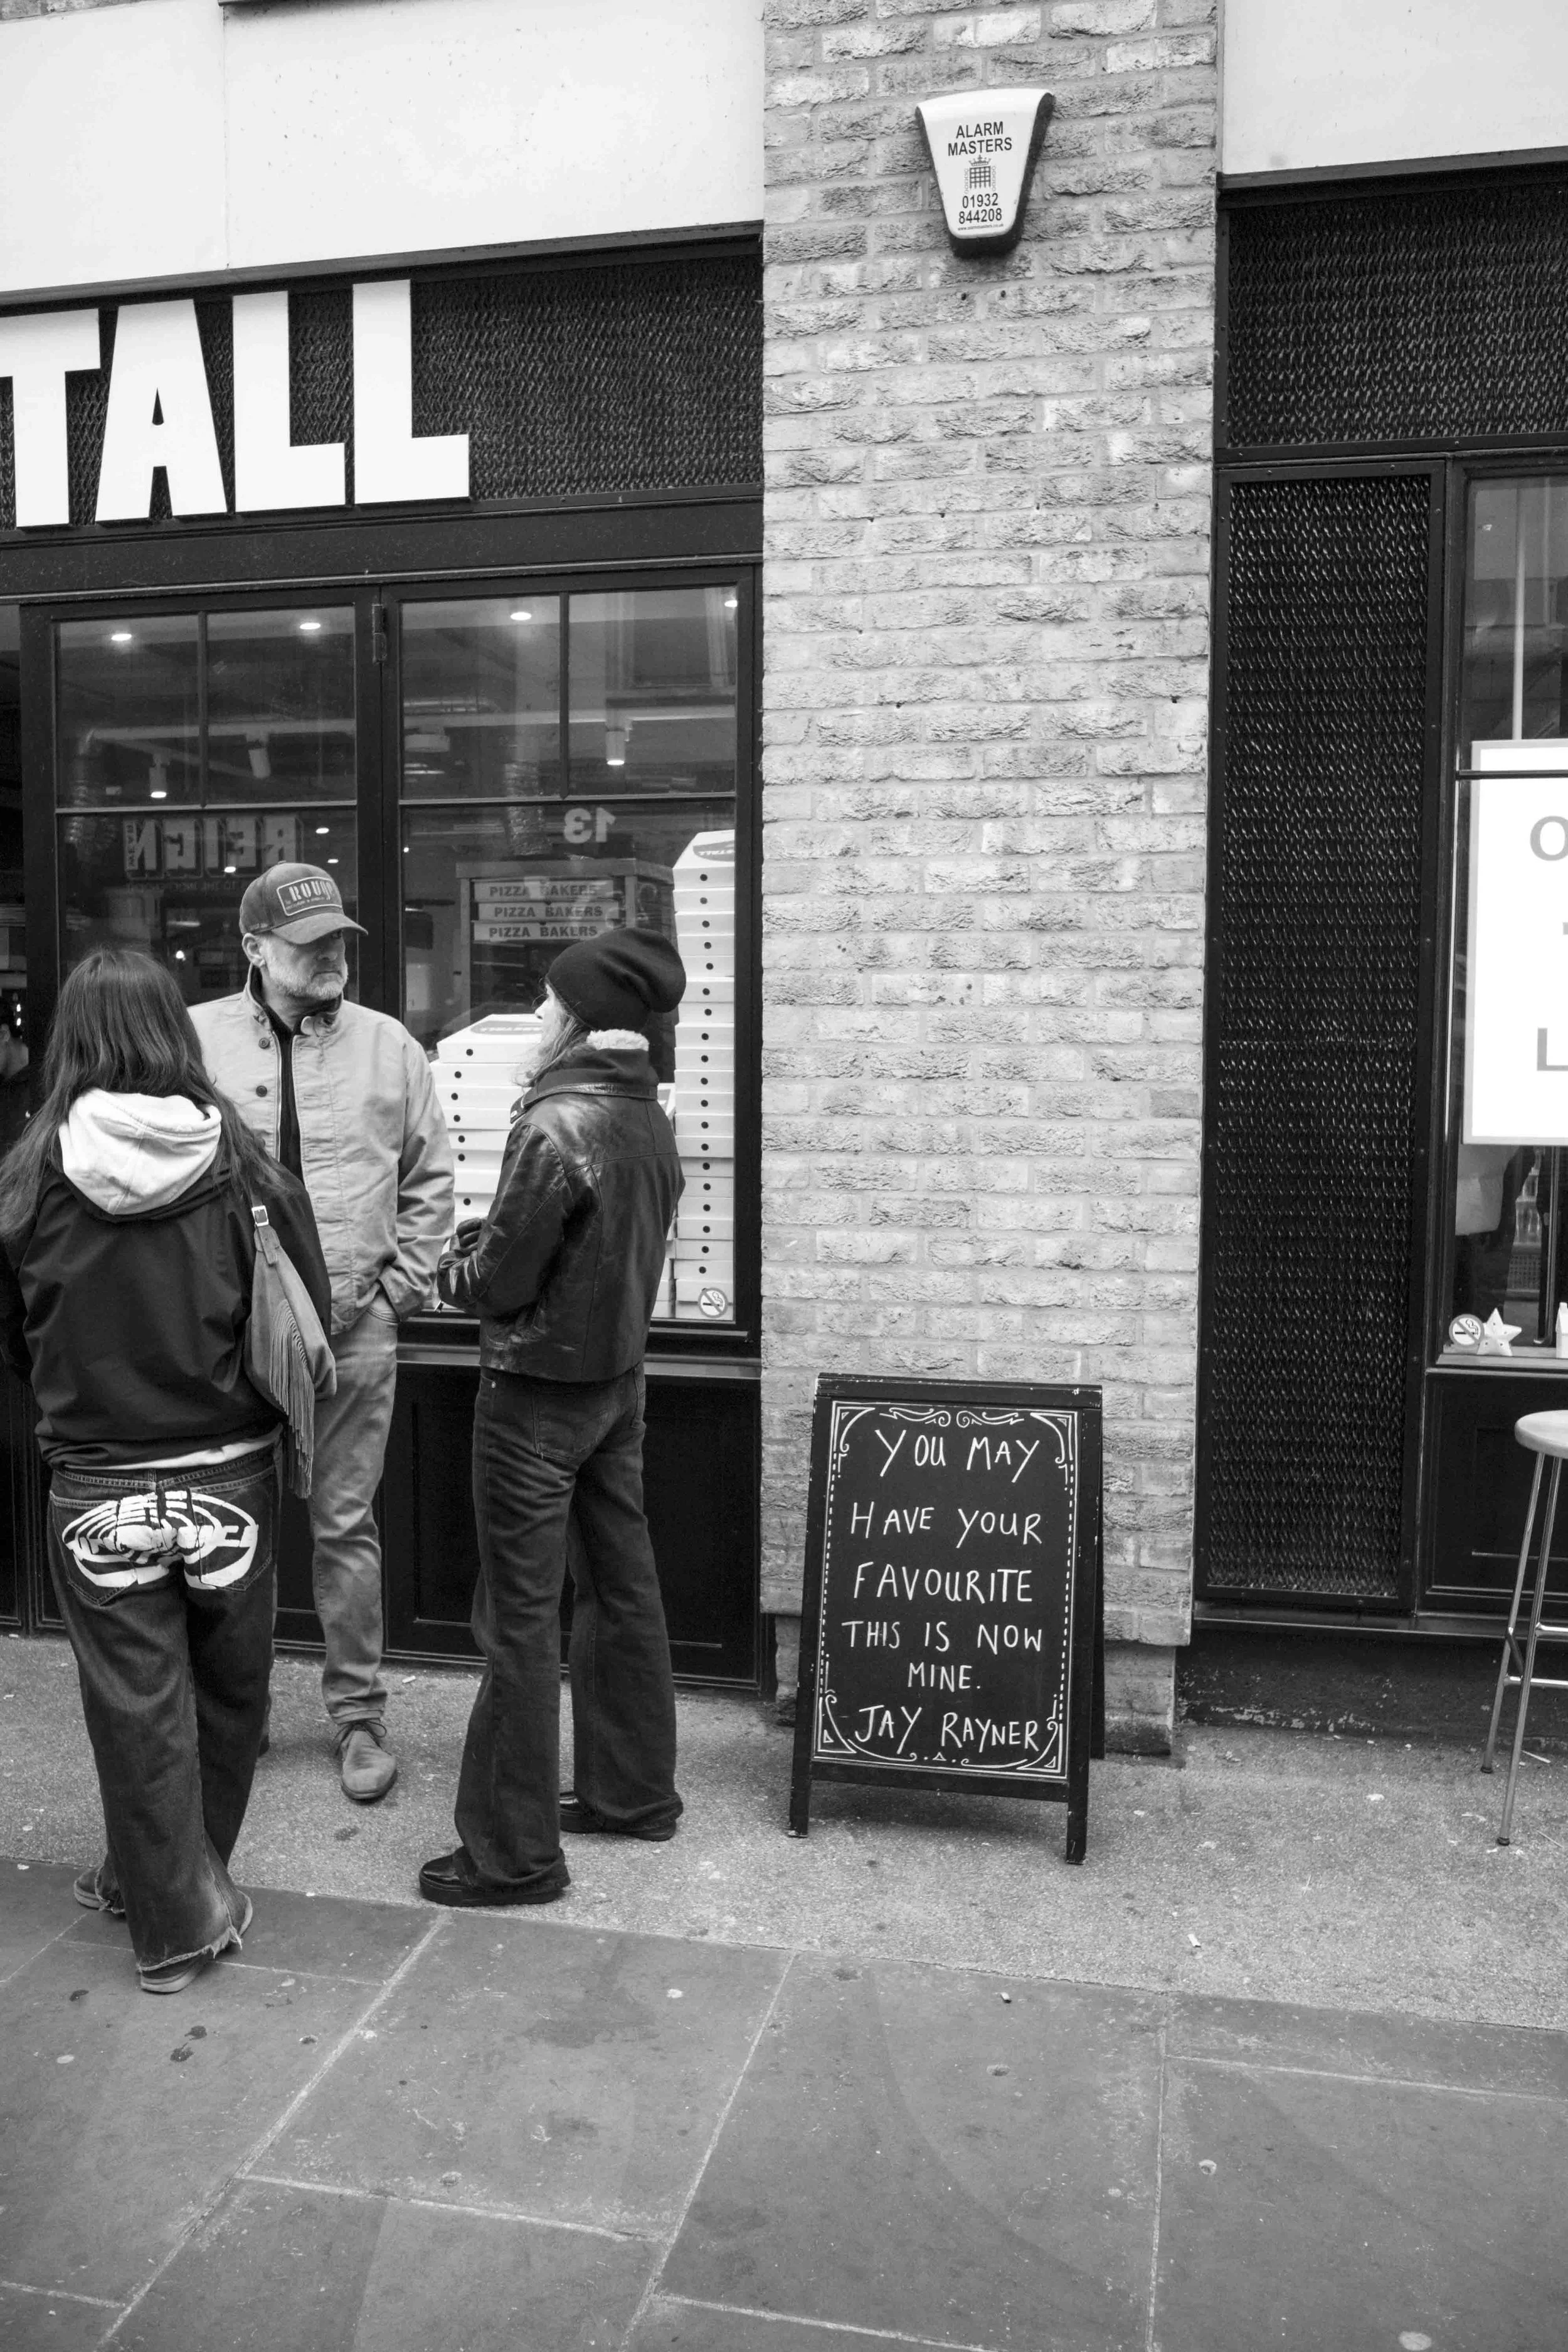
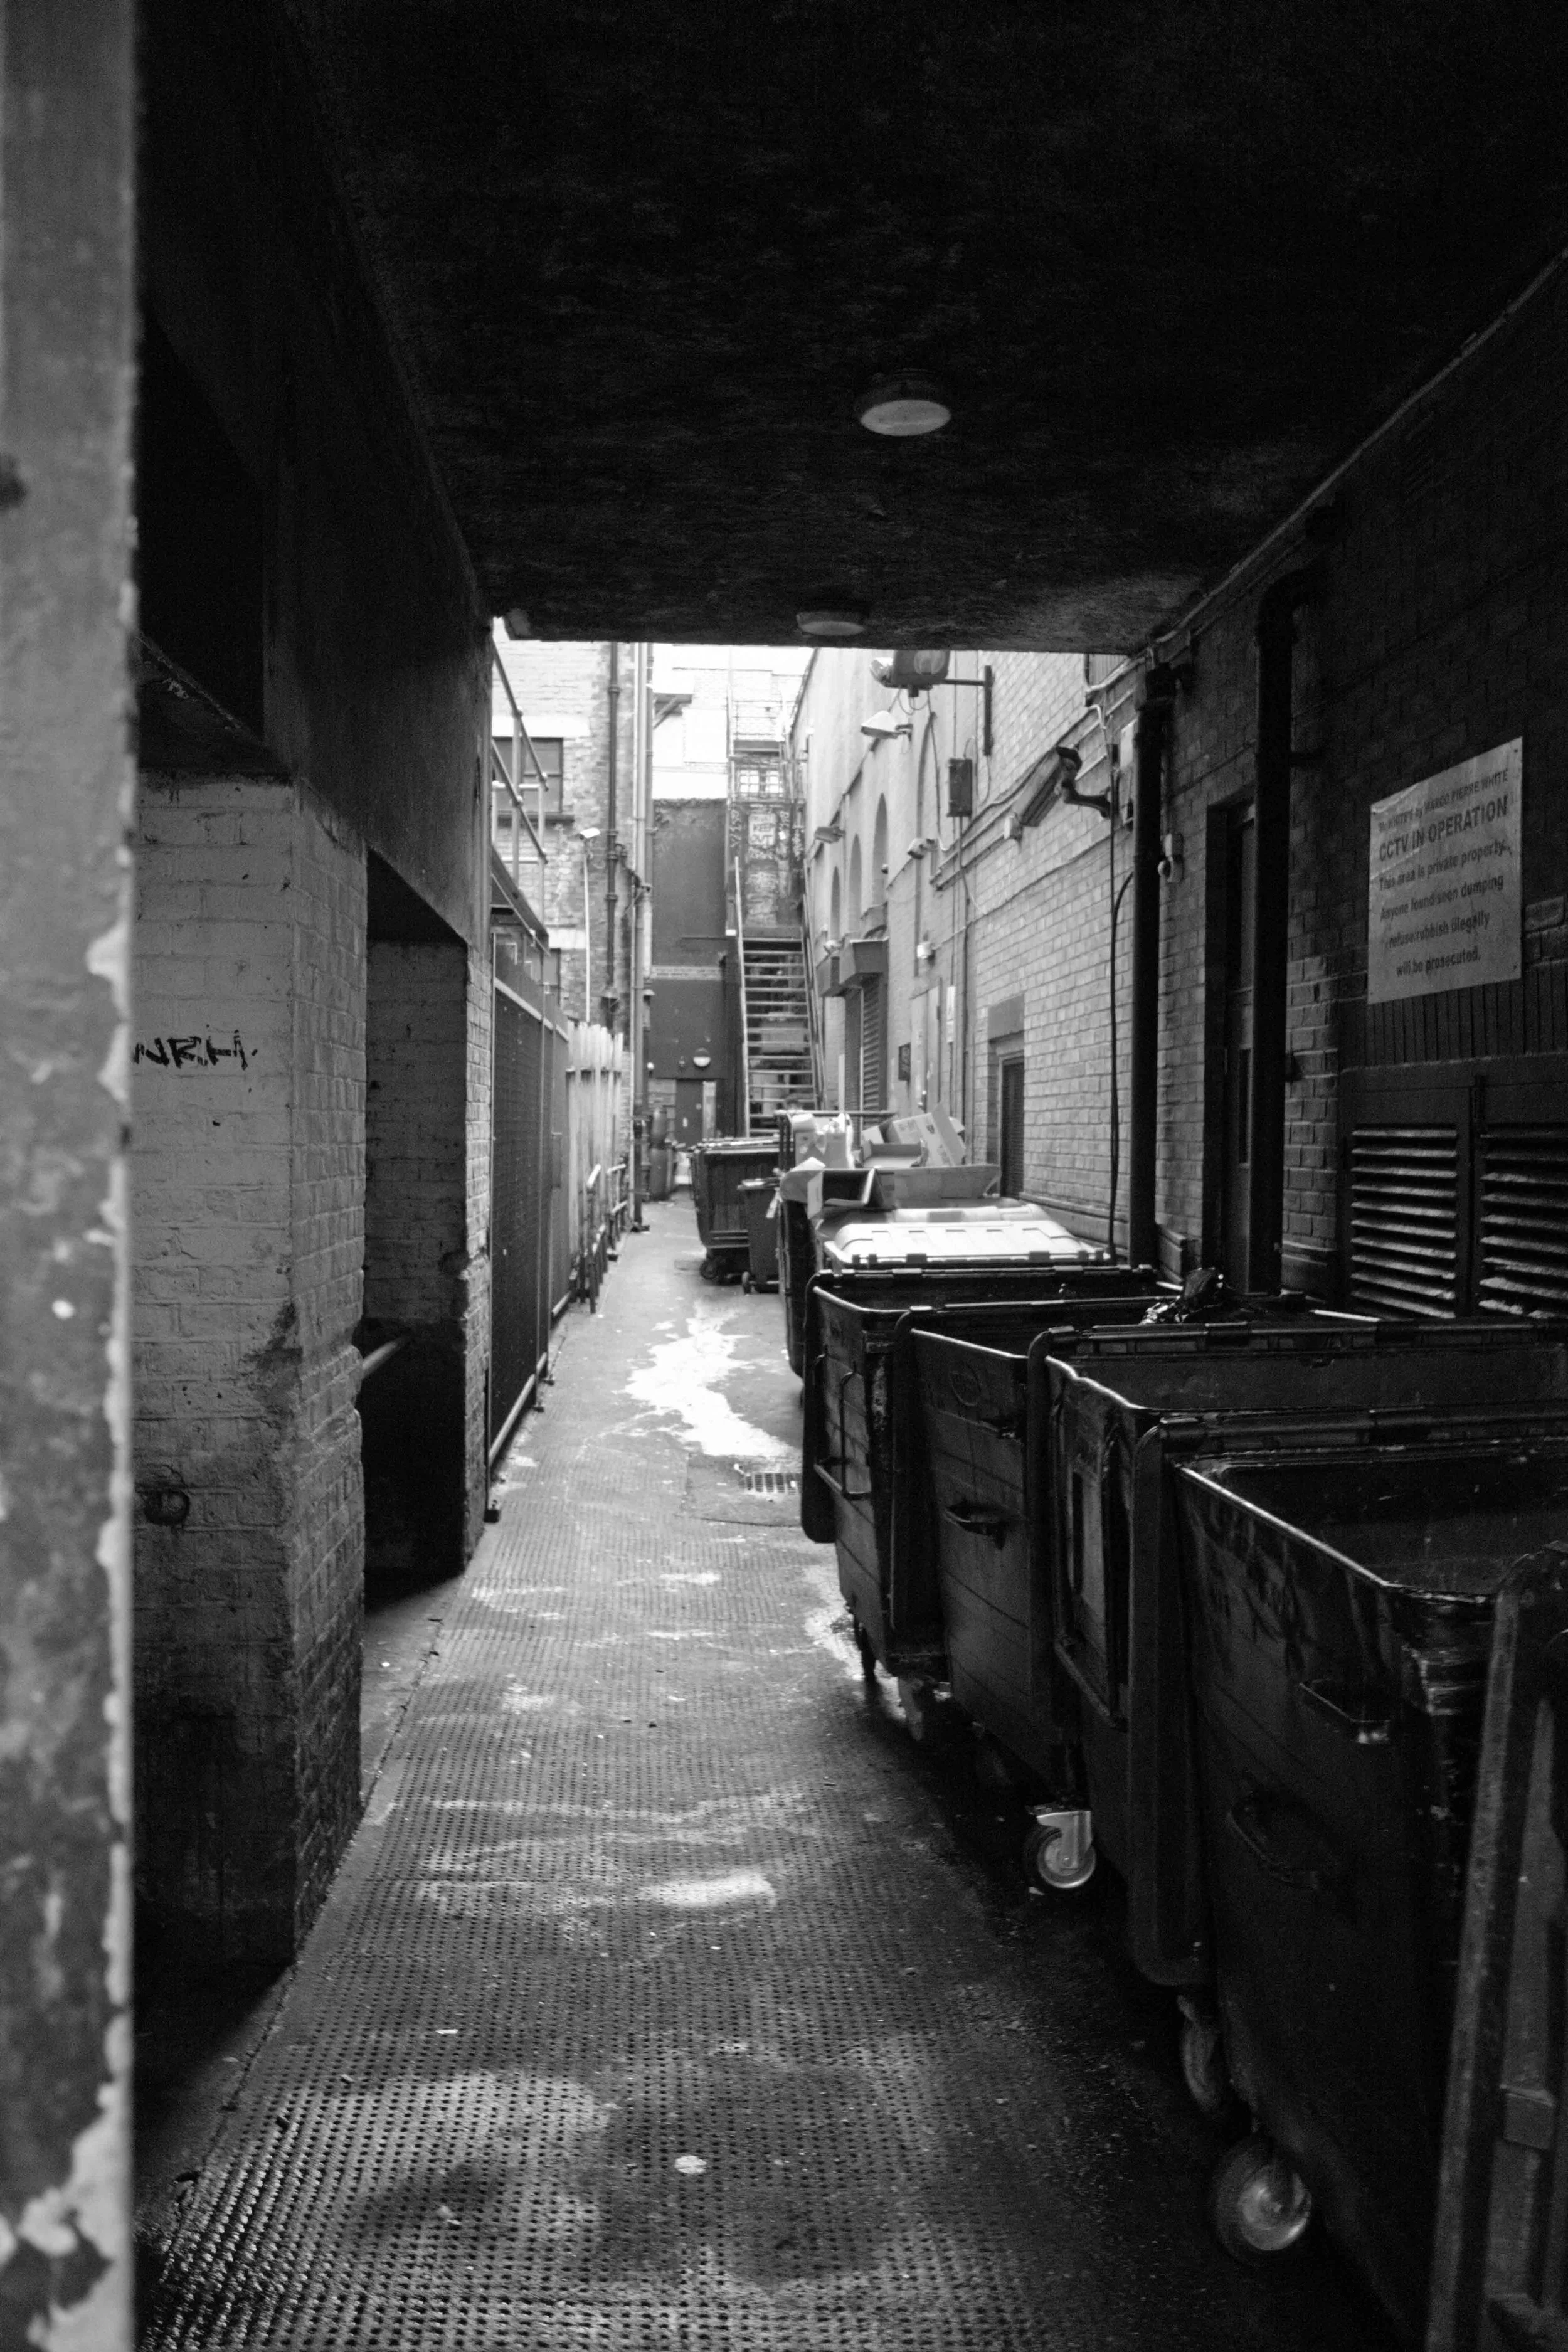
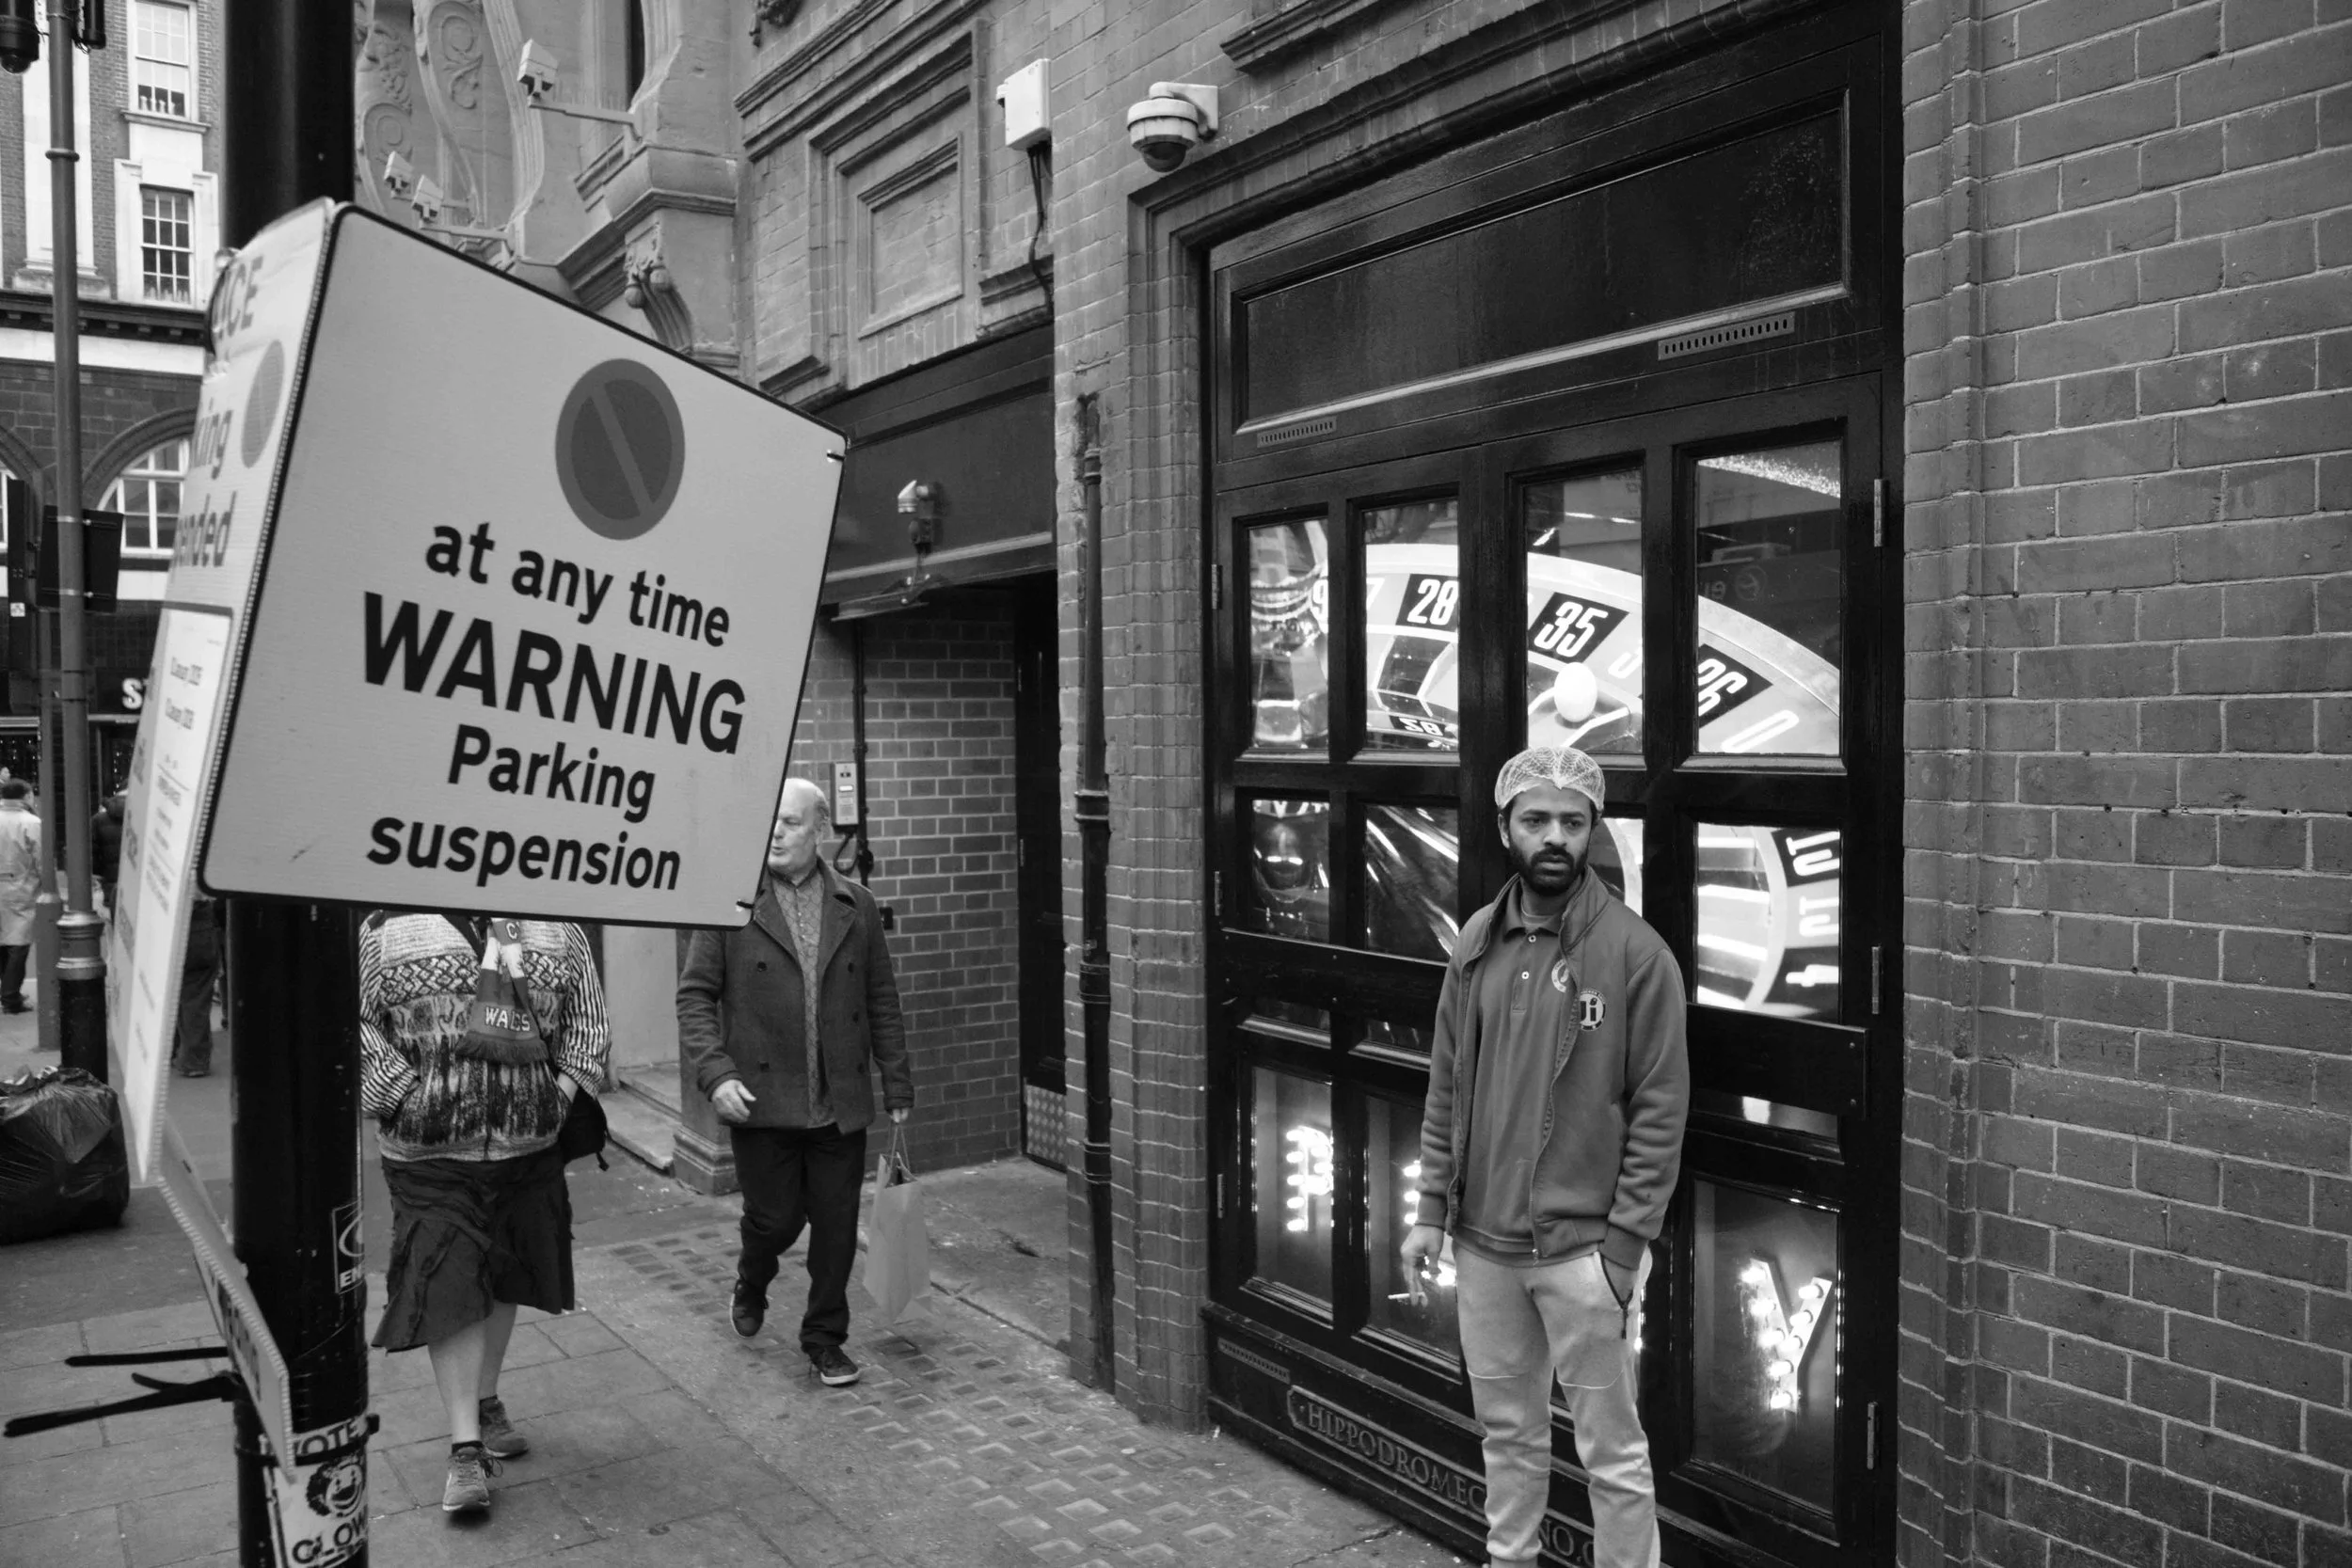
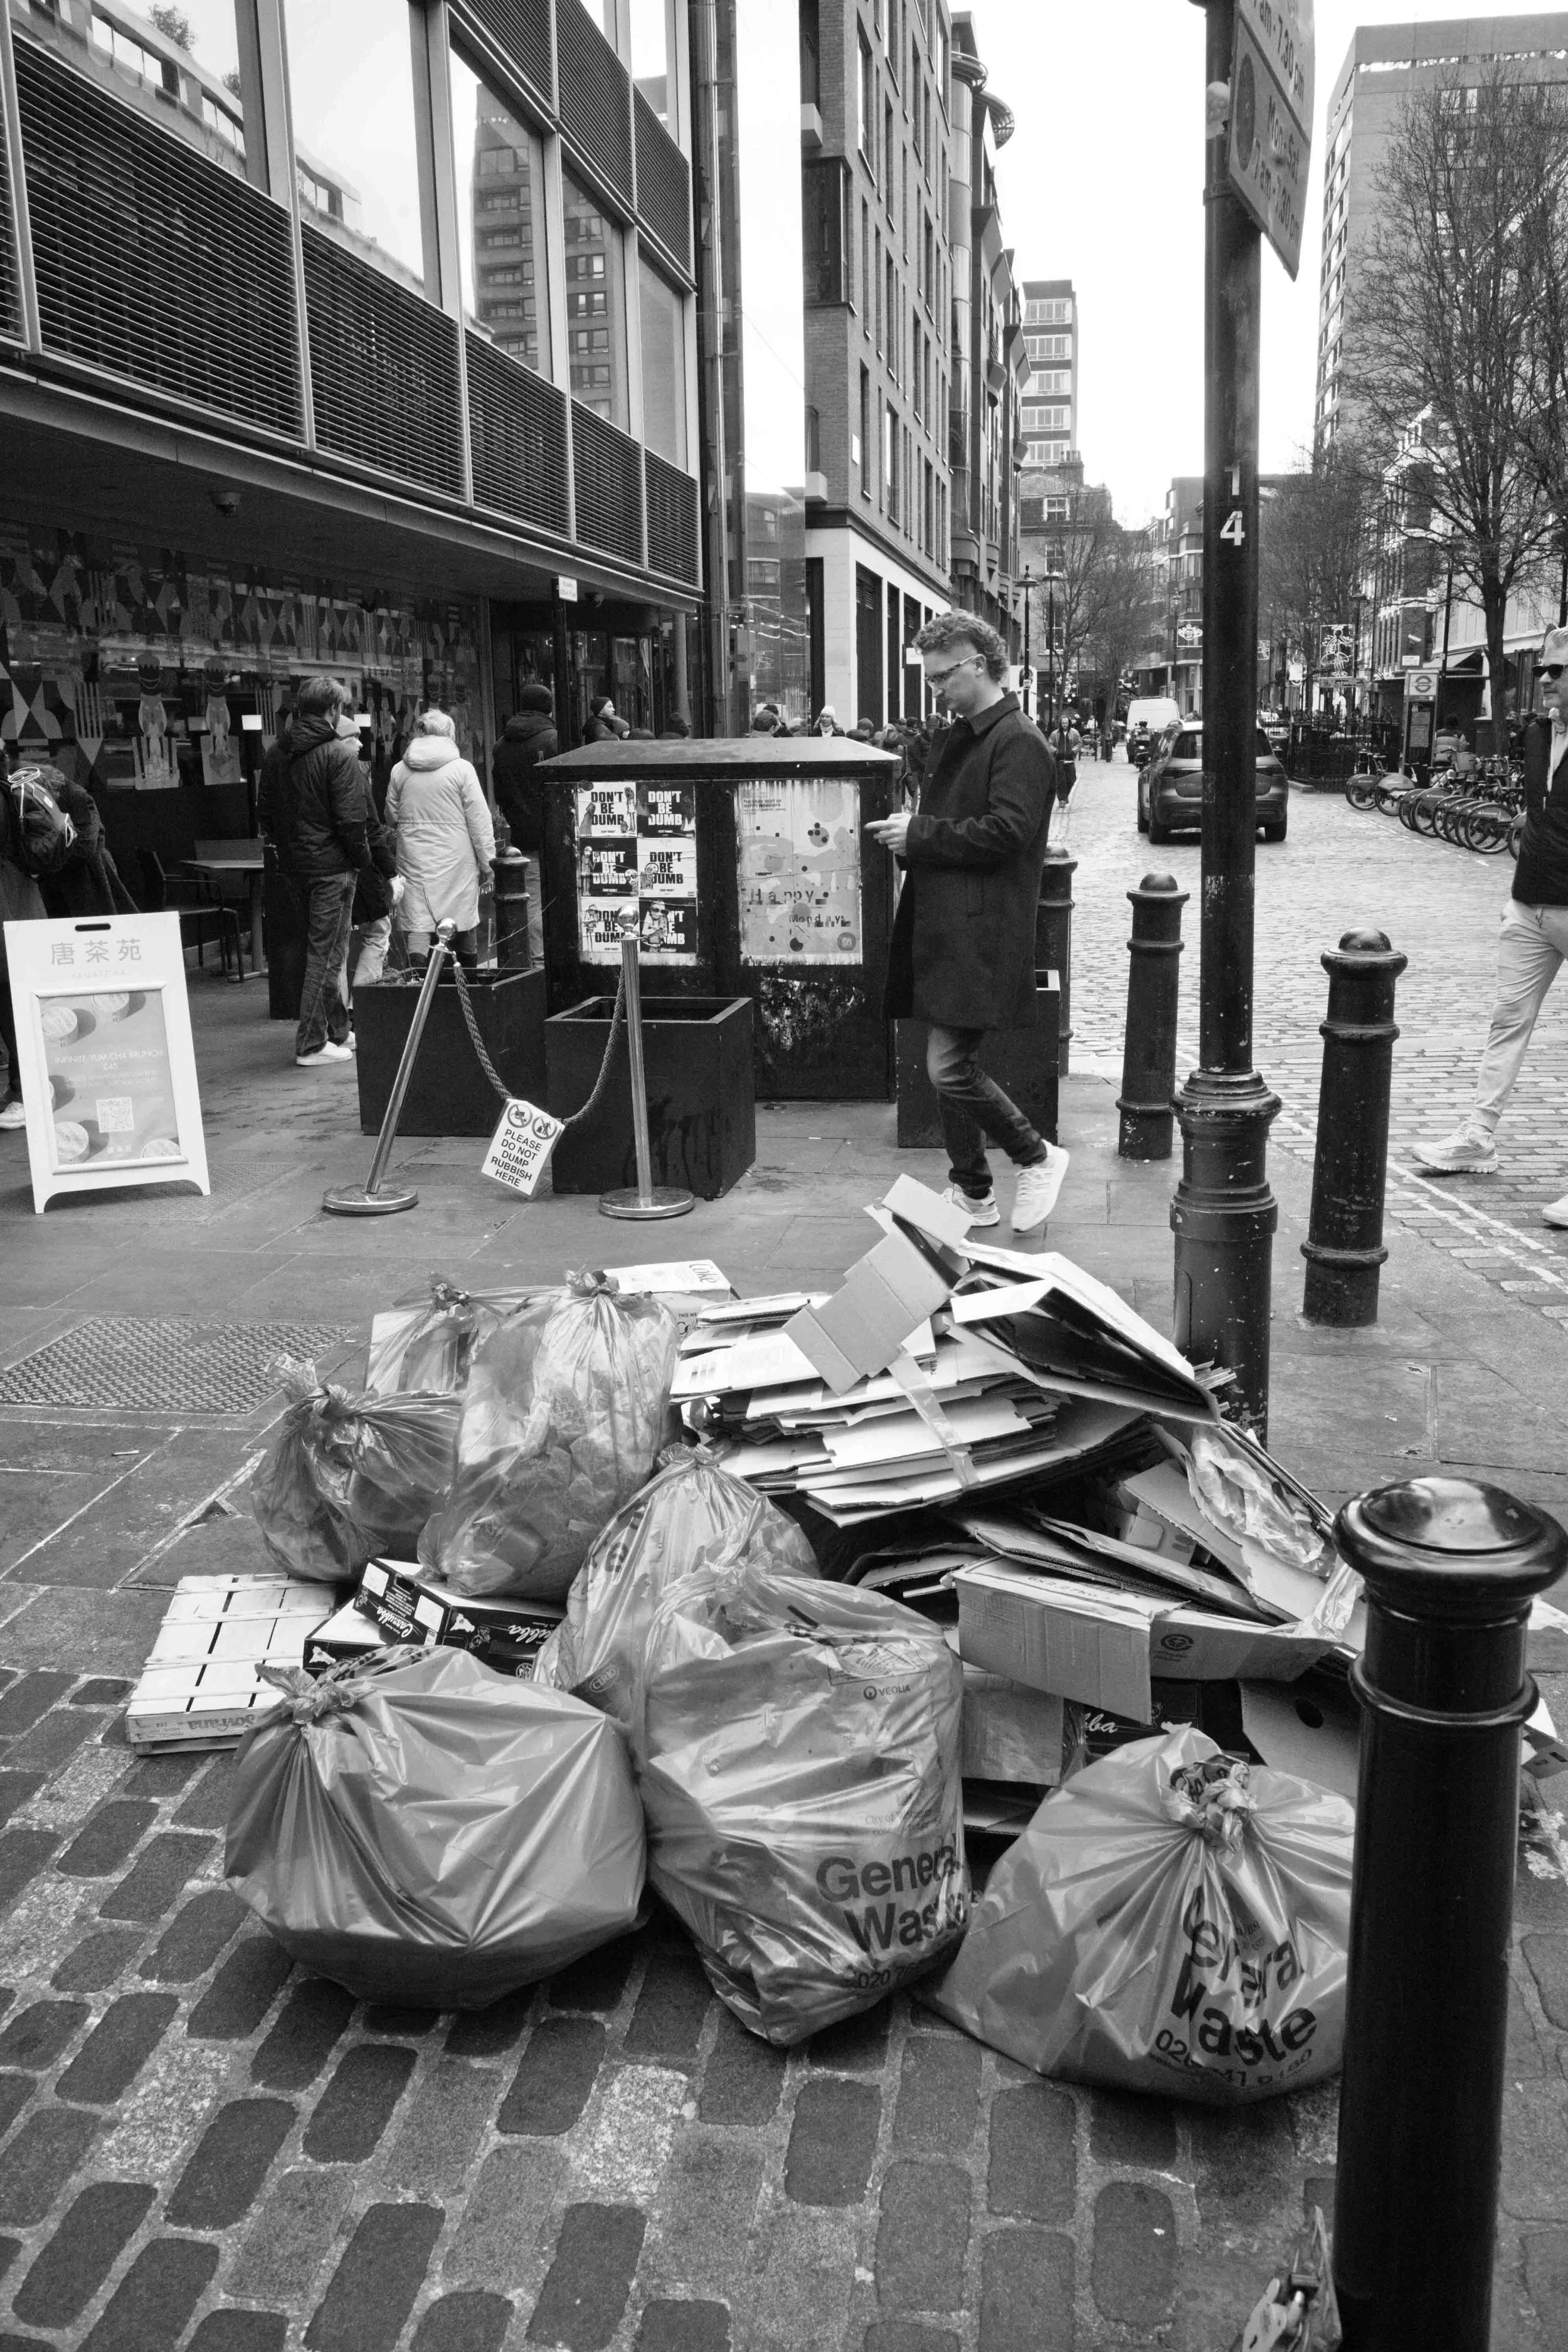
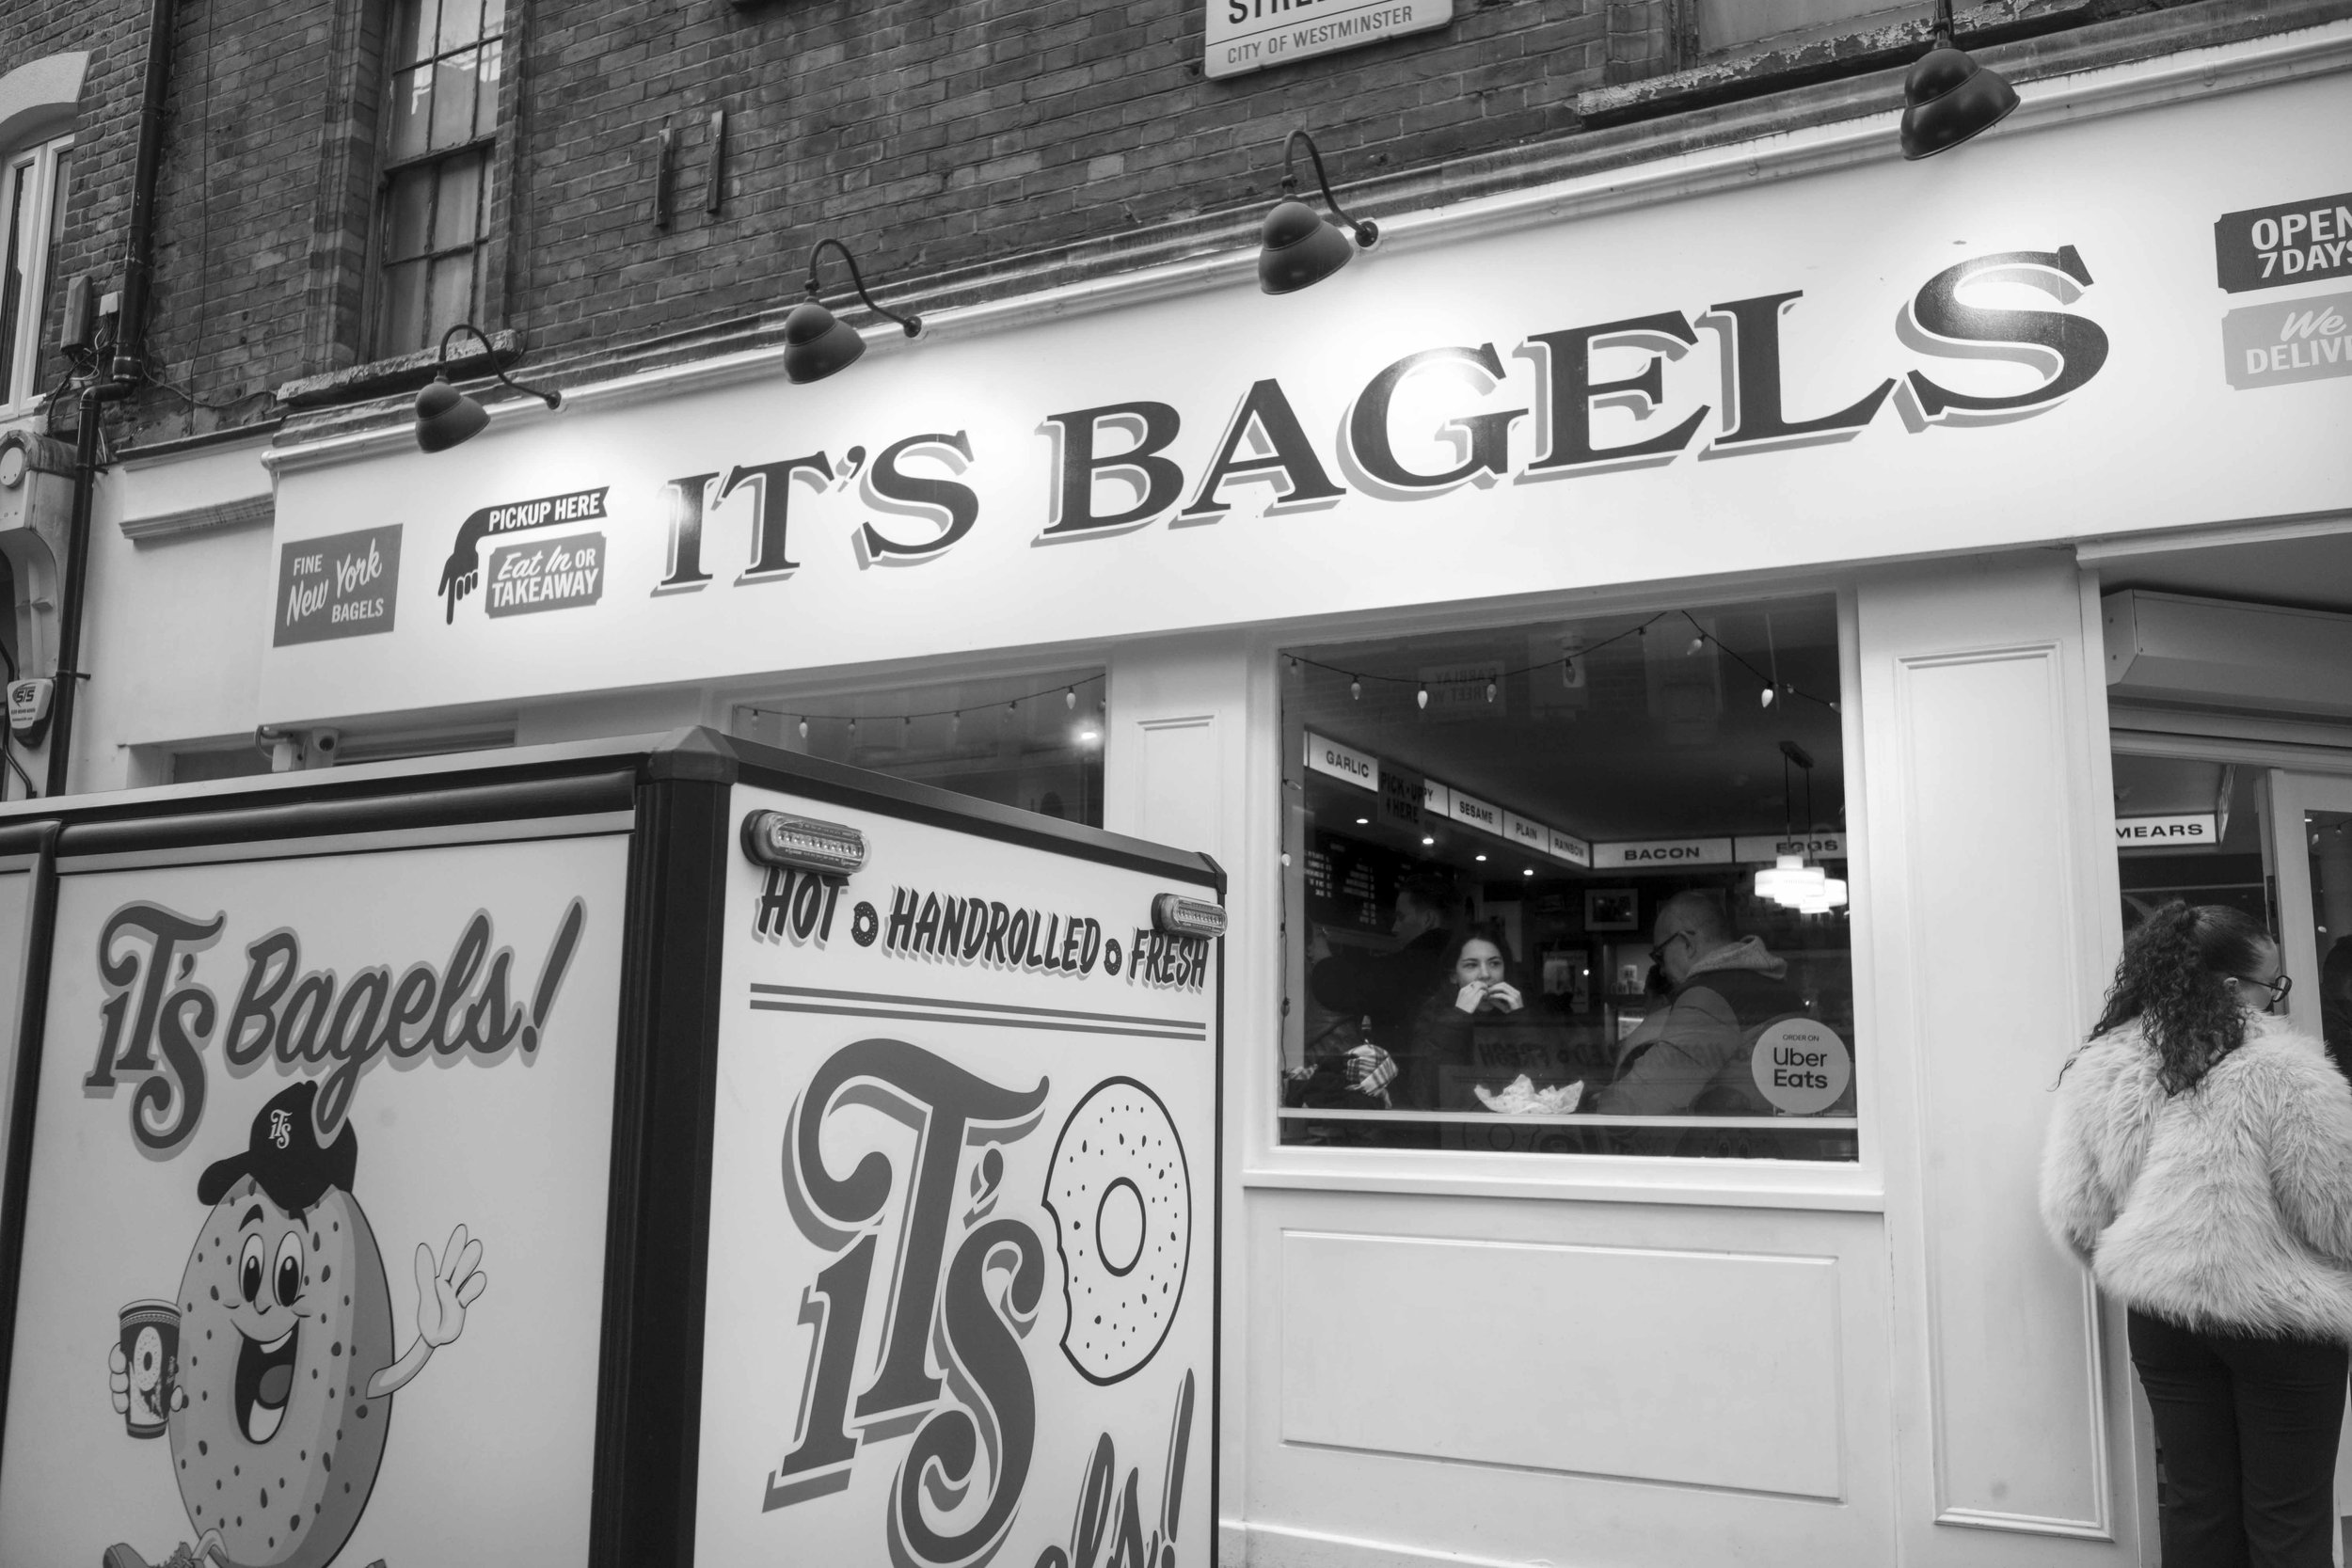
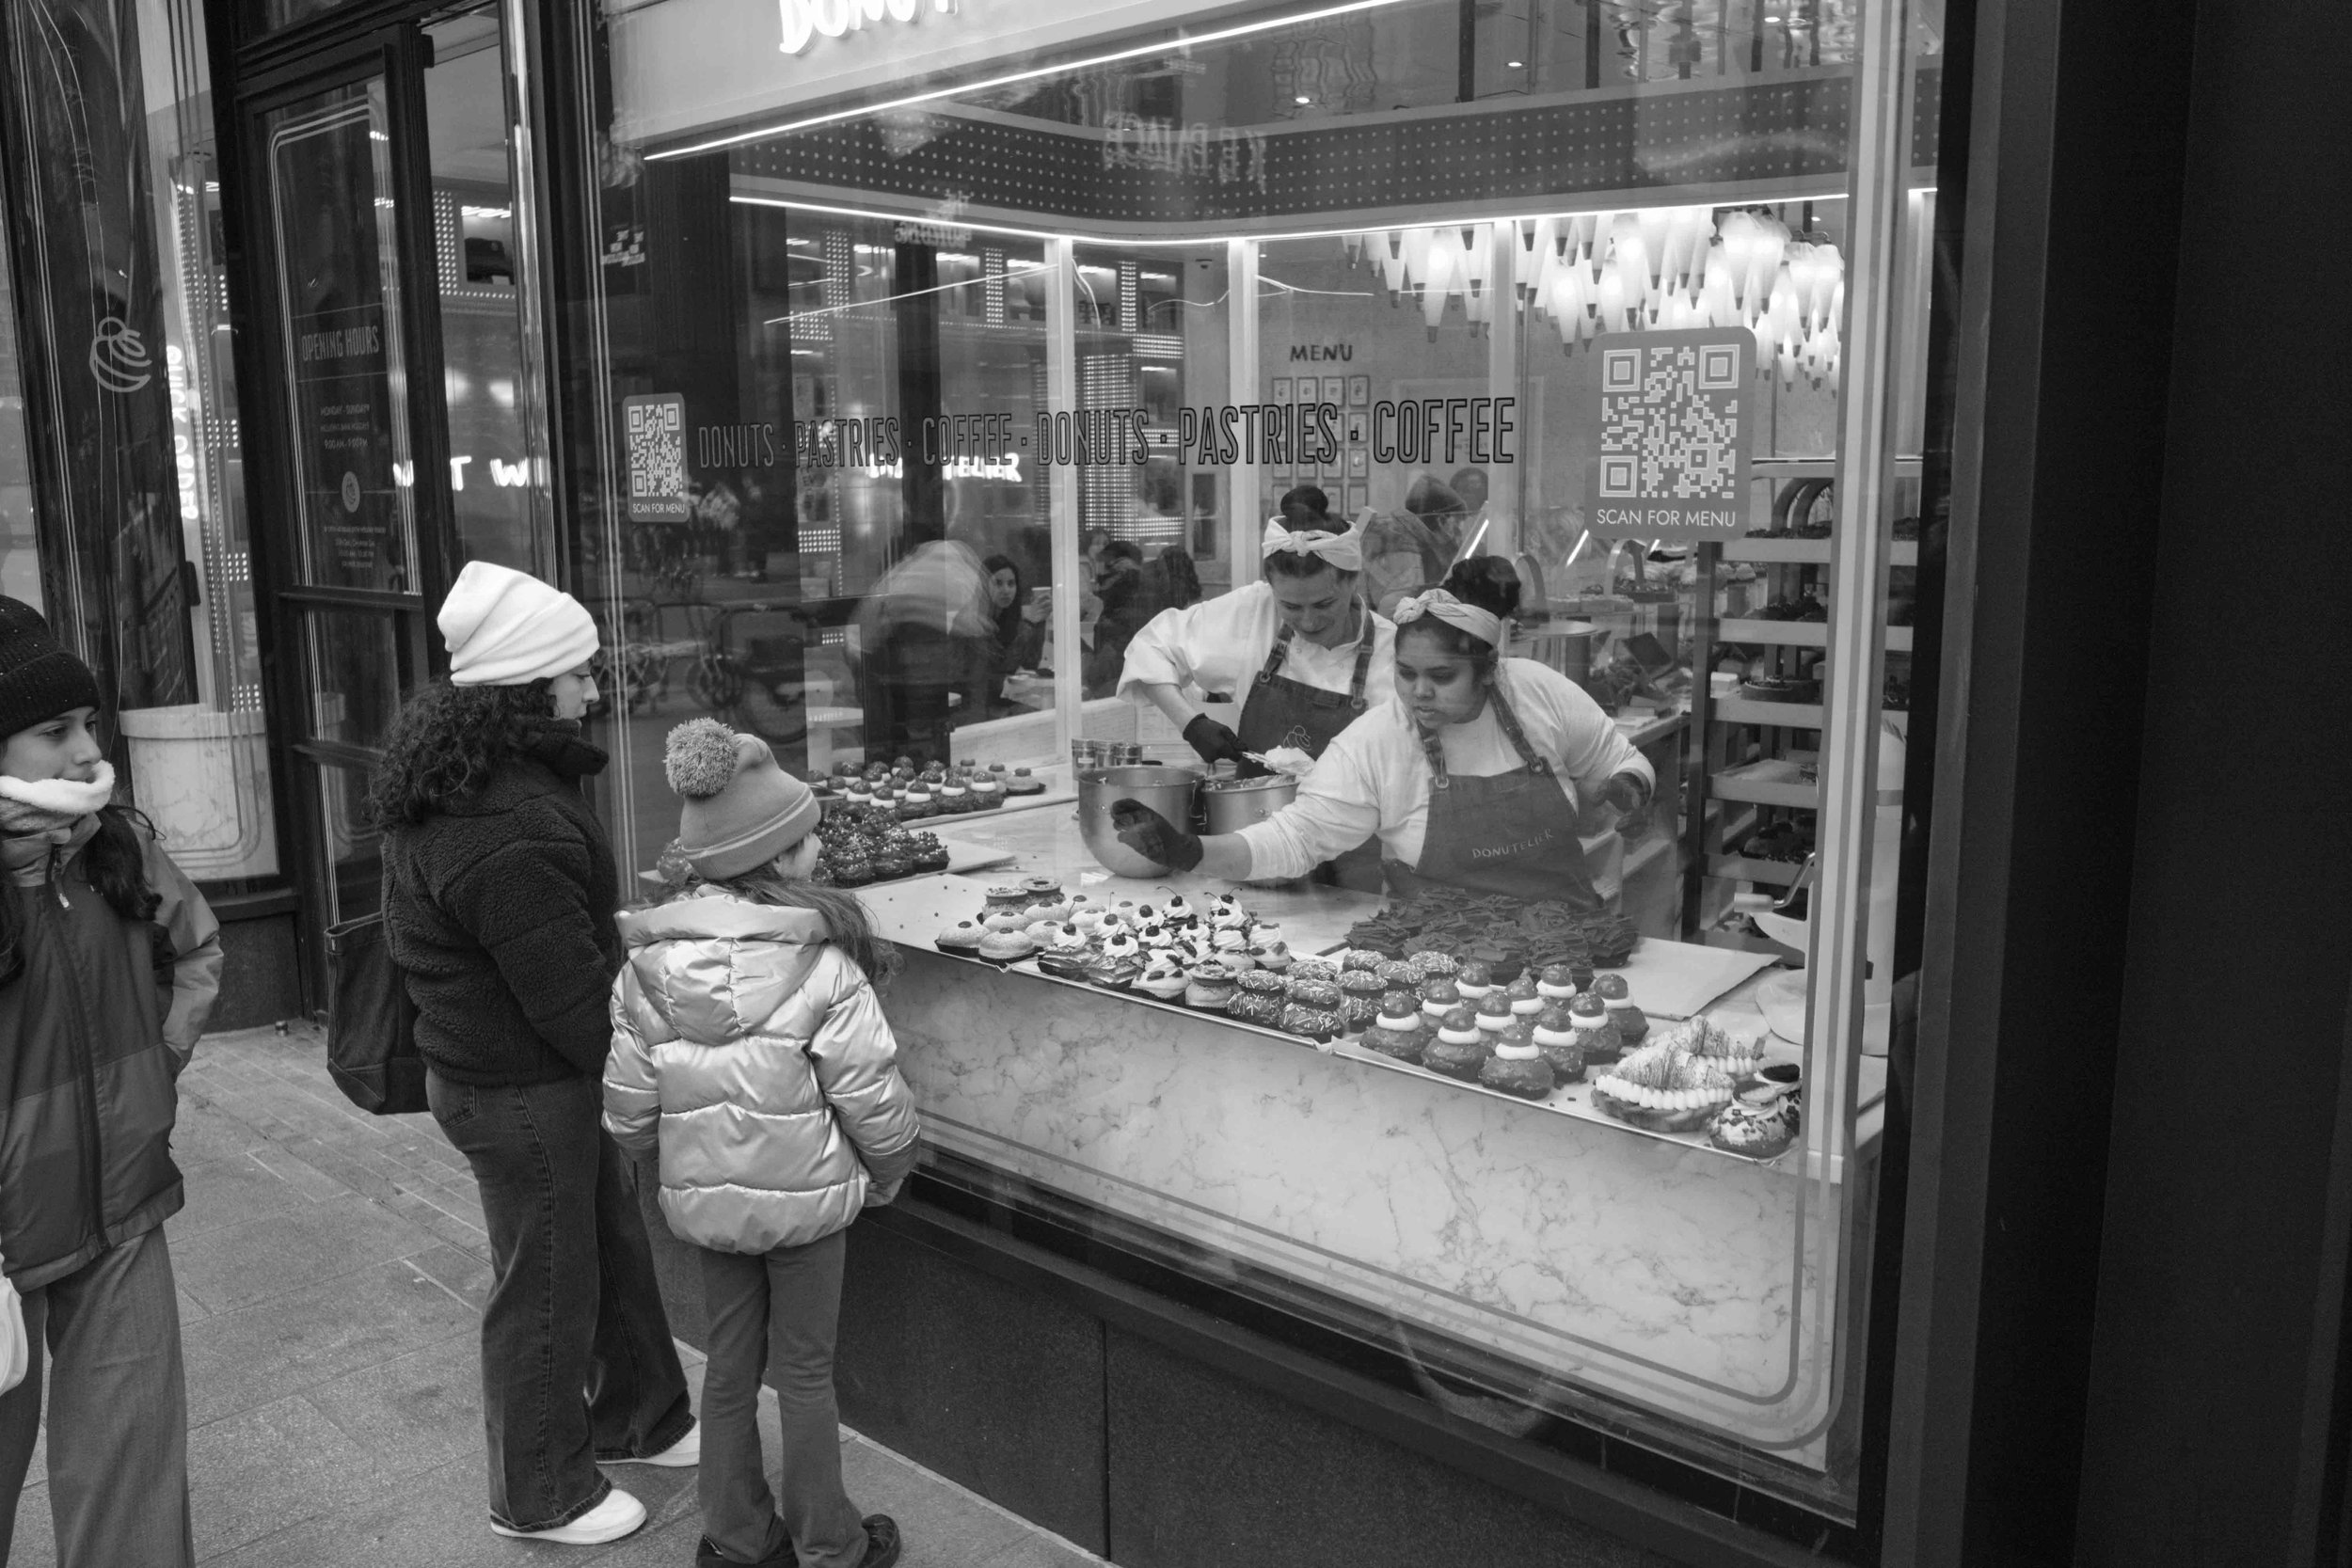
2. The Grit of Soho and Chinatown
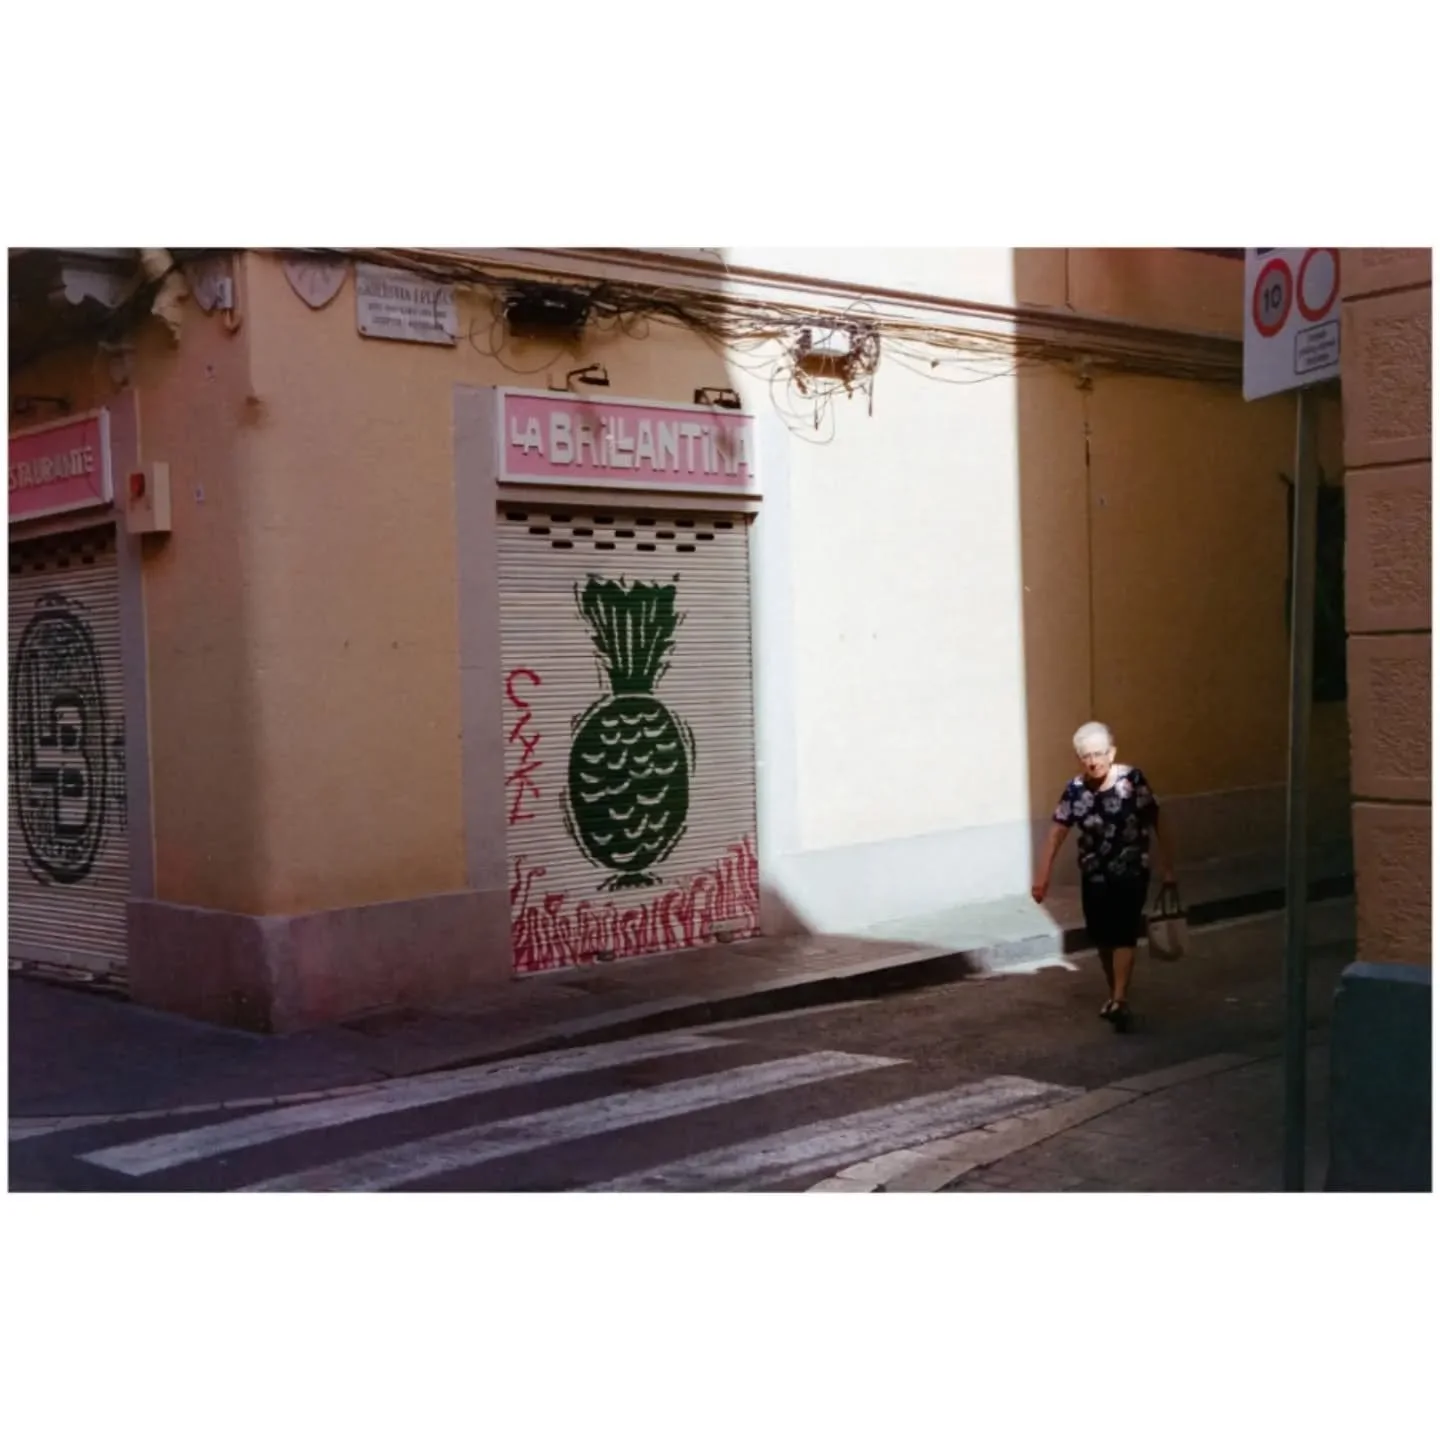
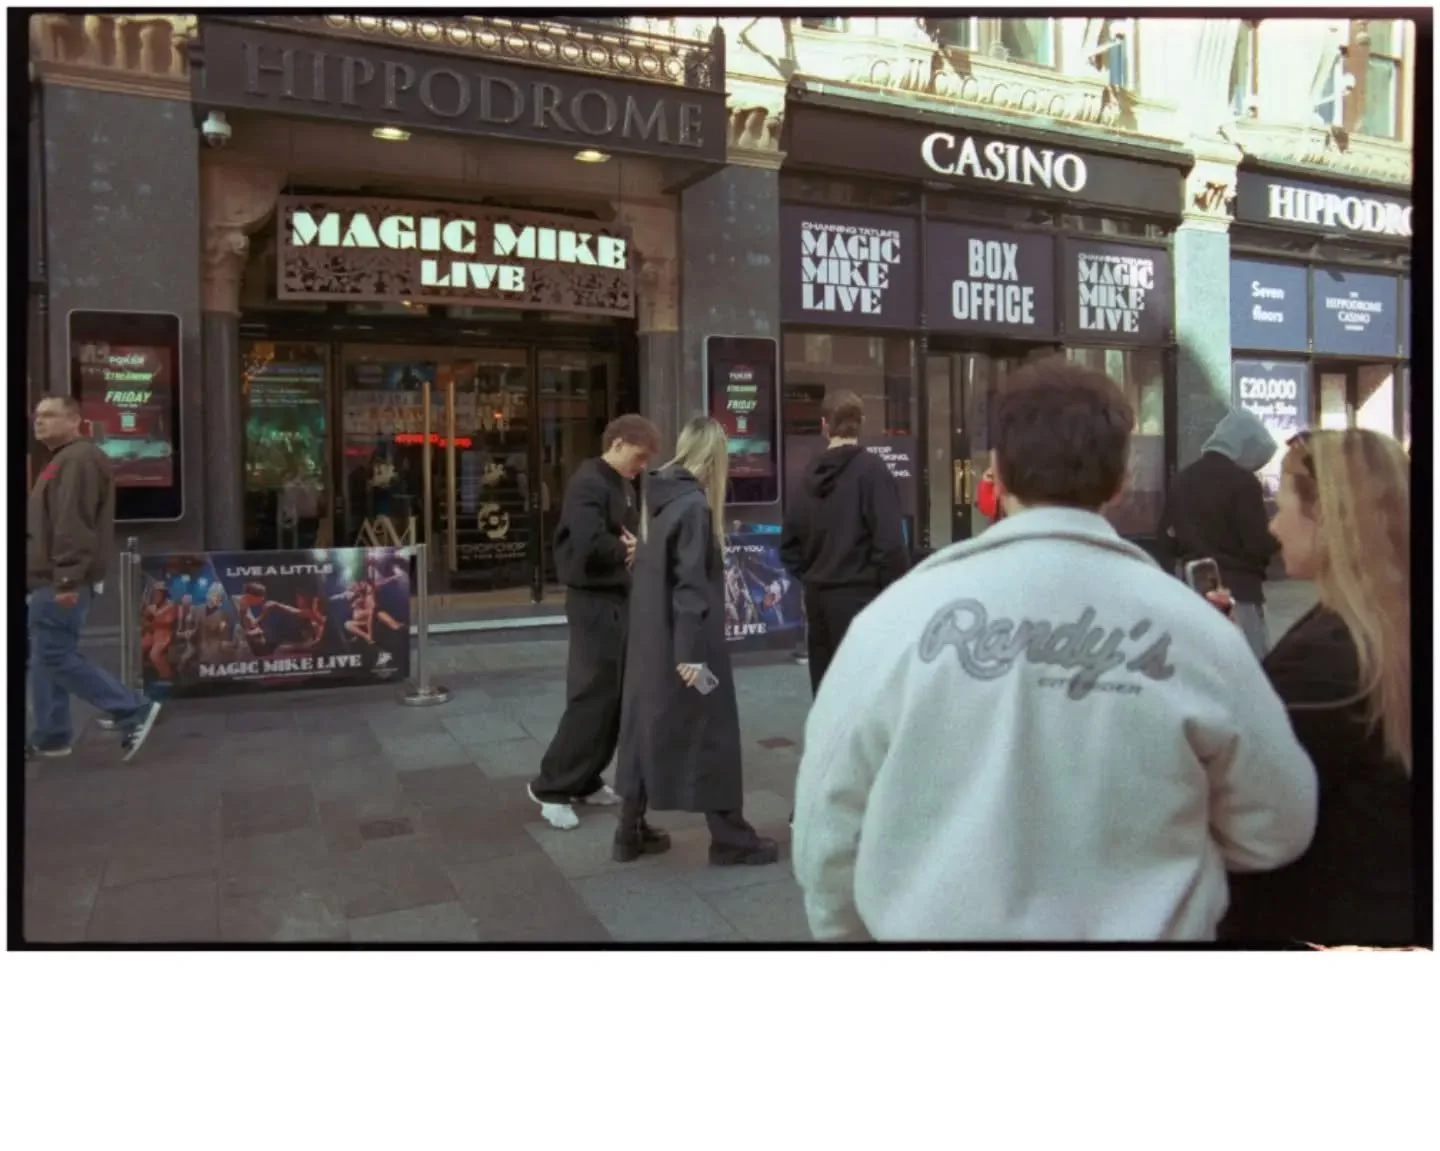
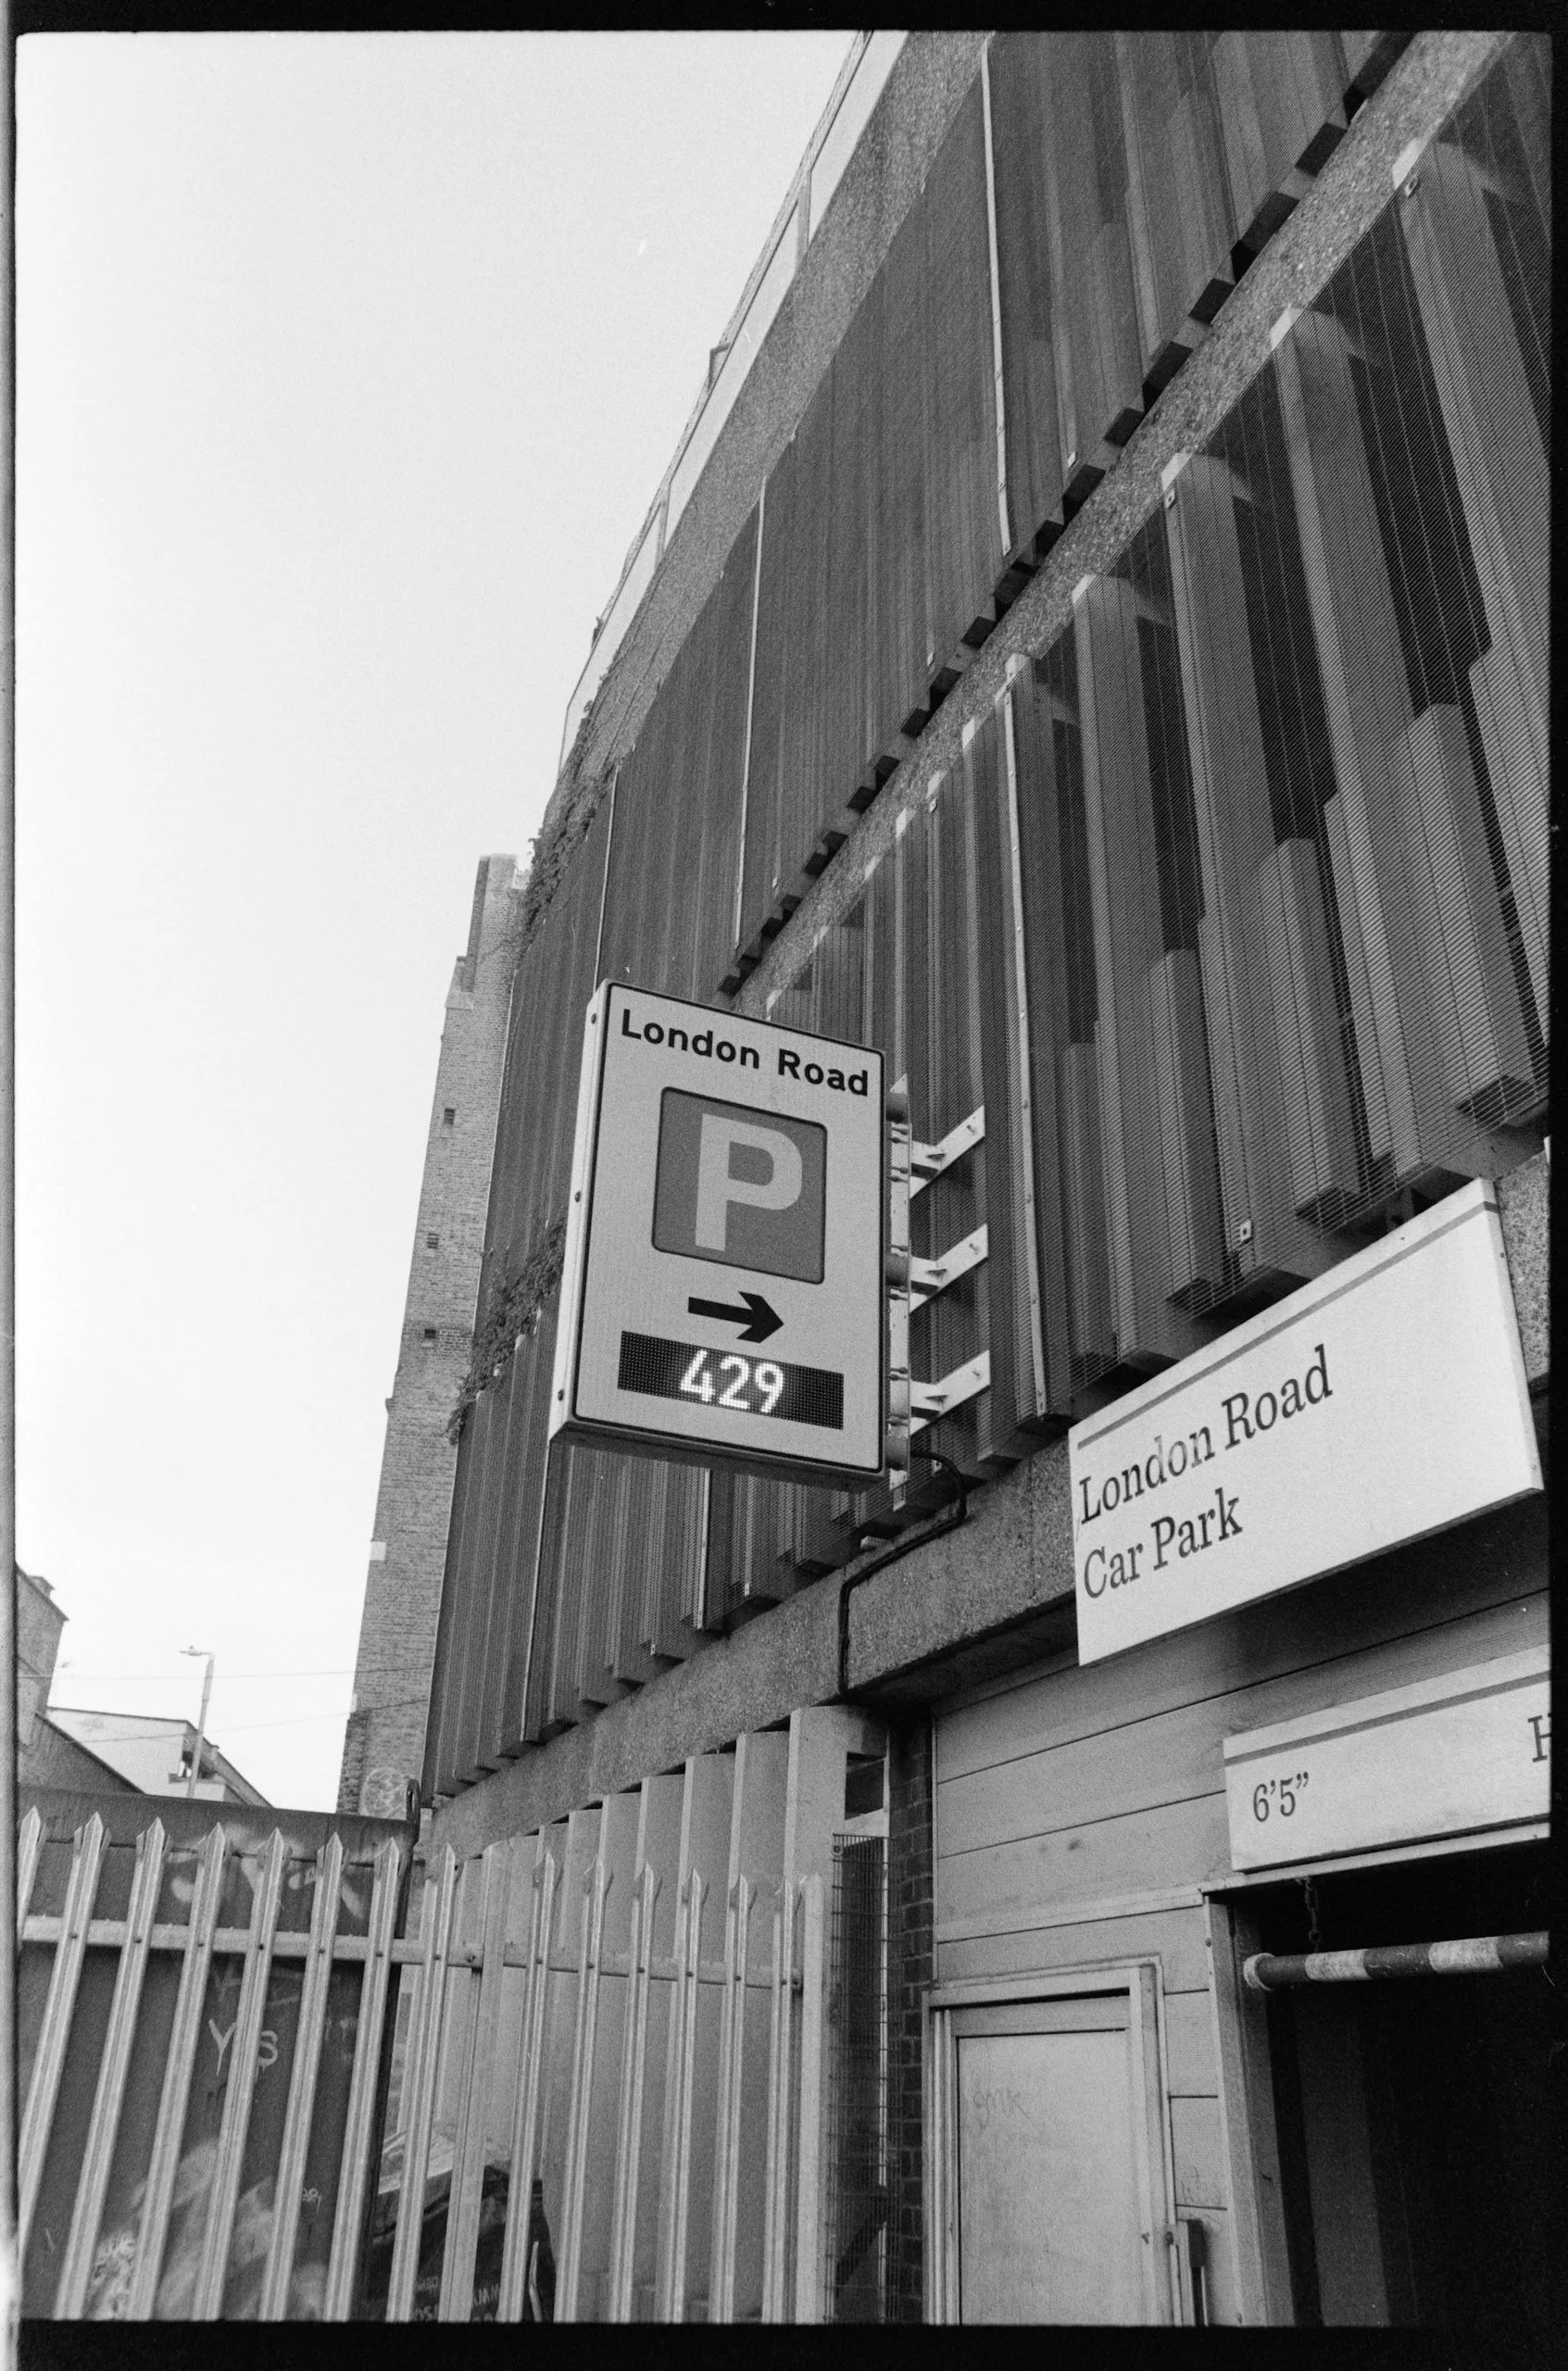
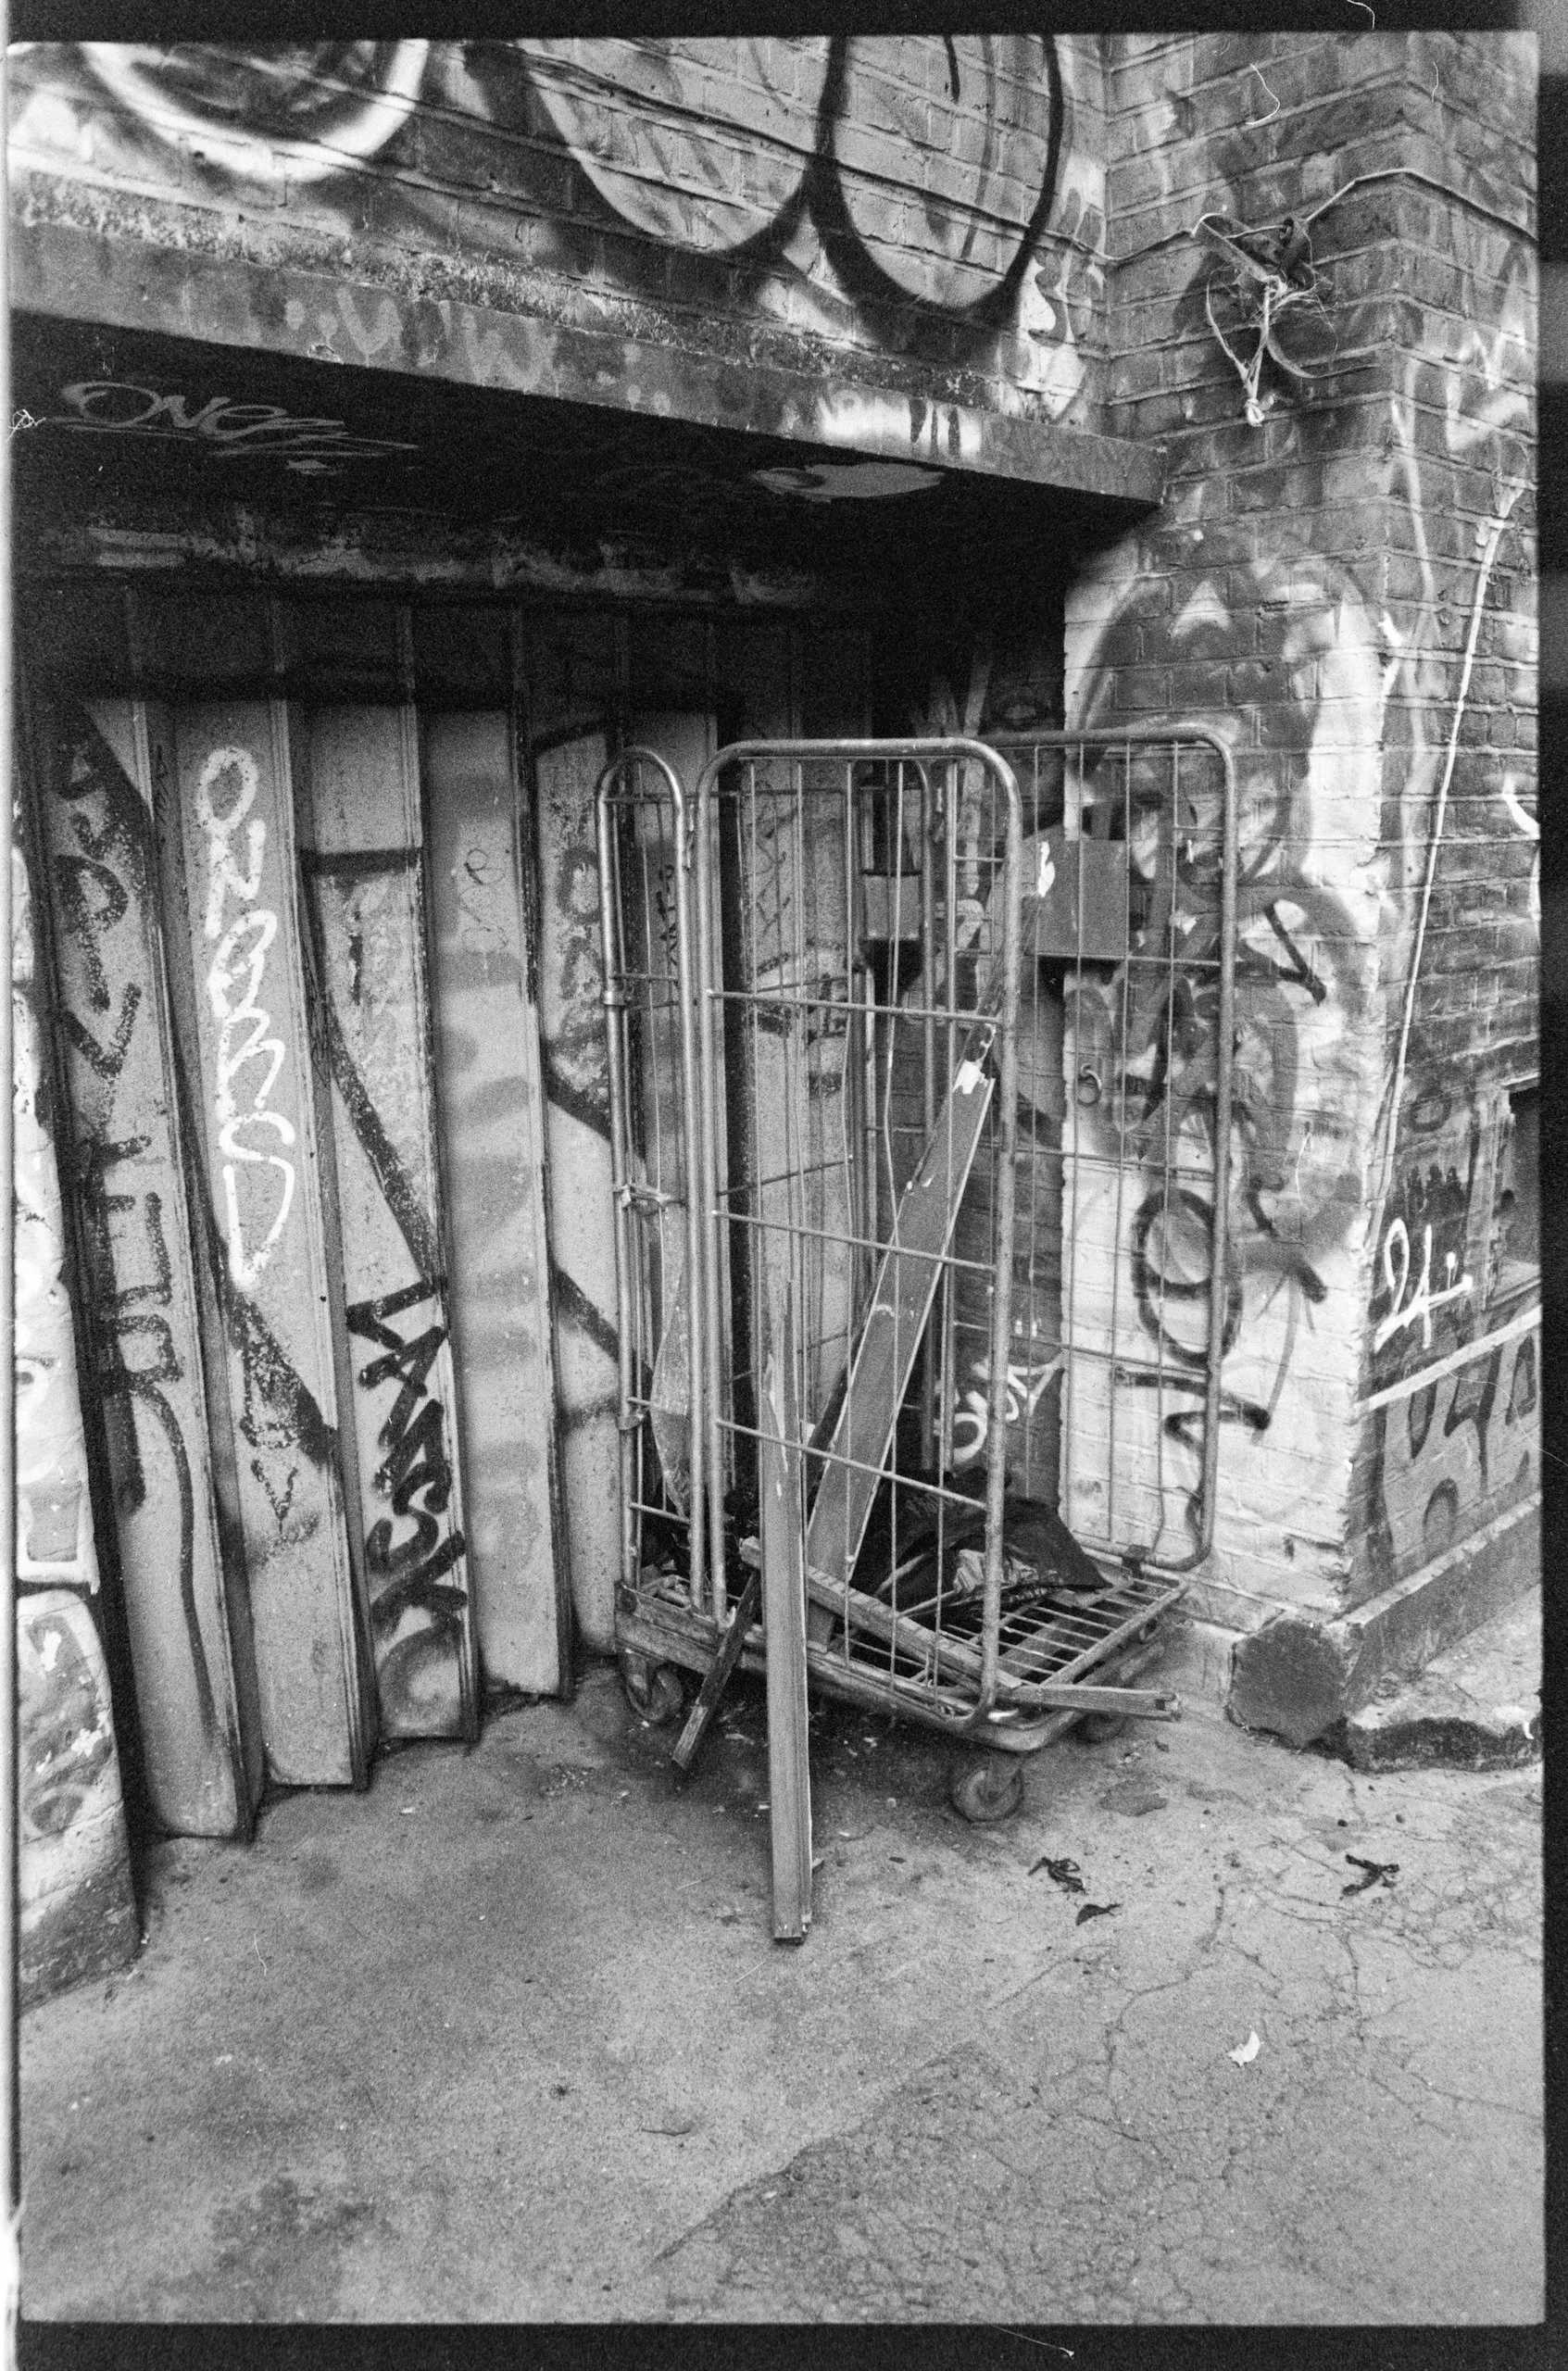
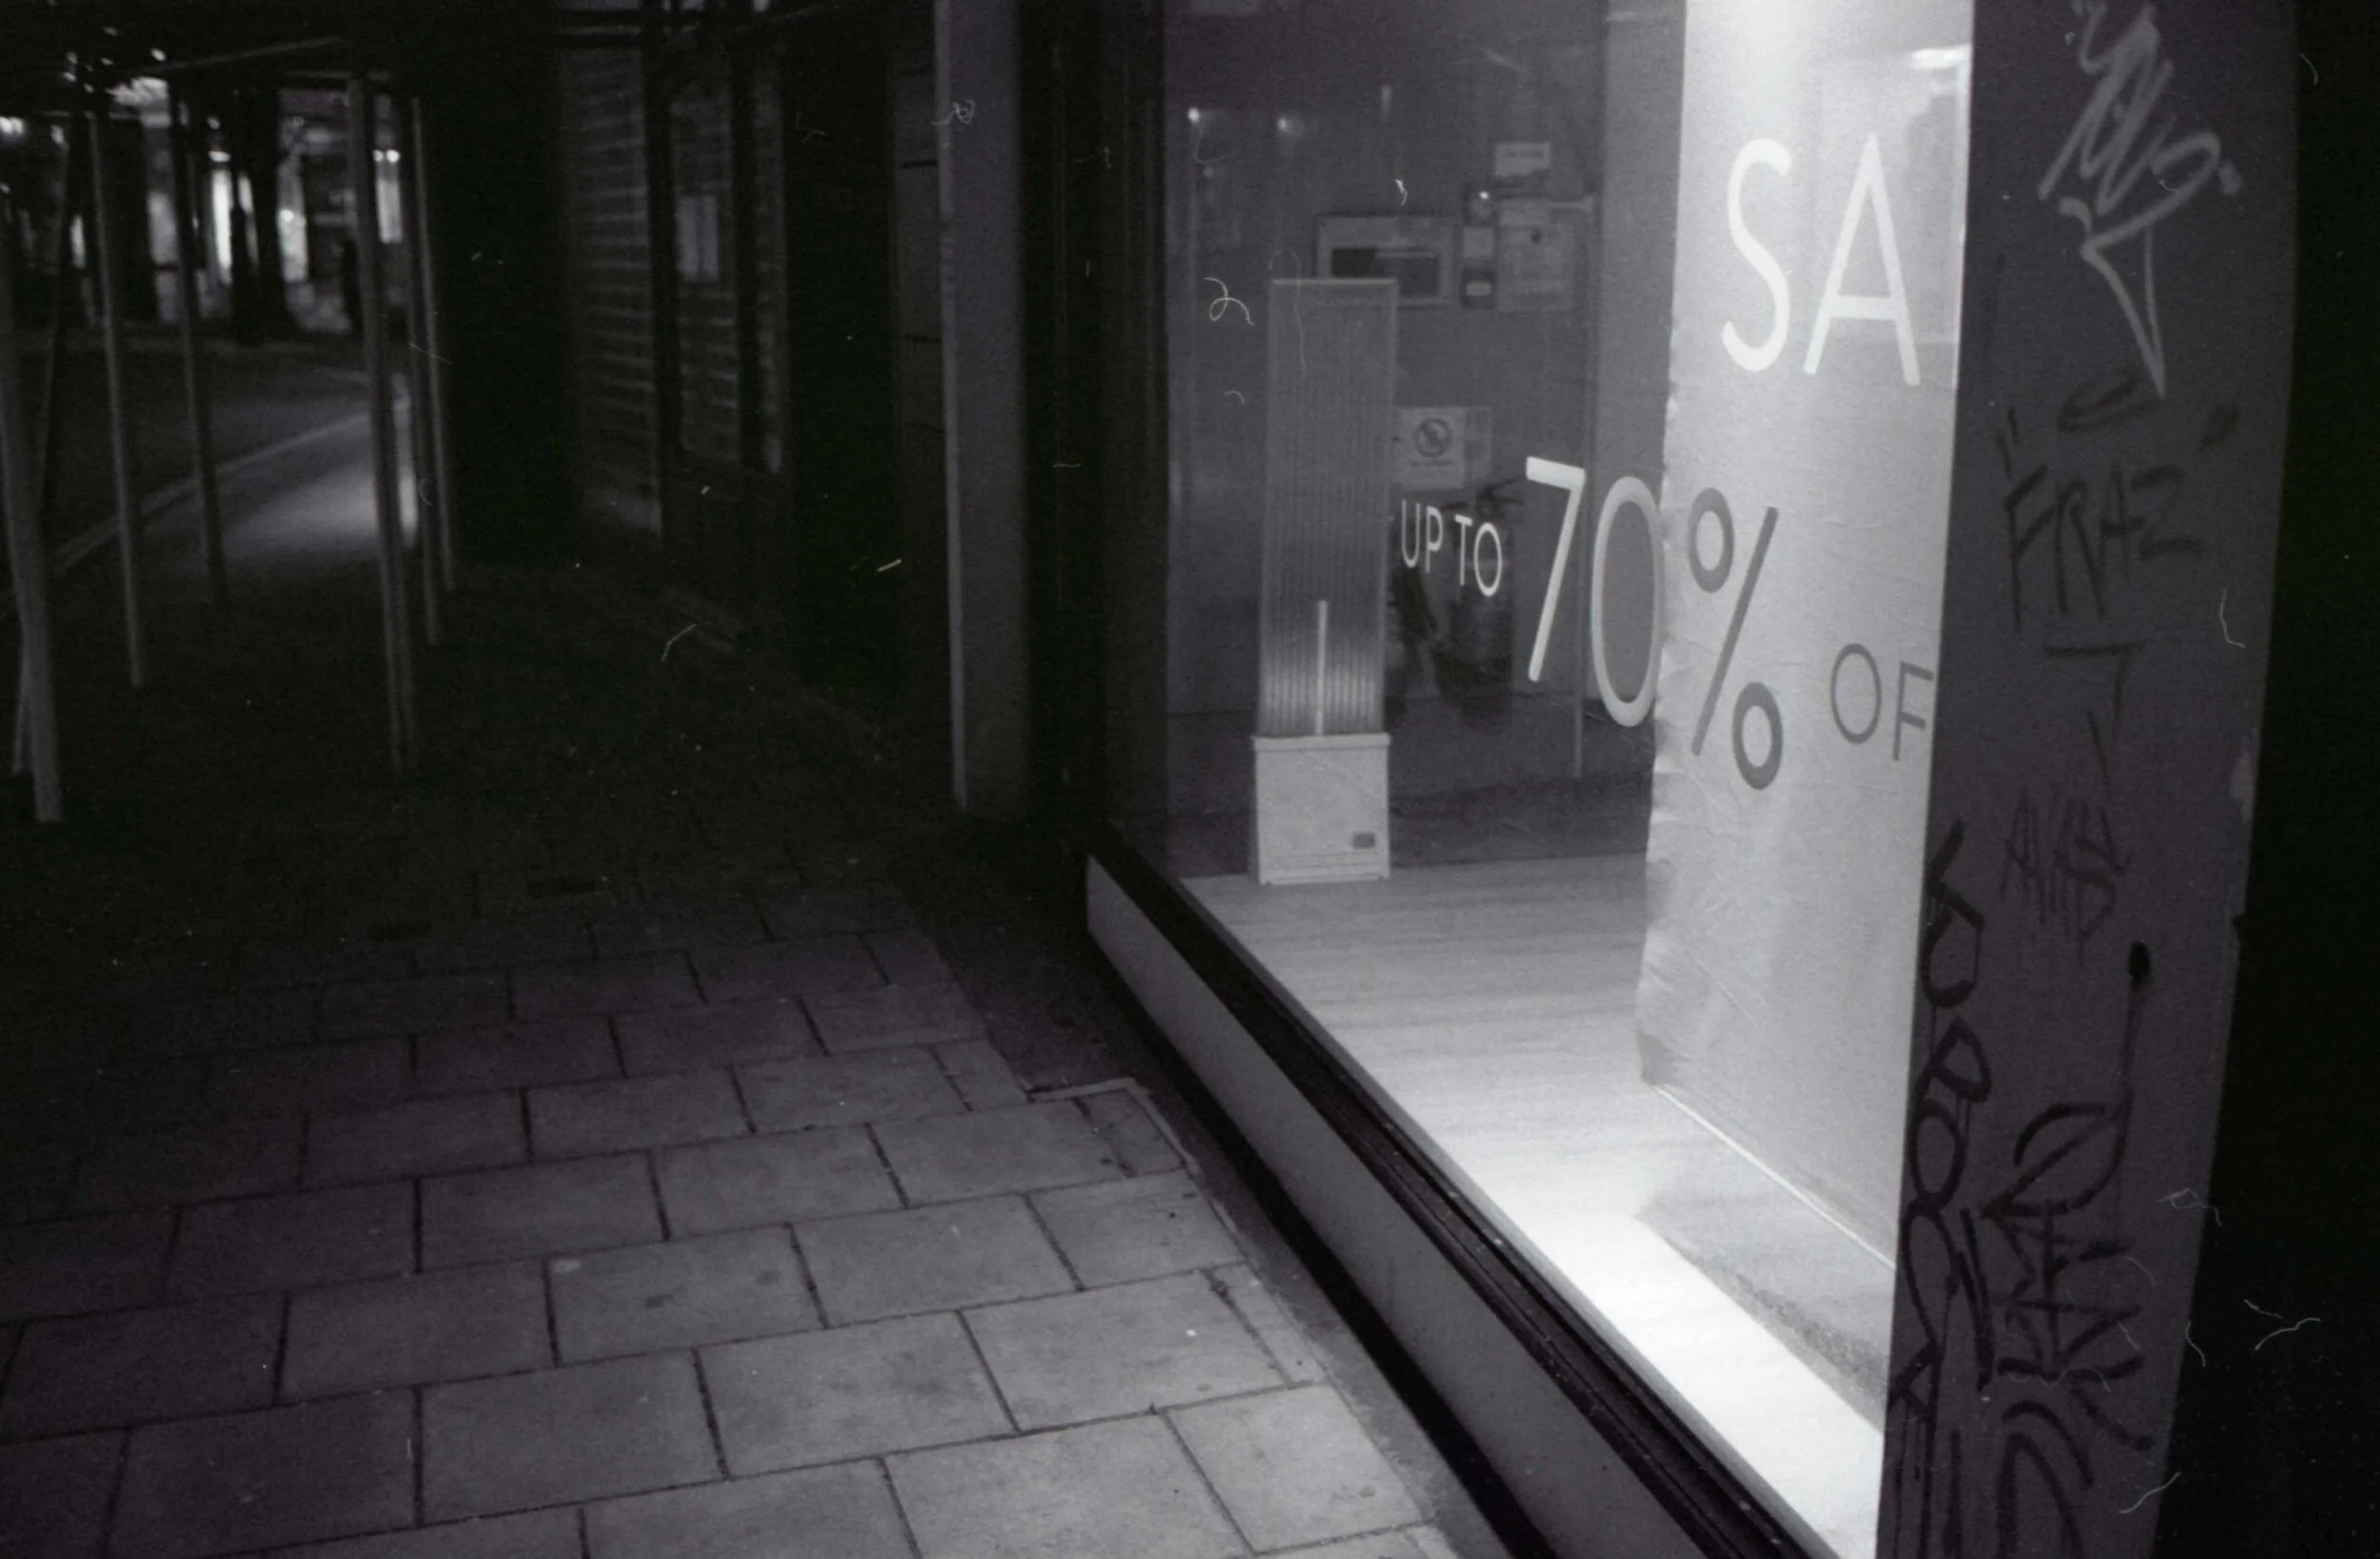
Street photography isn't always about the landmarks. Sometimes, it’s about a pile of trash bags on a busy corner or the narrow, bin-lined alleys behind Leicester Square. The 28mm is perfect for these tight spaces.
In Chinatown, I caught a great moment of the chefs taking a break outside "Hungry Panda." The lens is so small that they hardly noticed me, allowing for a truly candid slice-of-life shot.
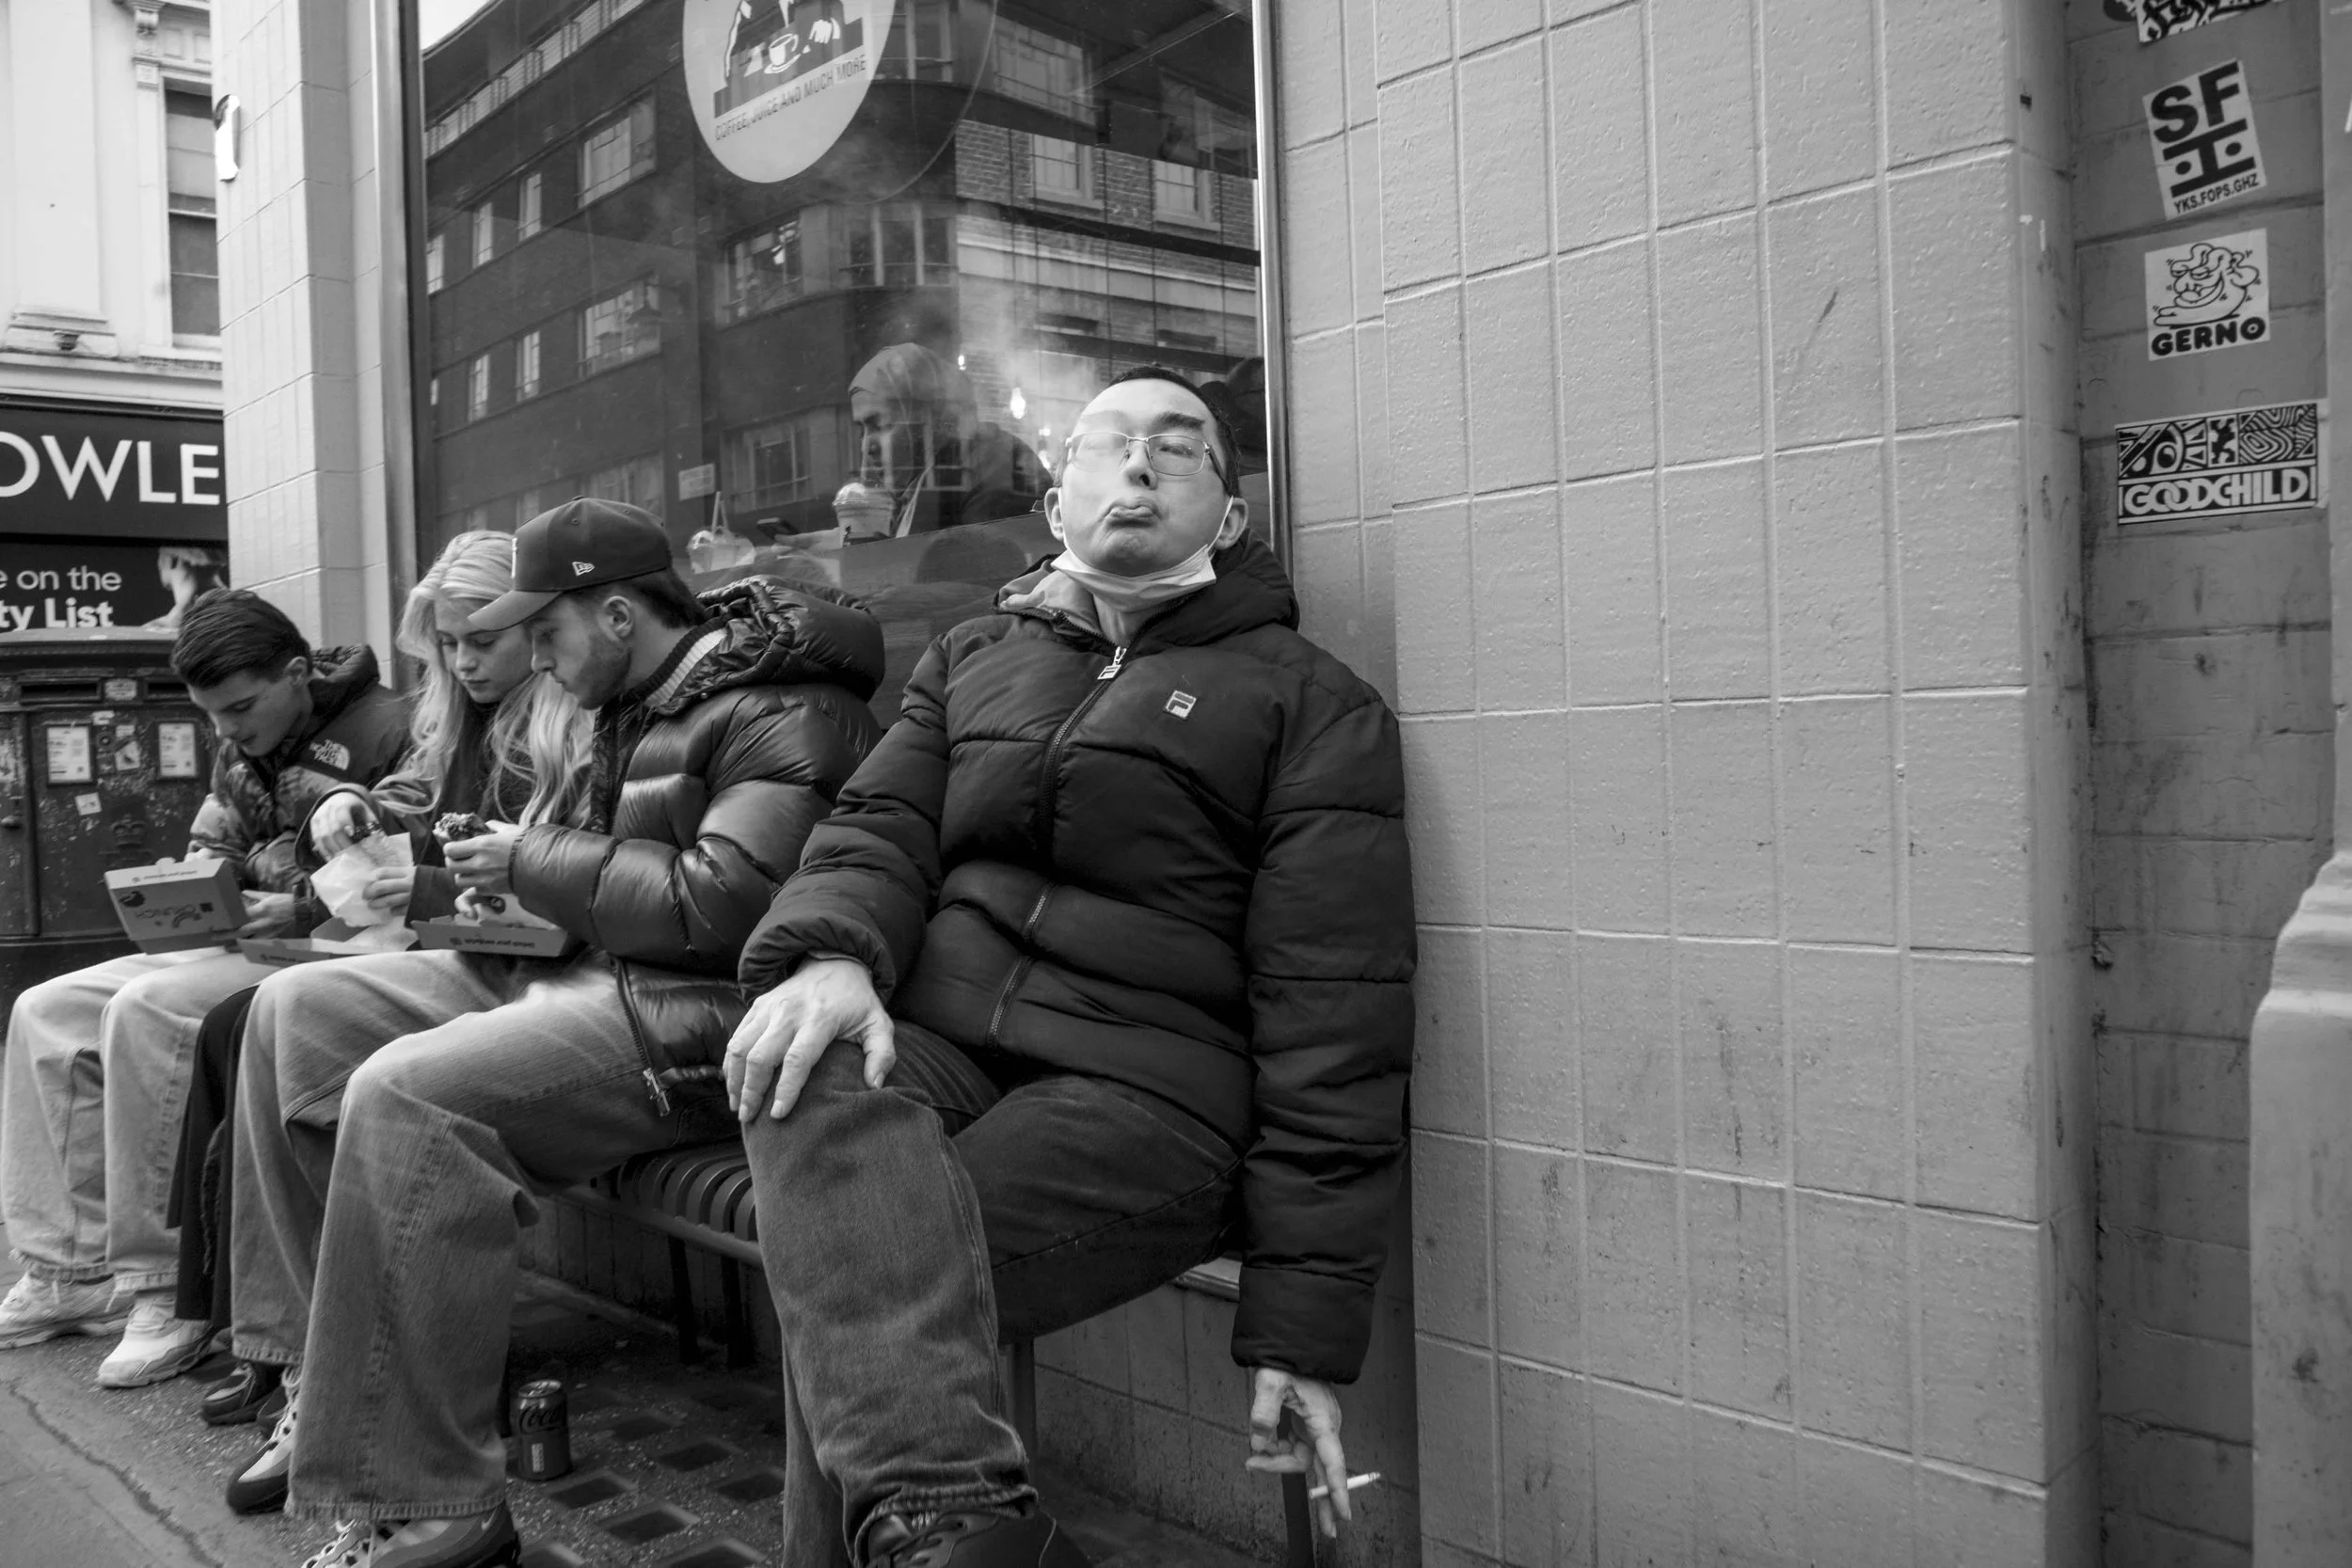

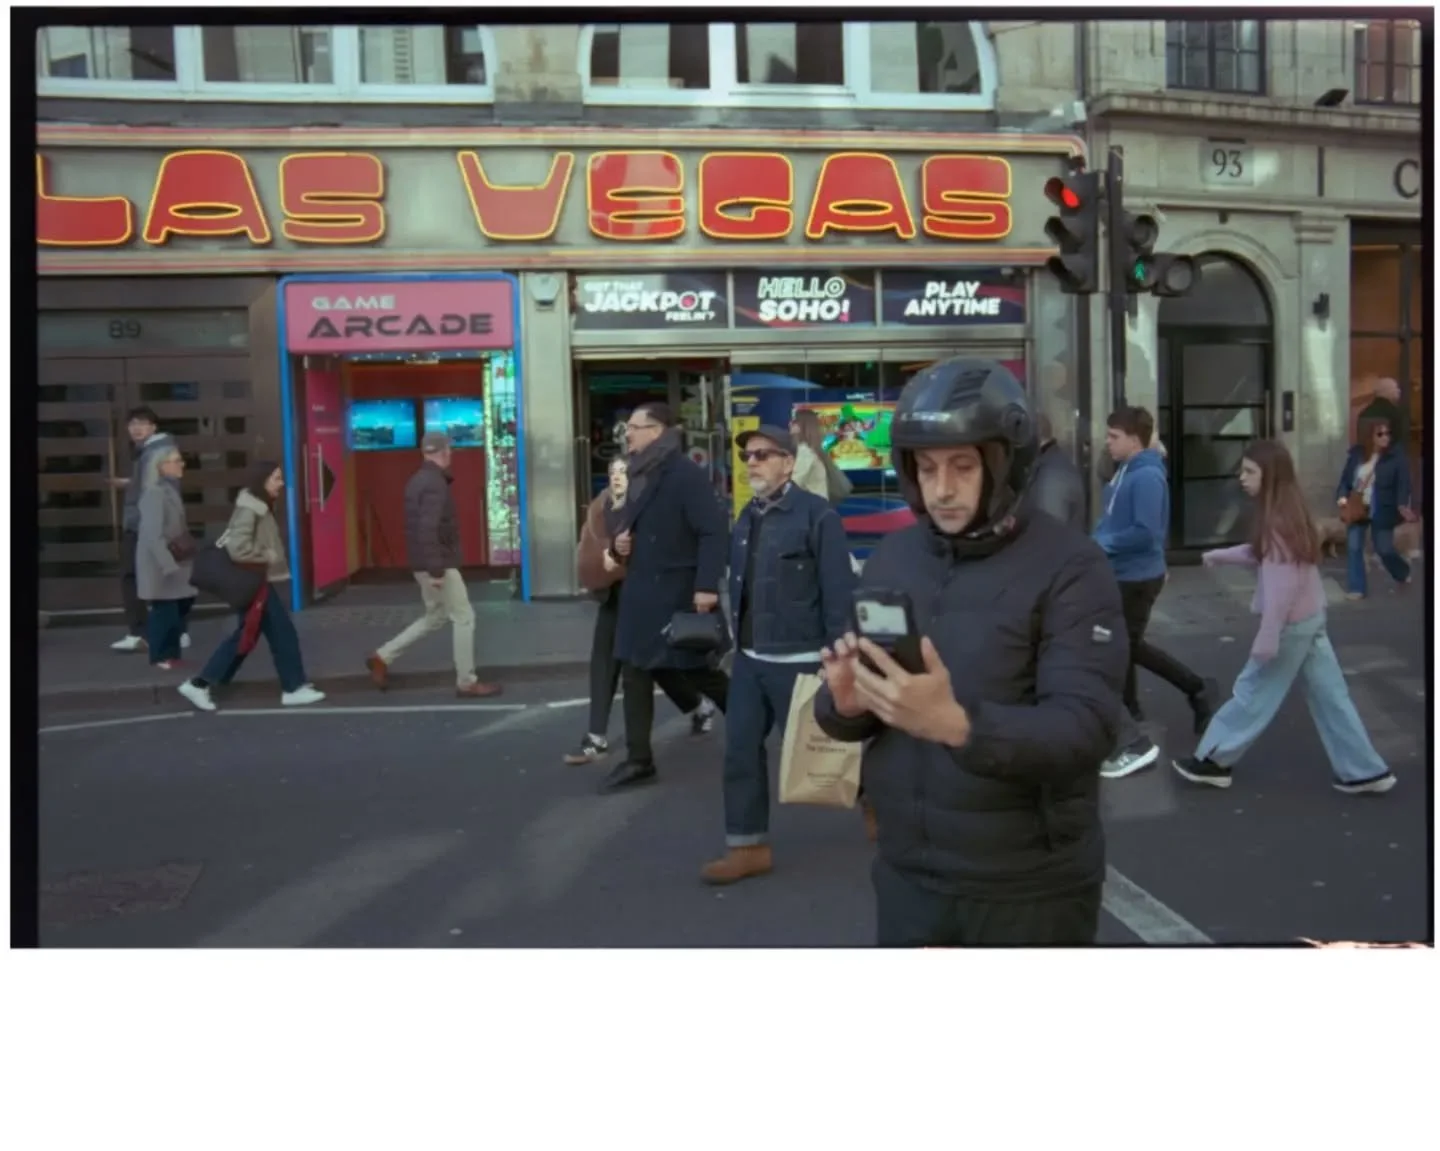
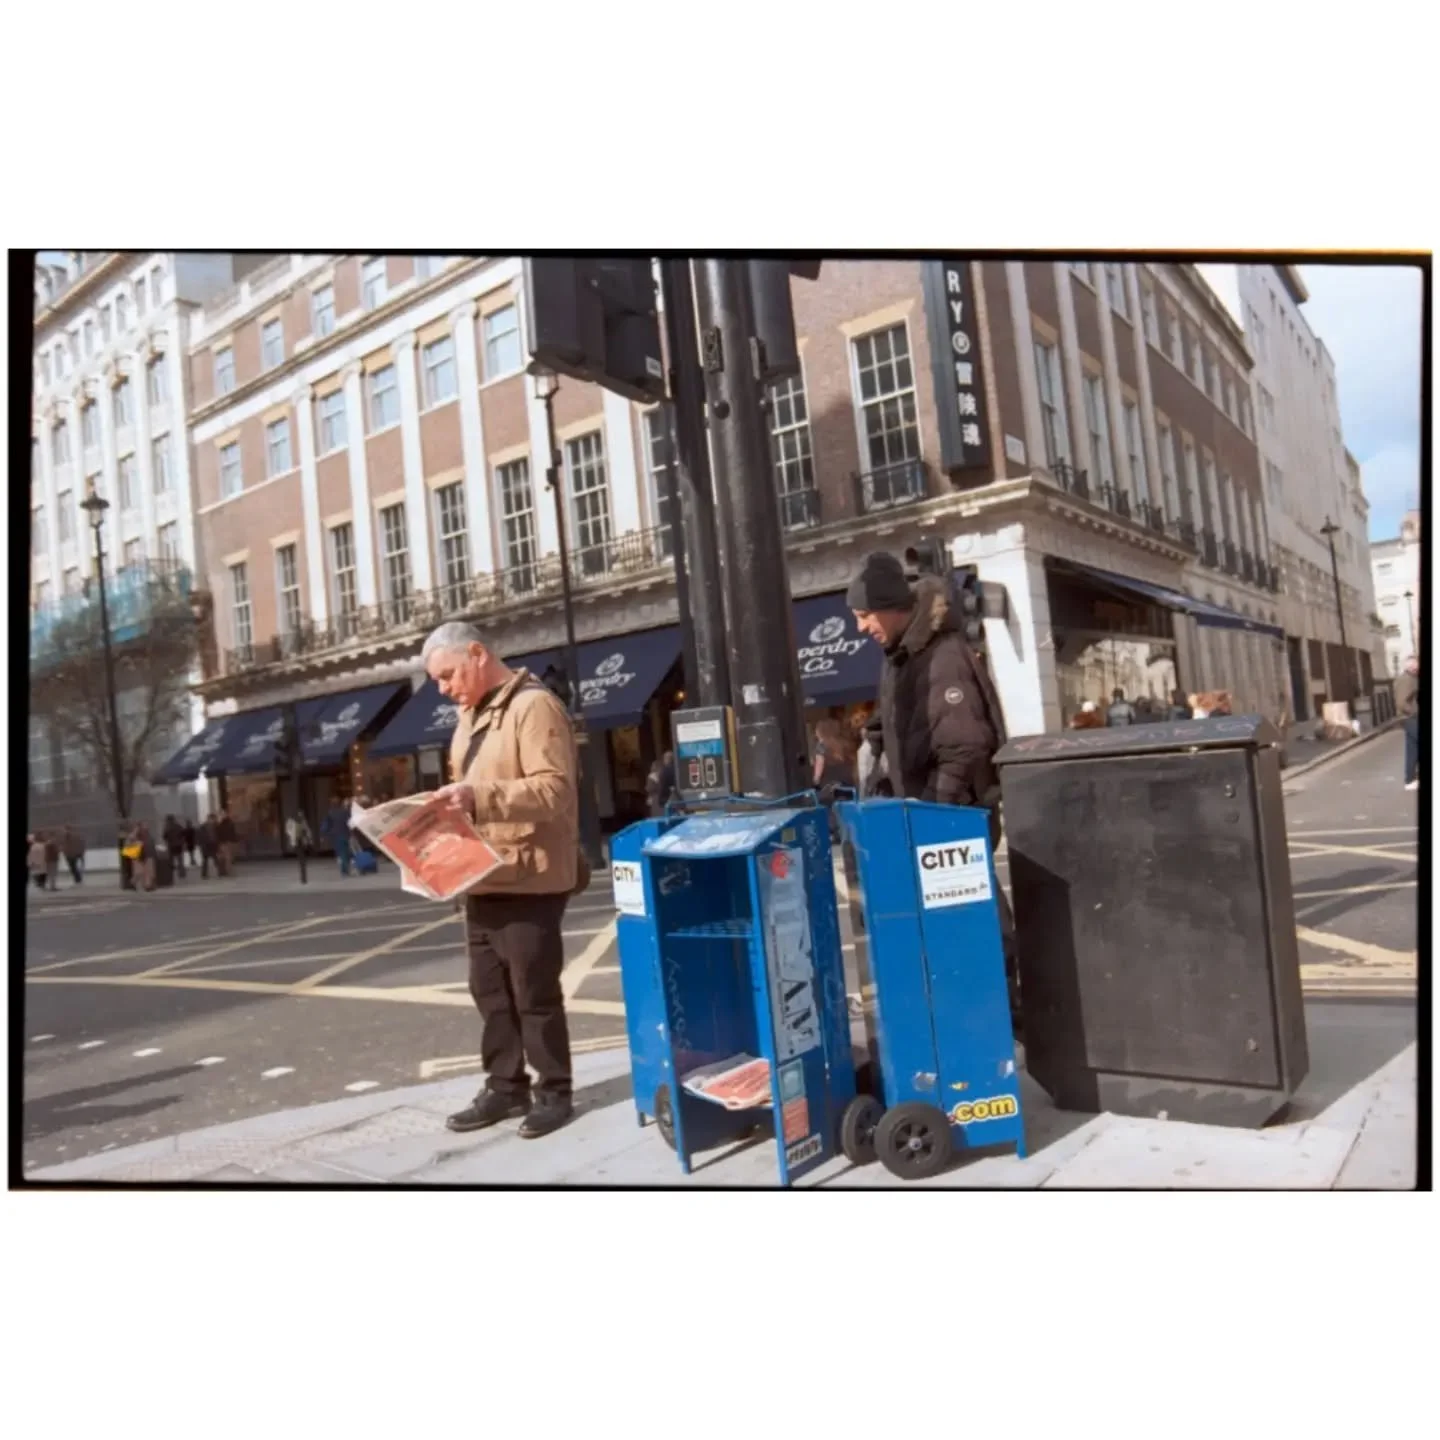
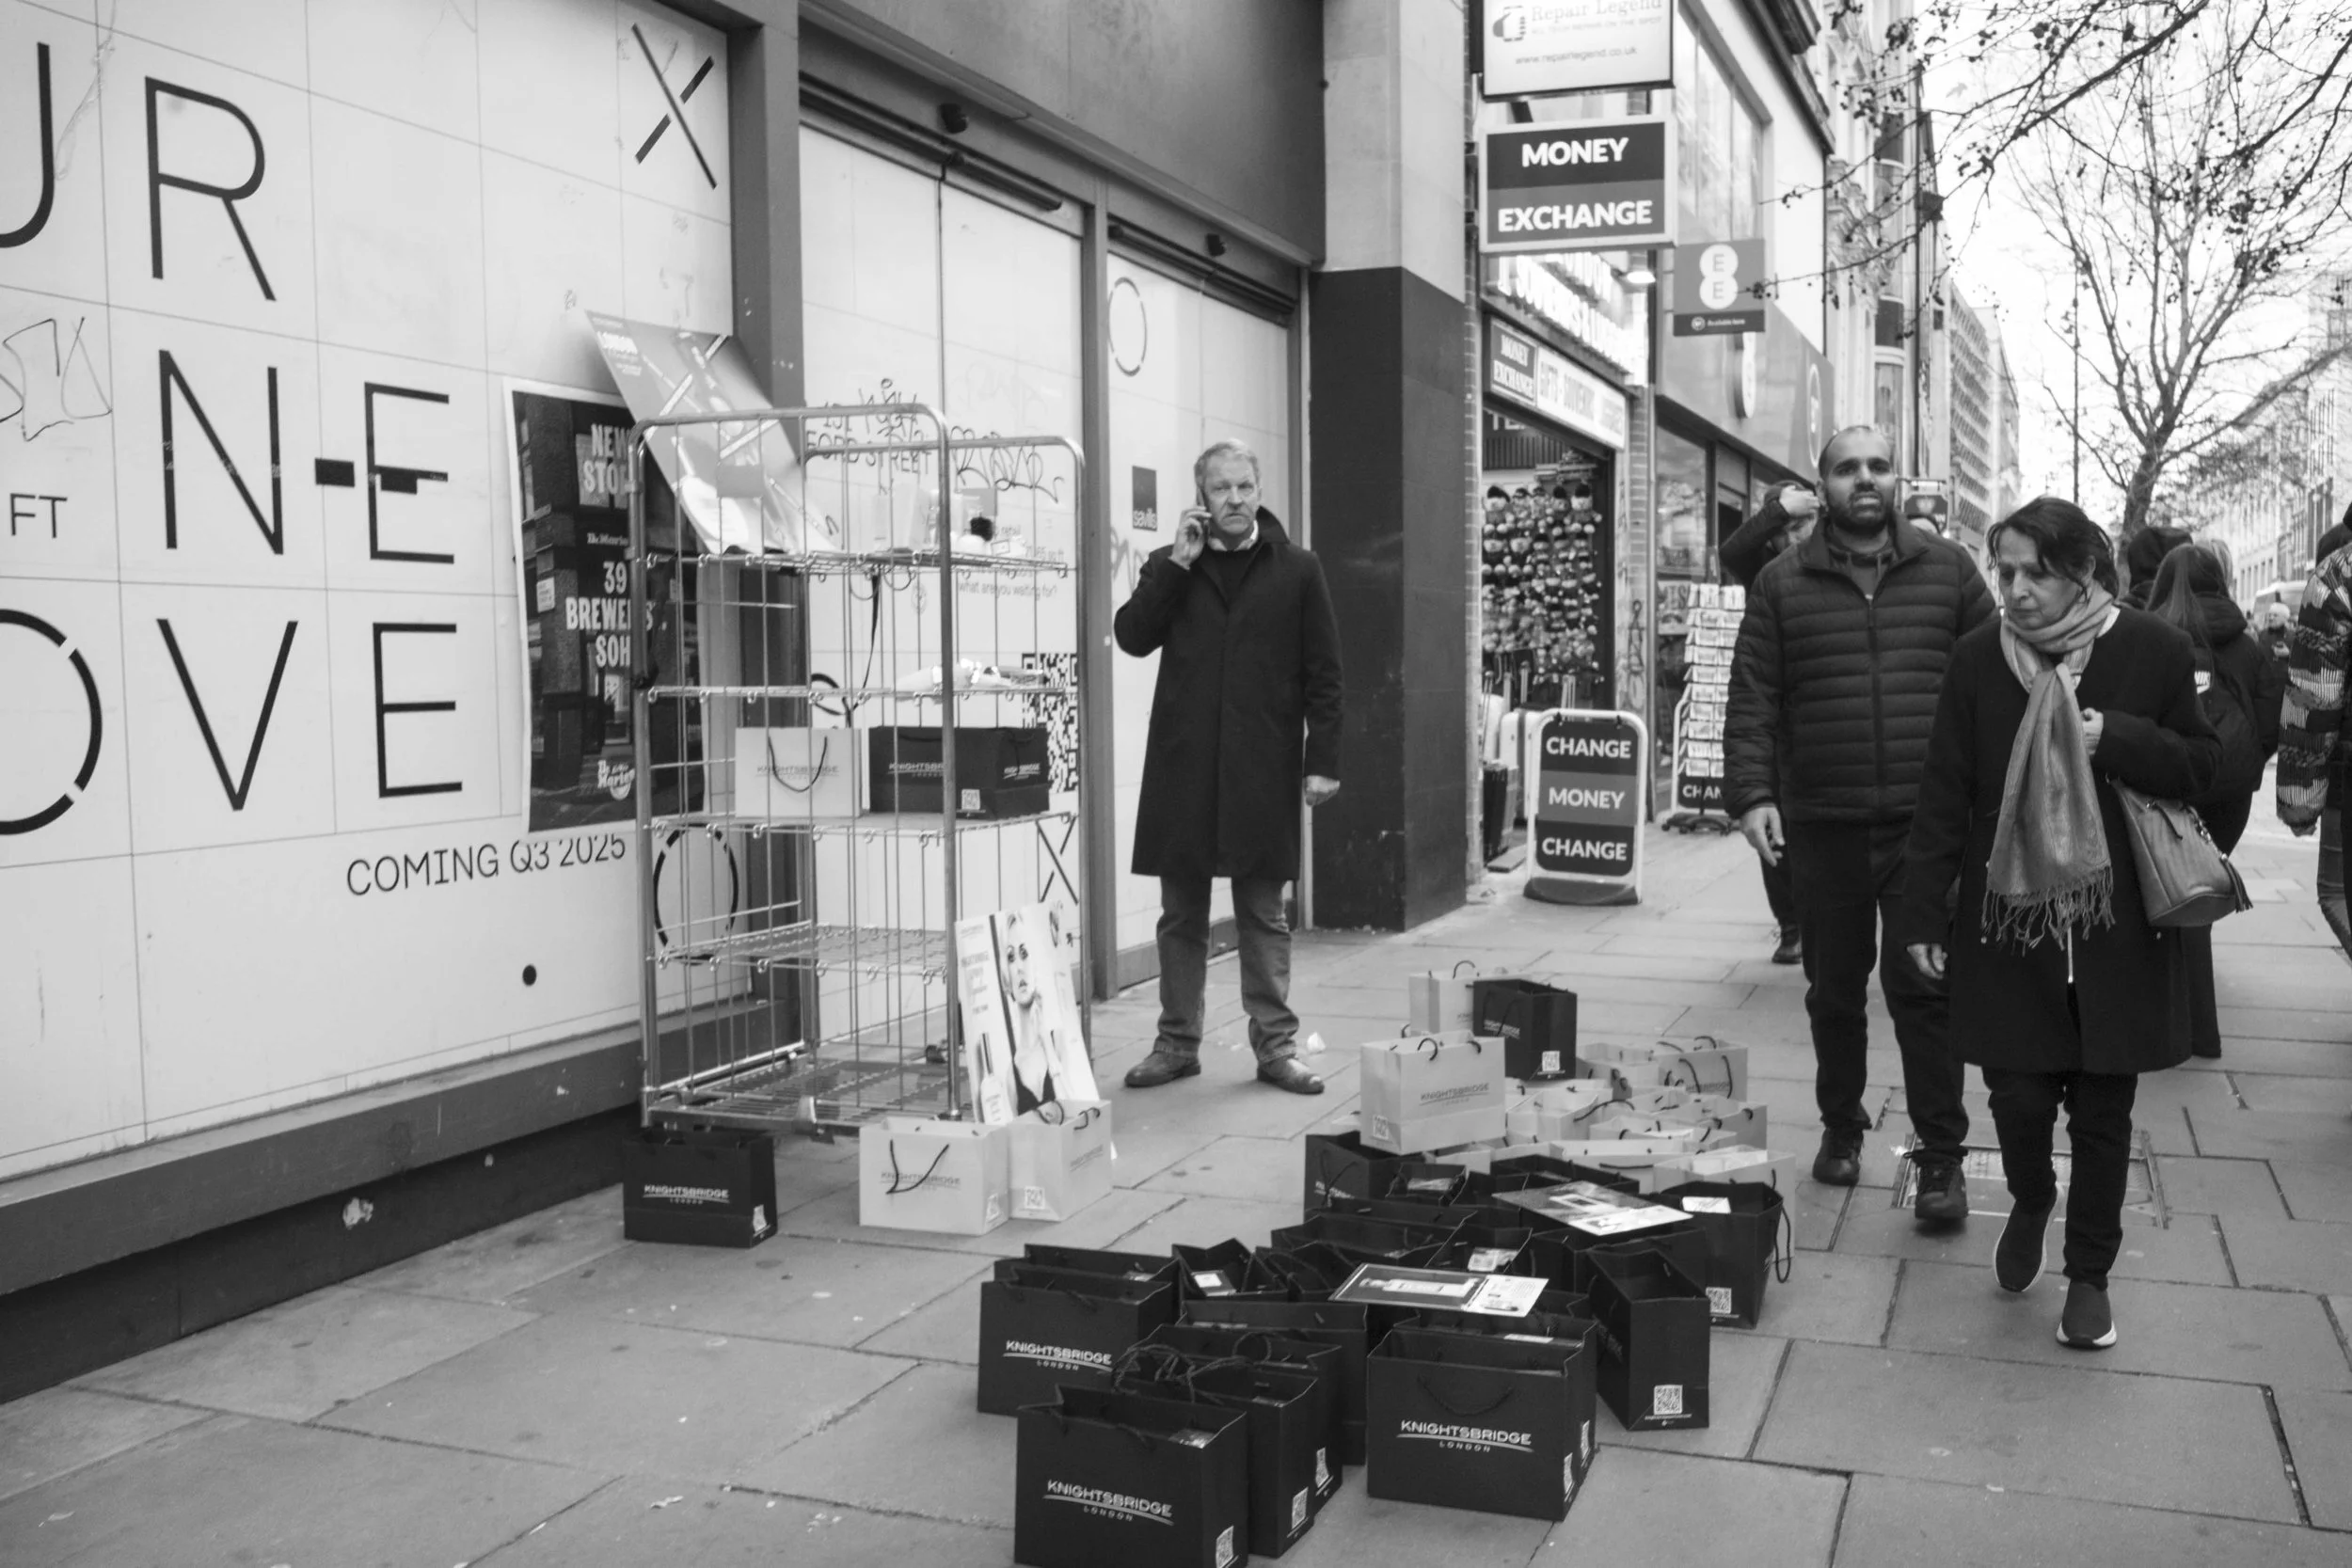
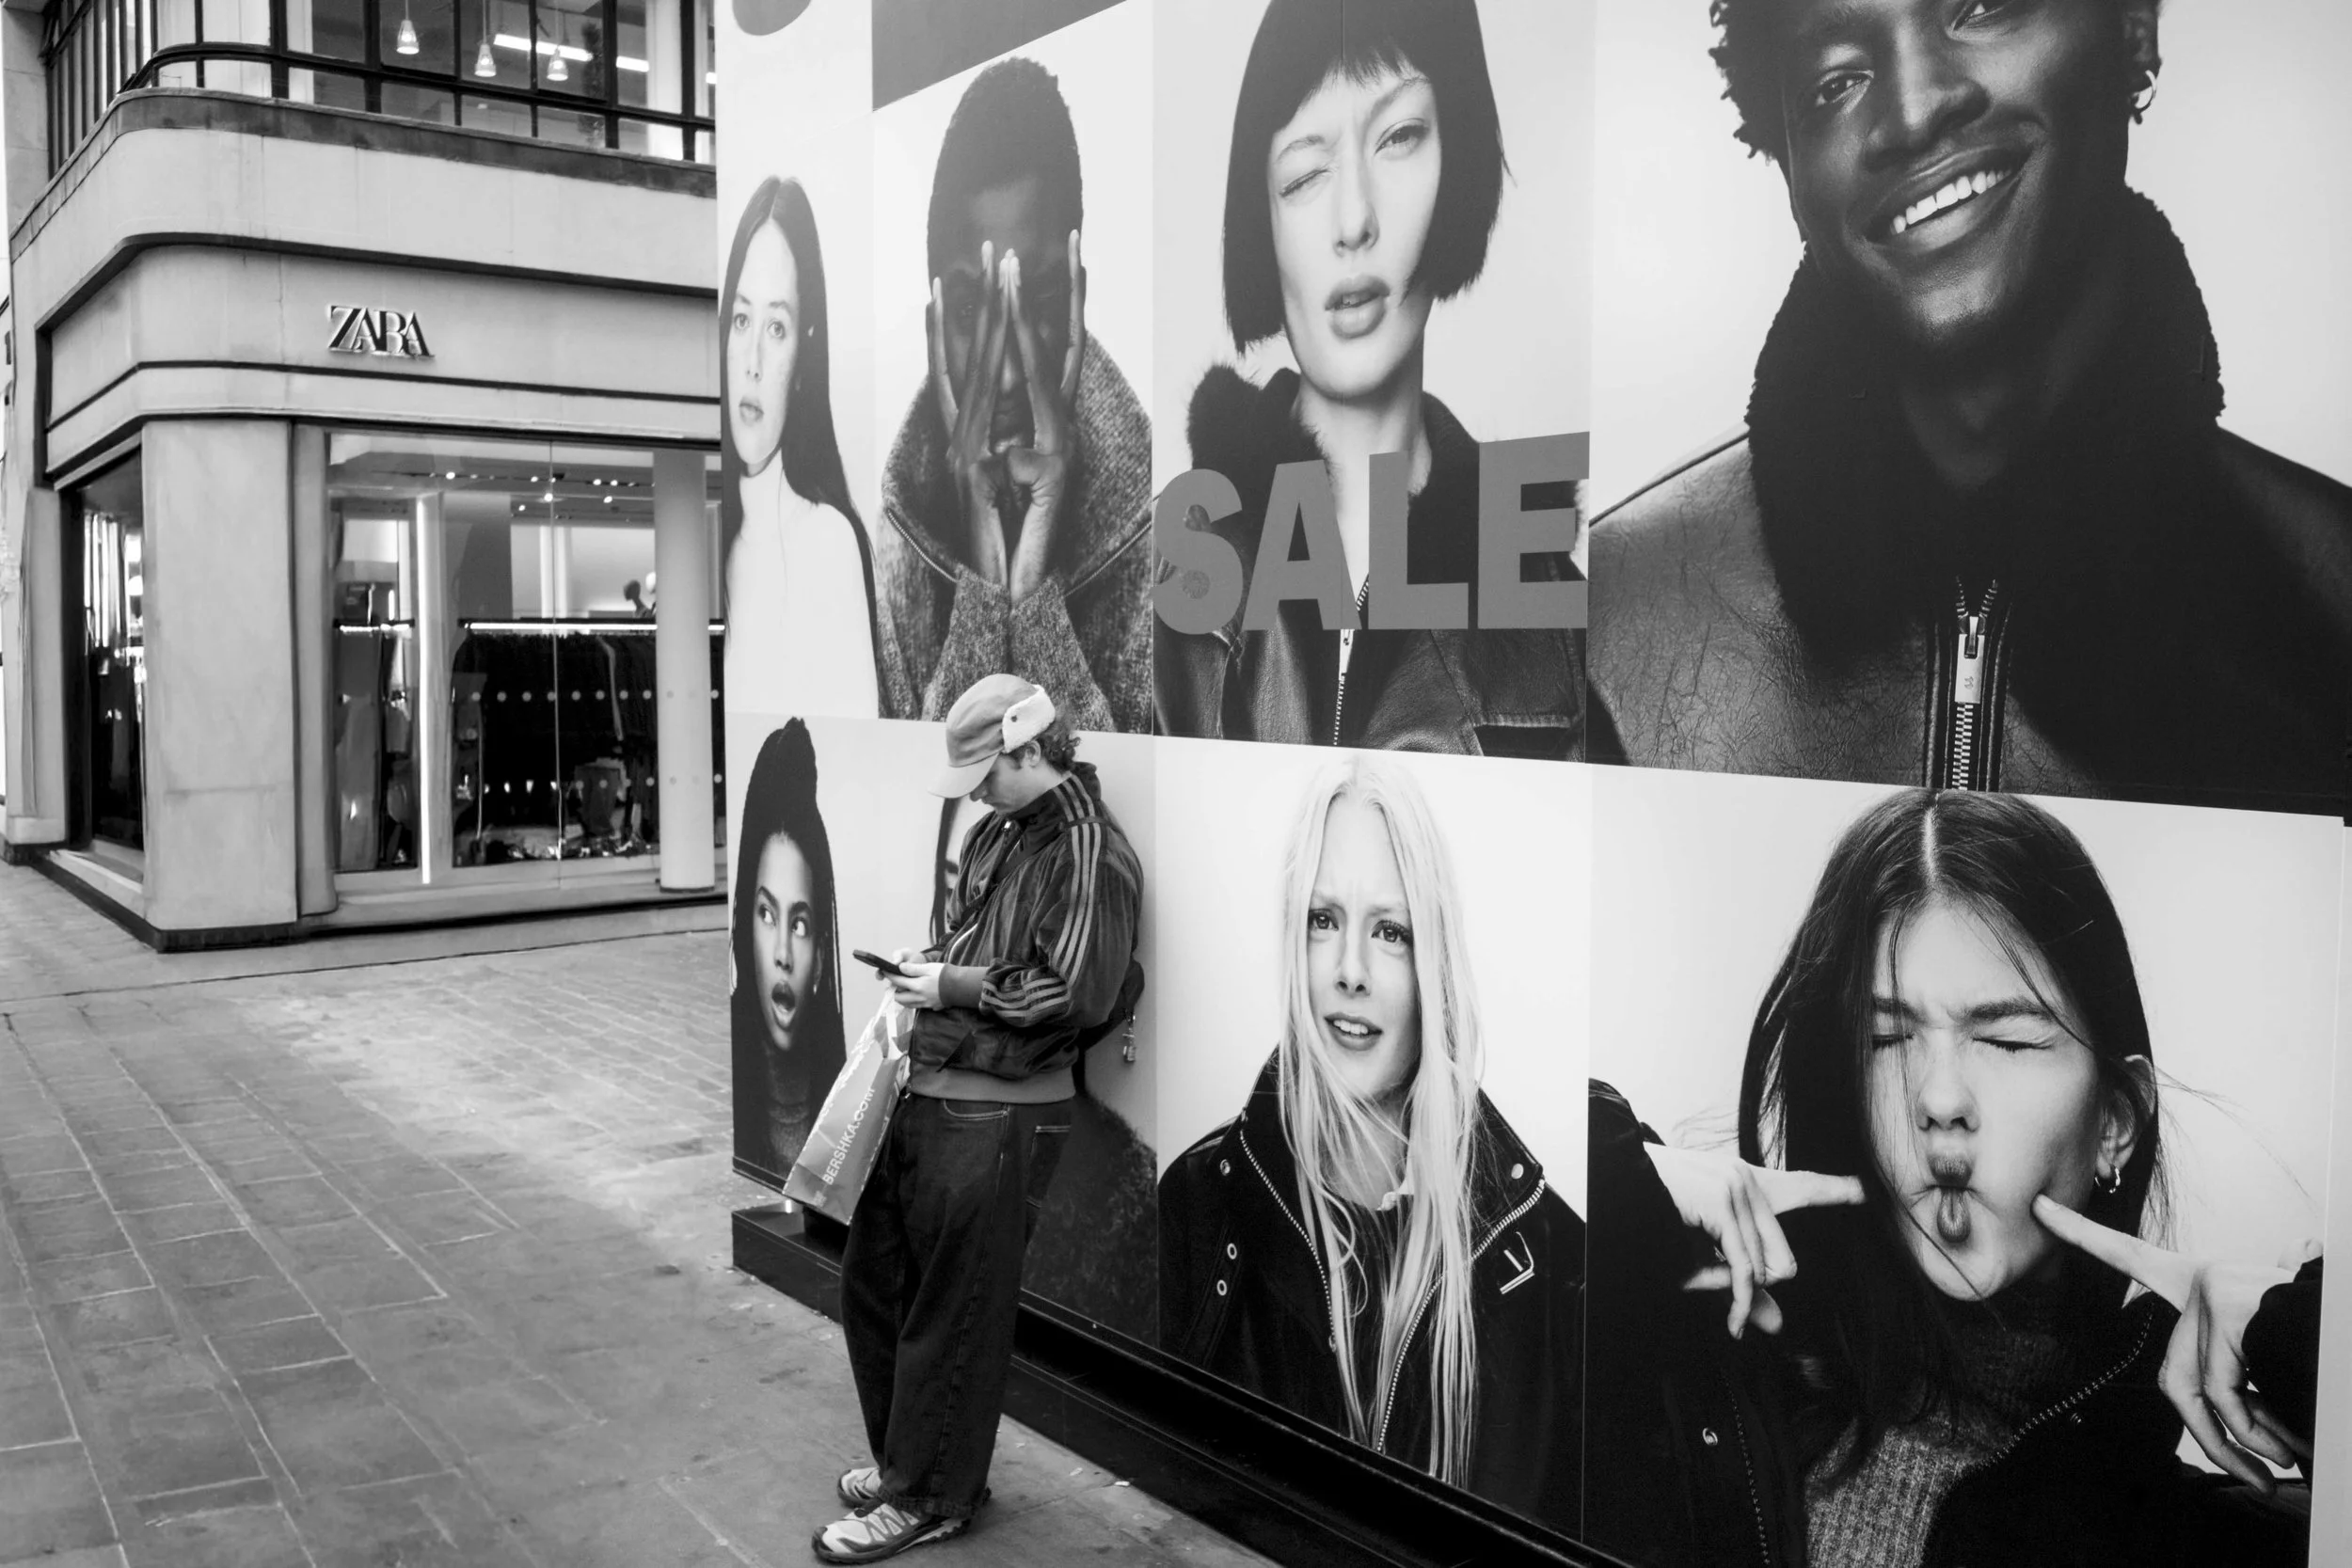
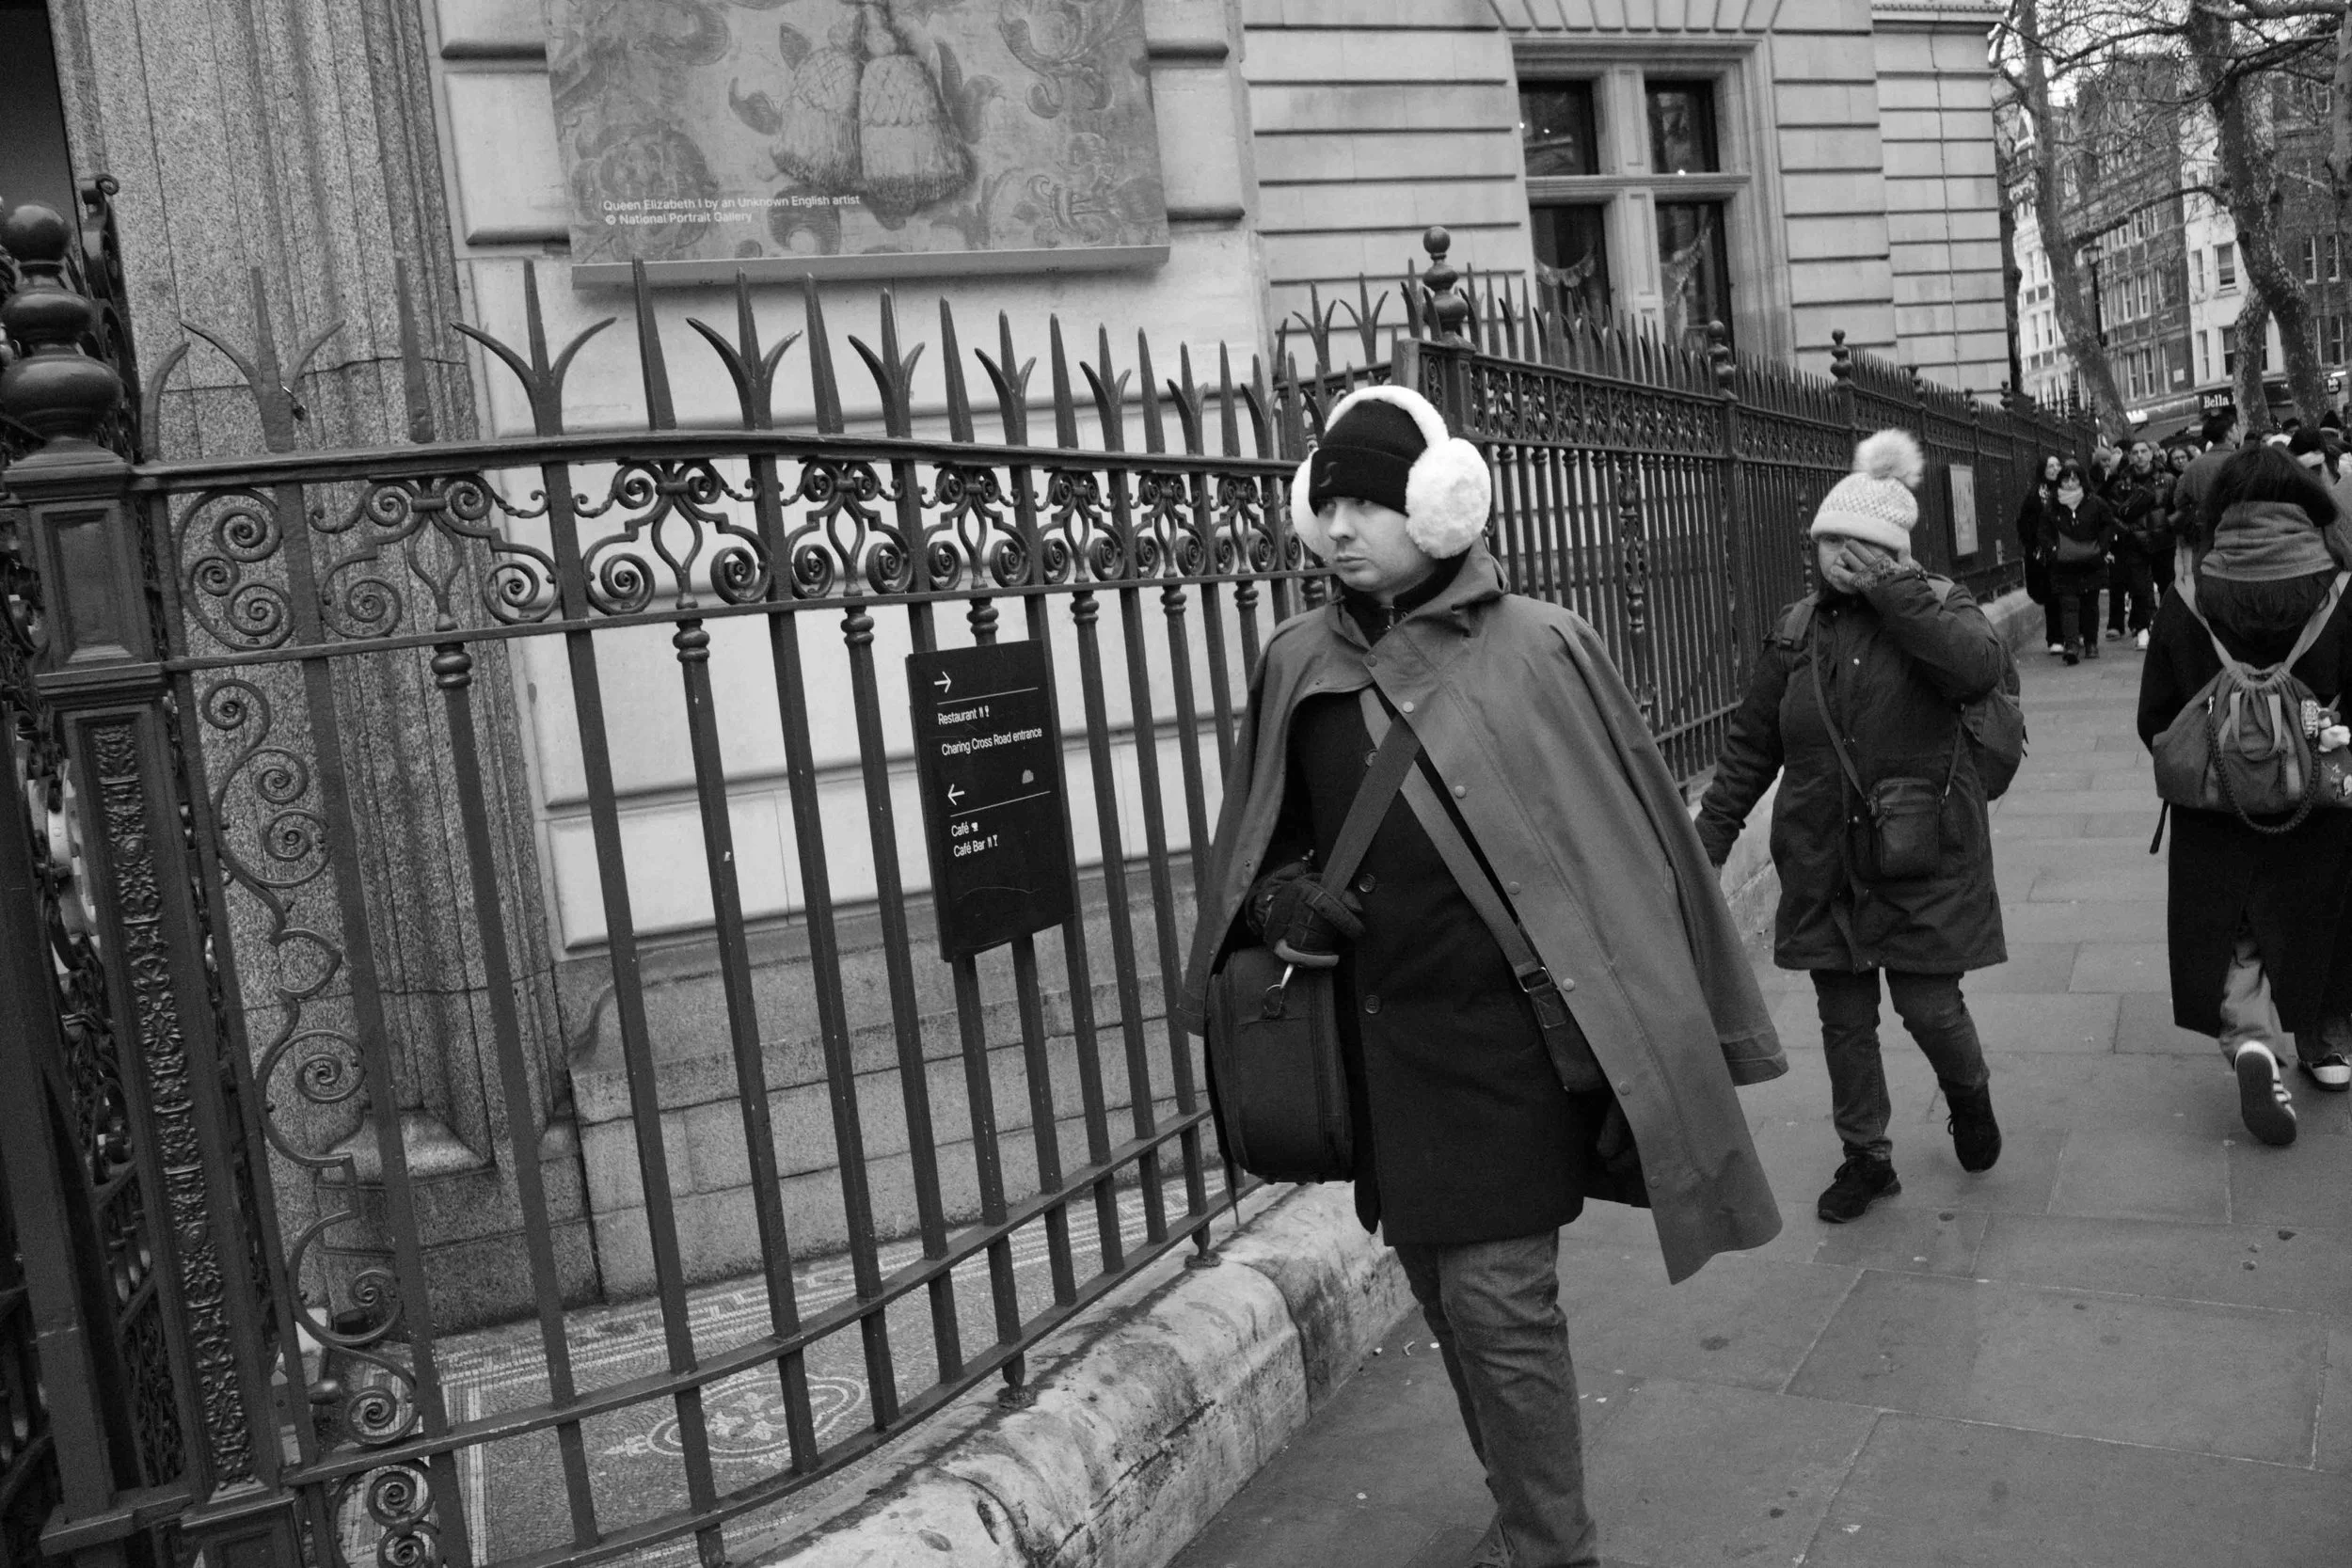
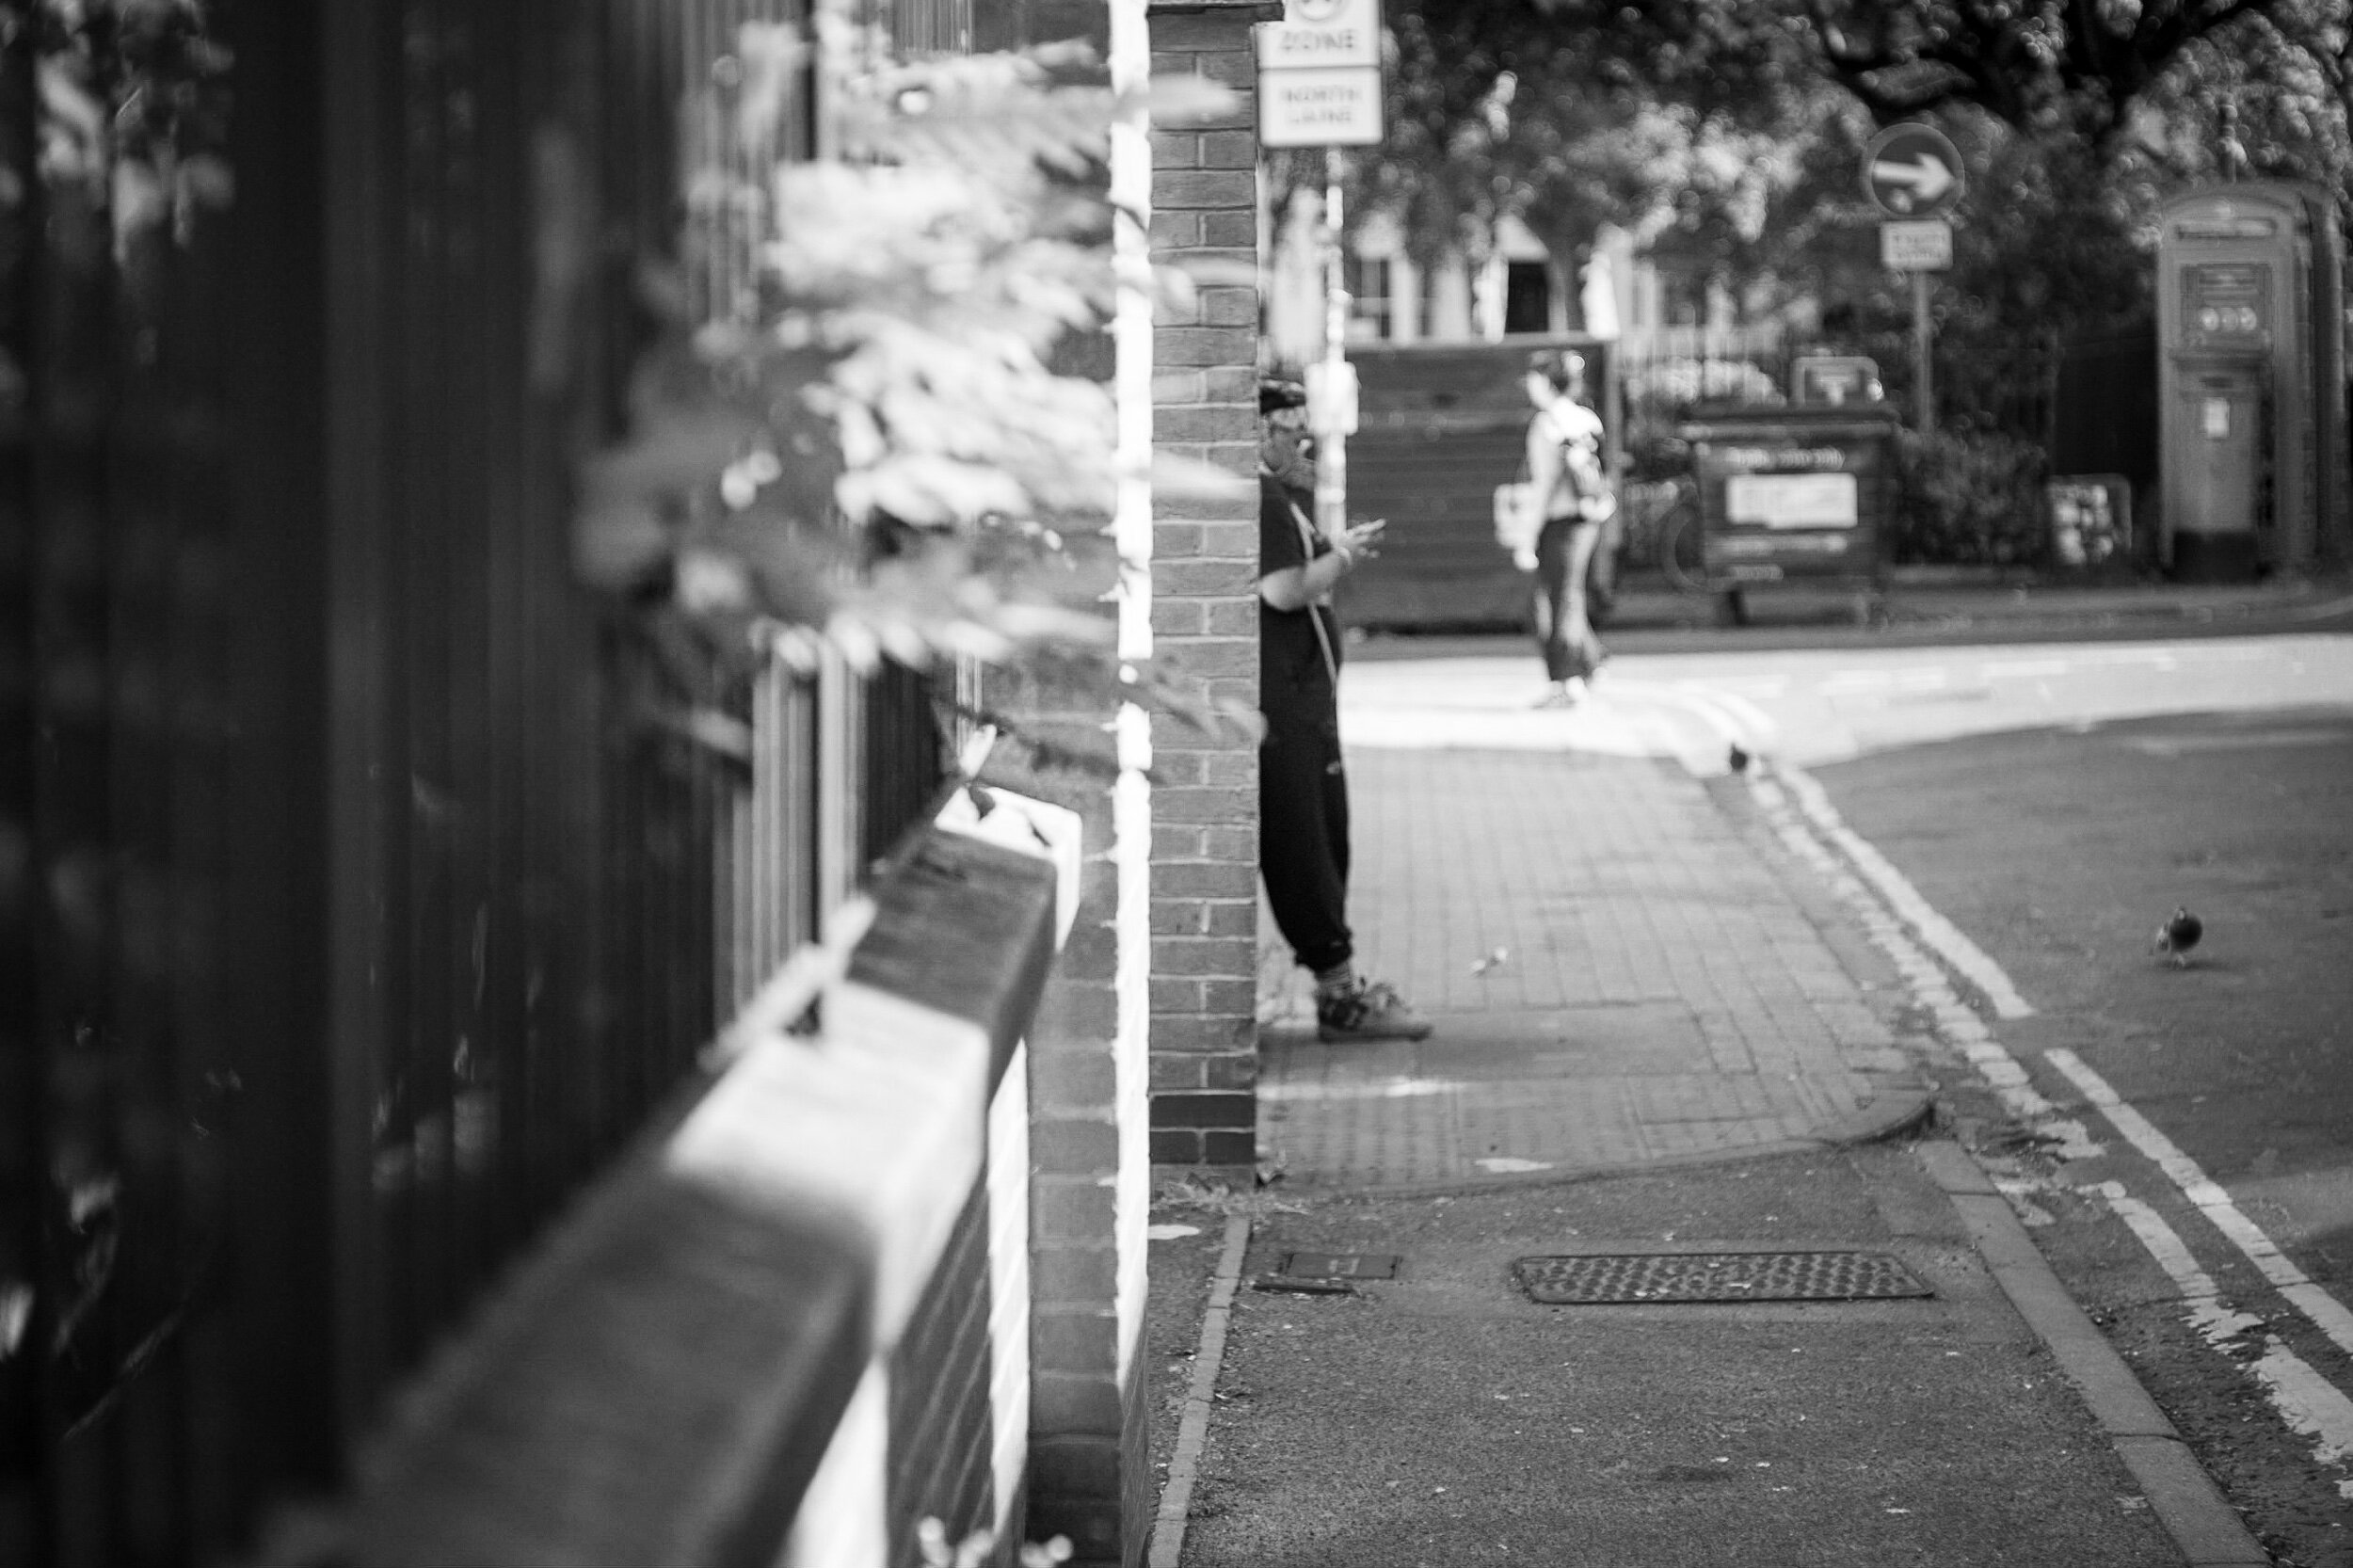
4. Details and Characters
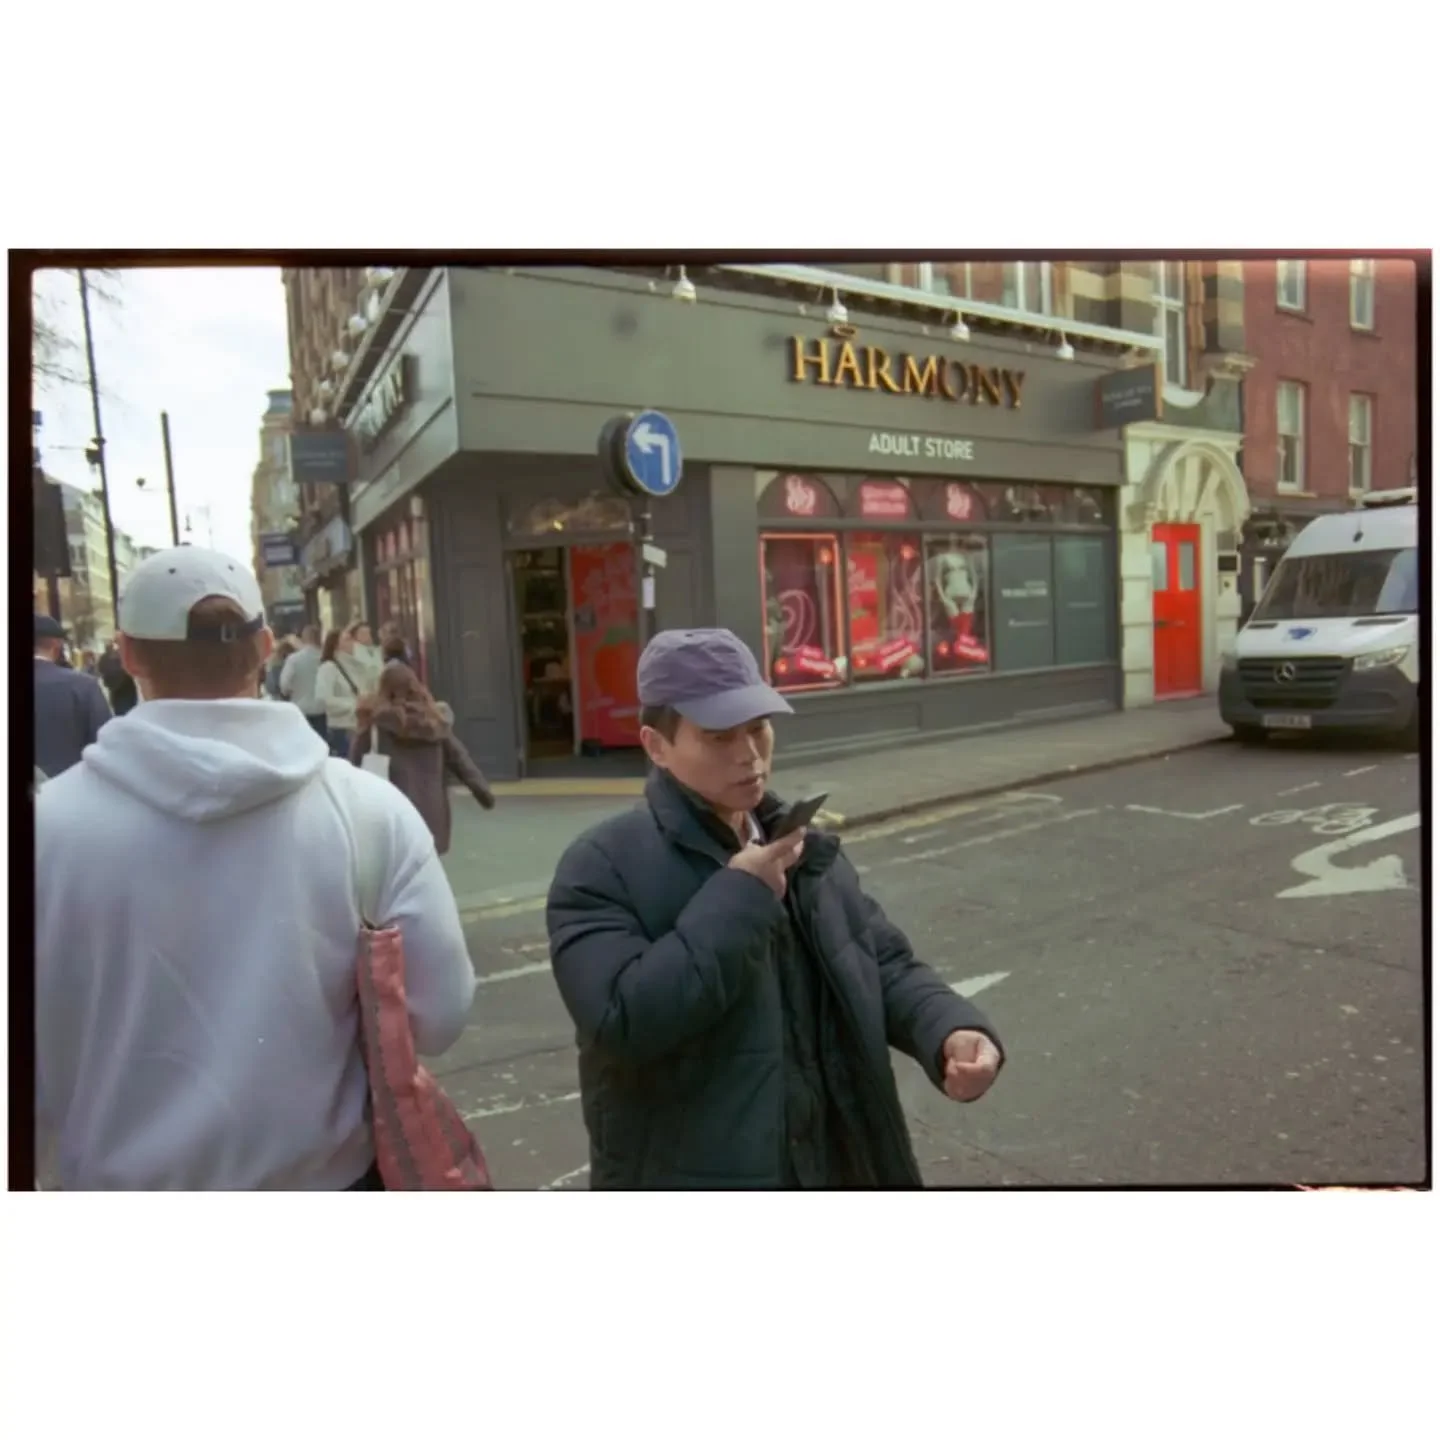
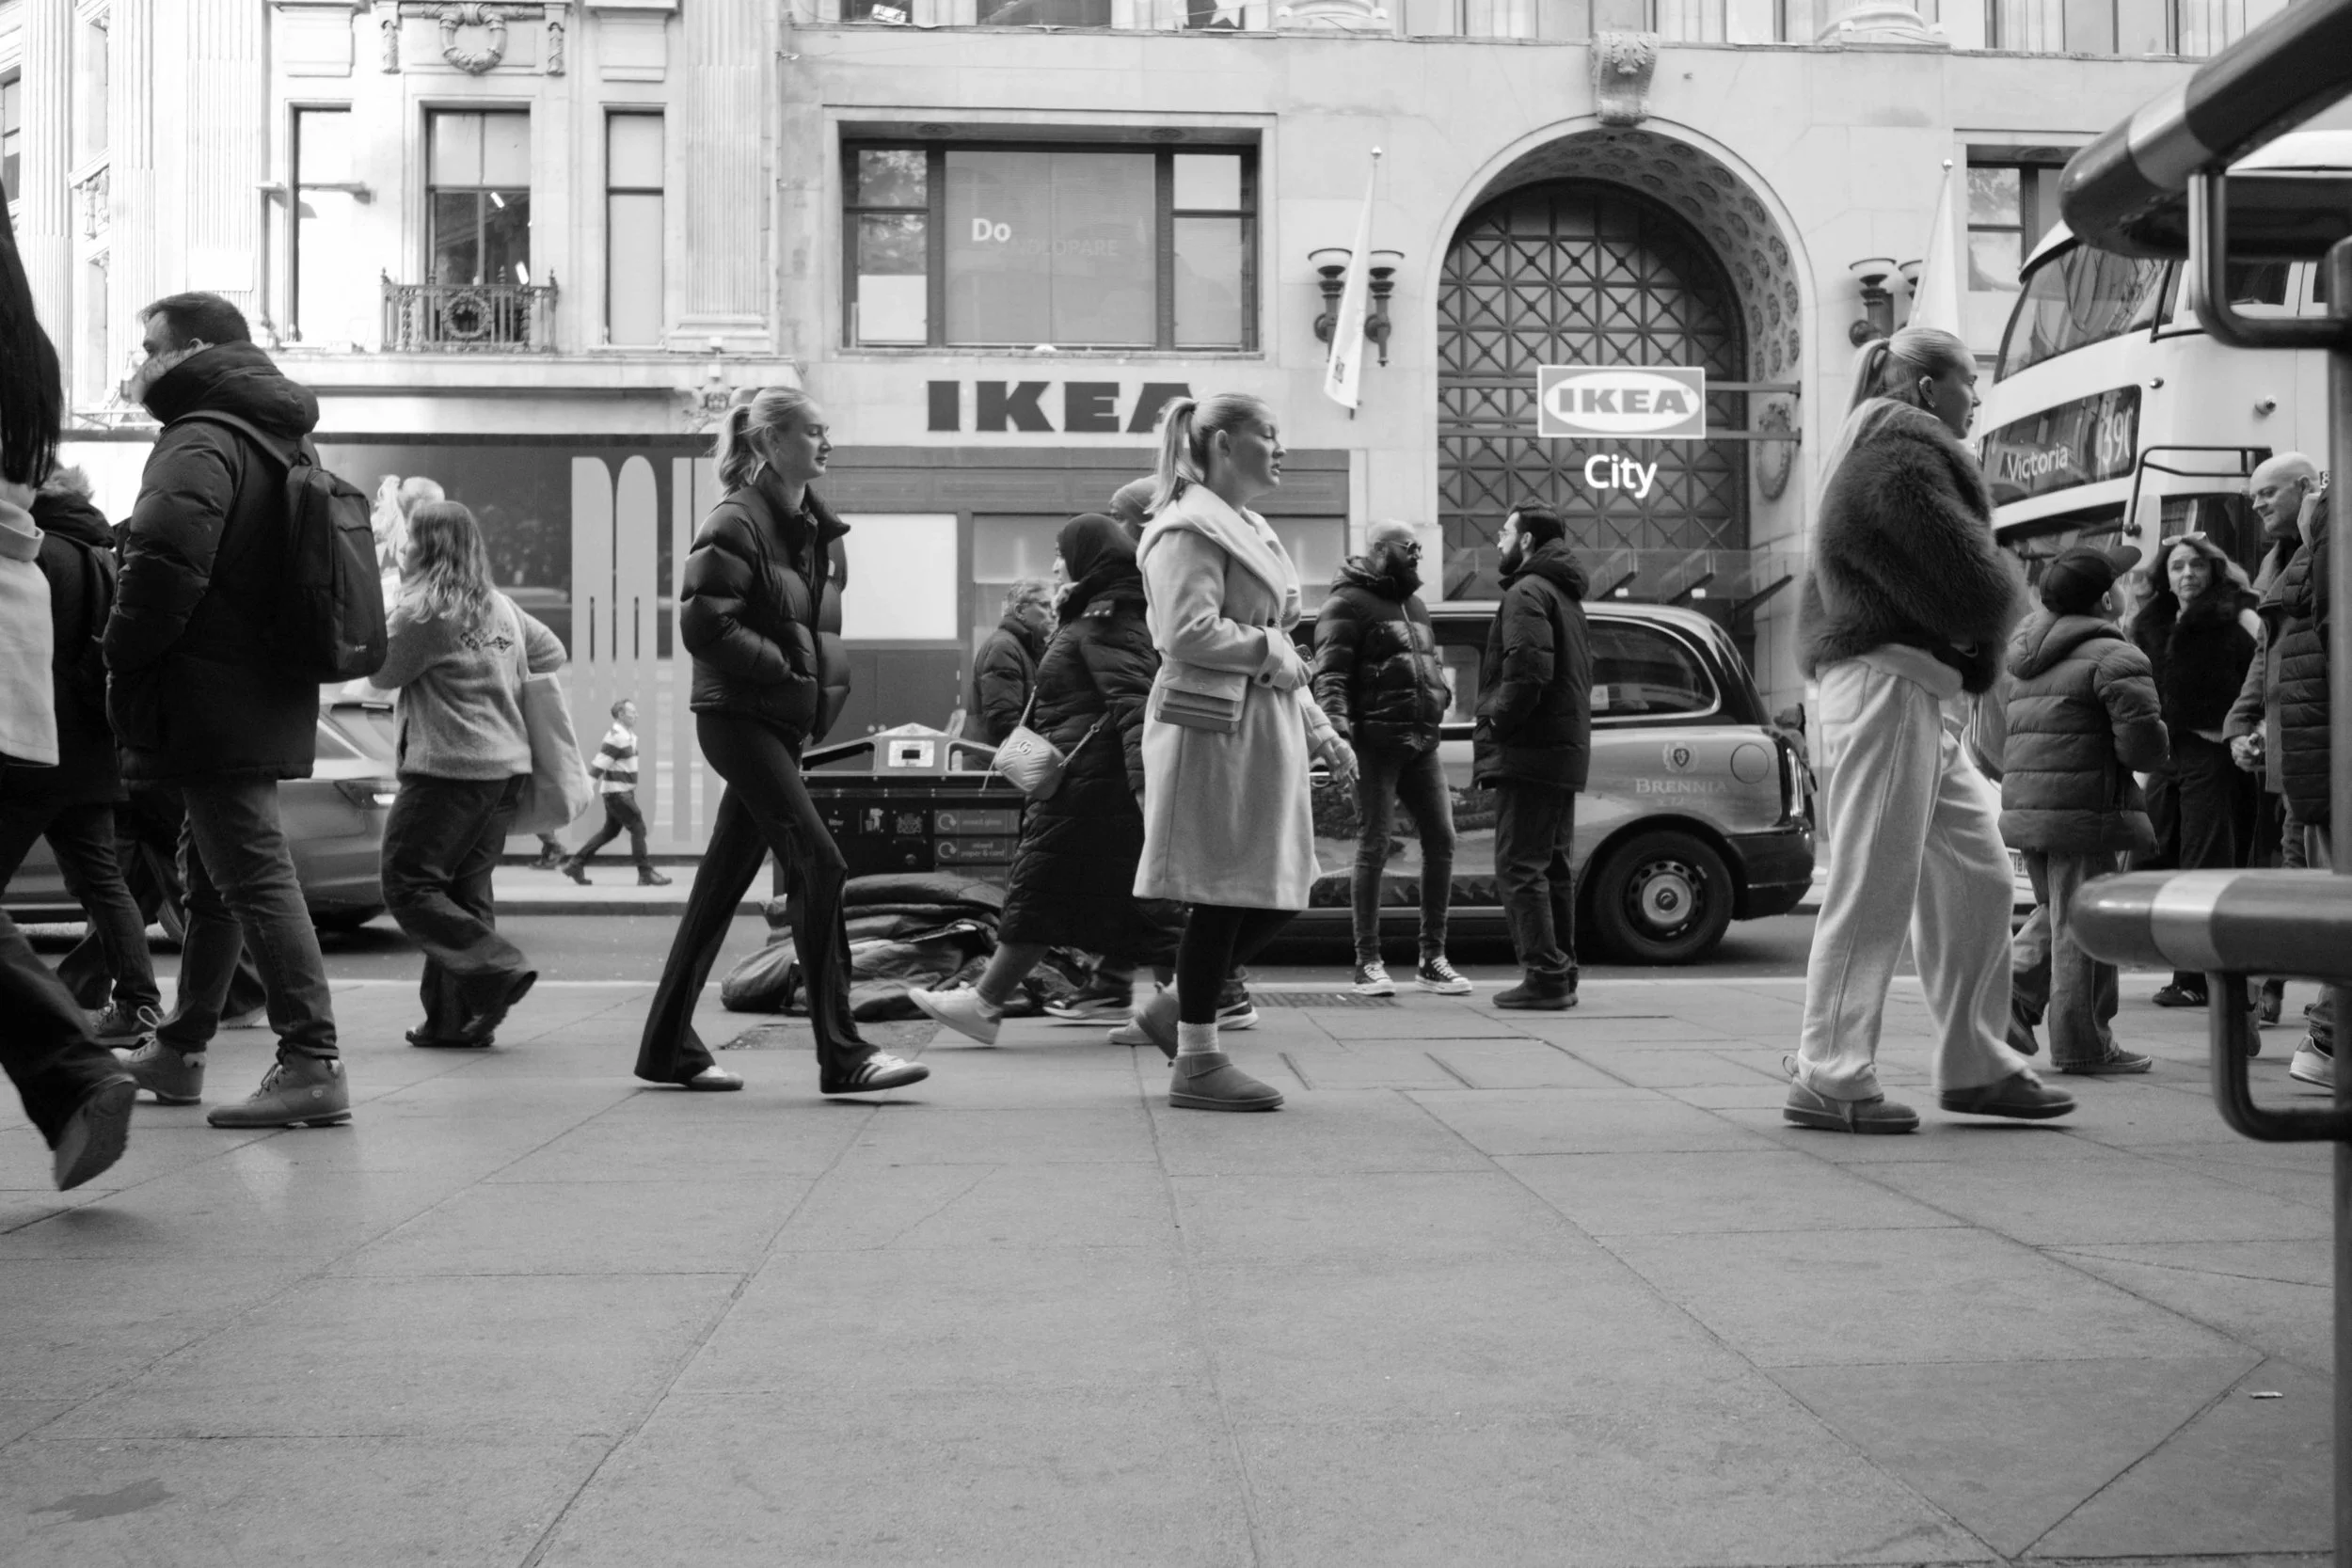
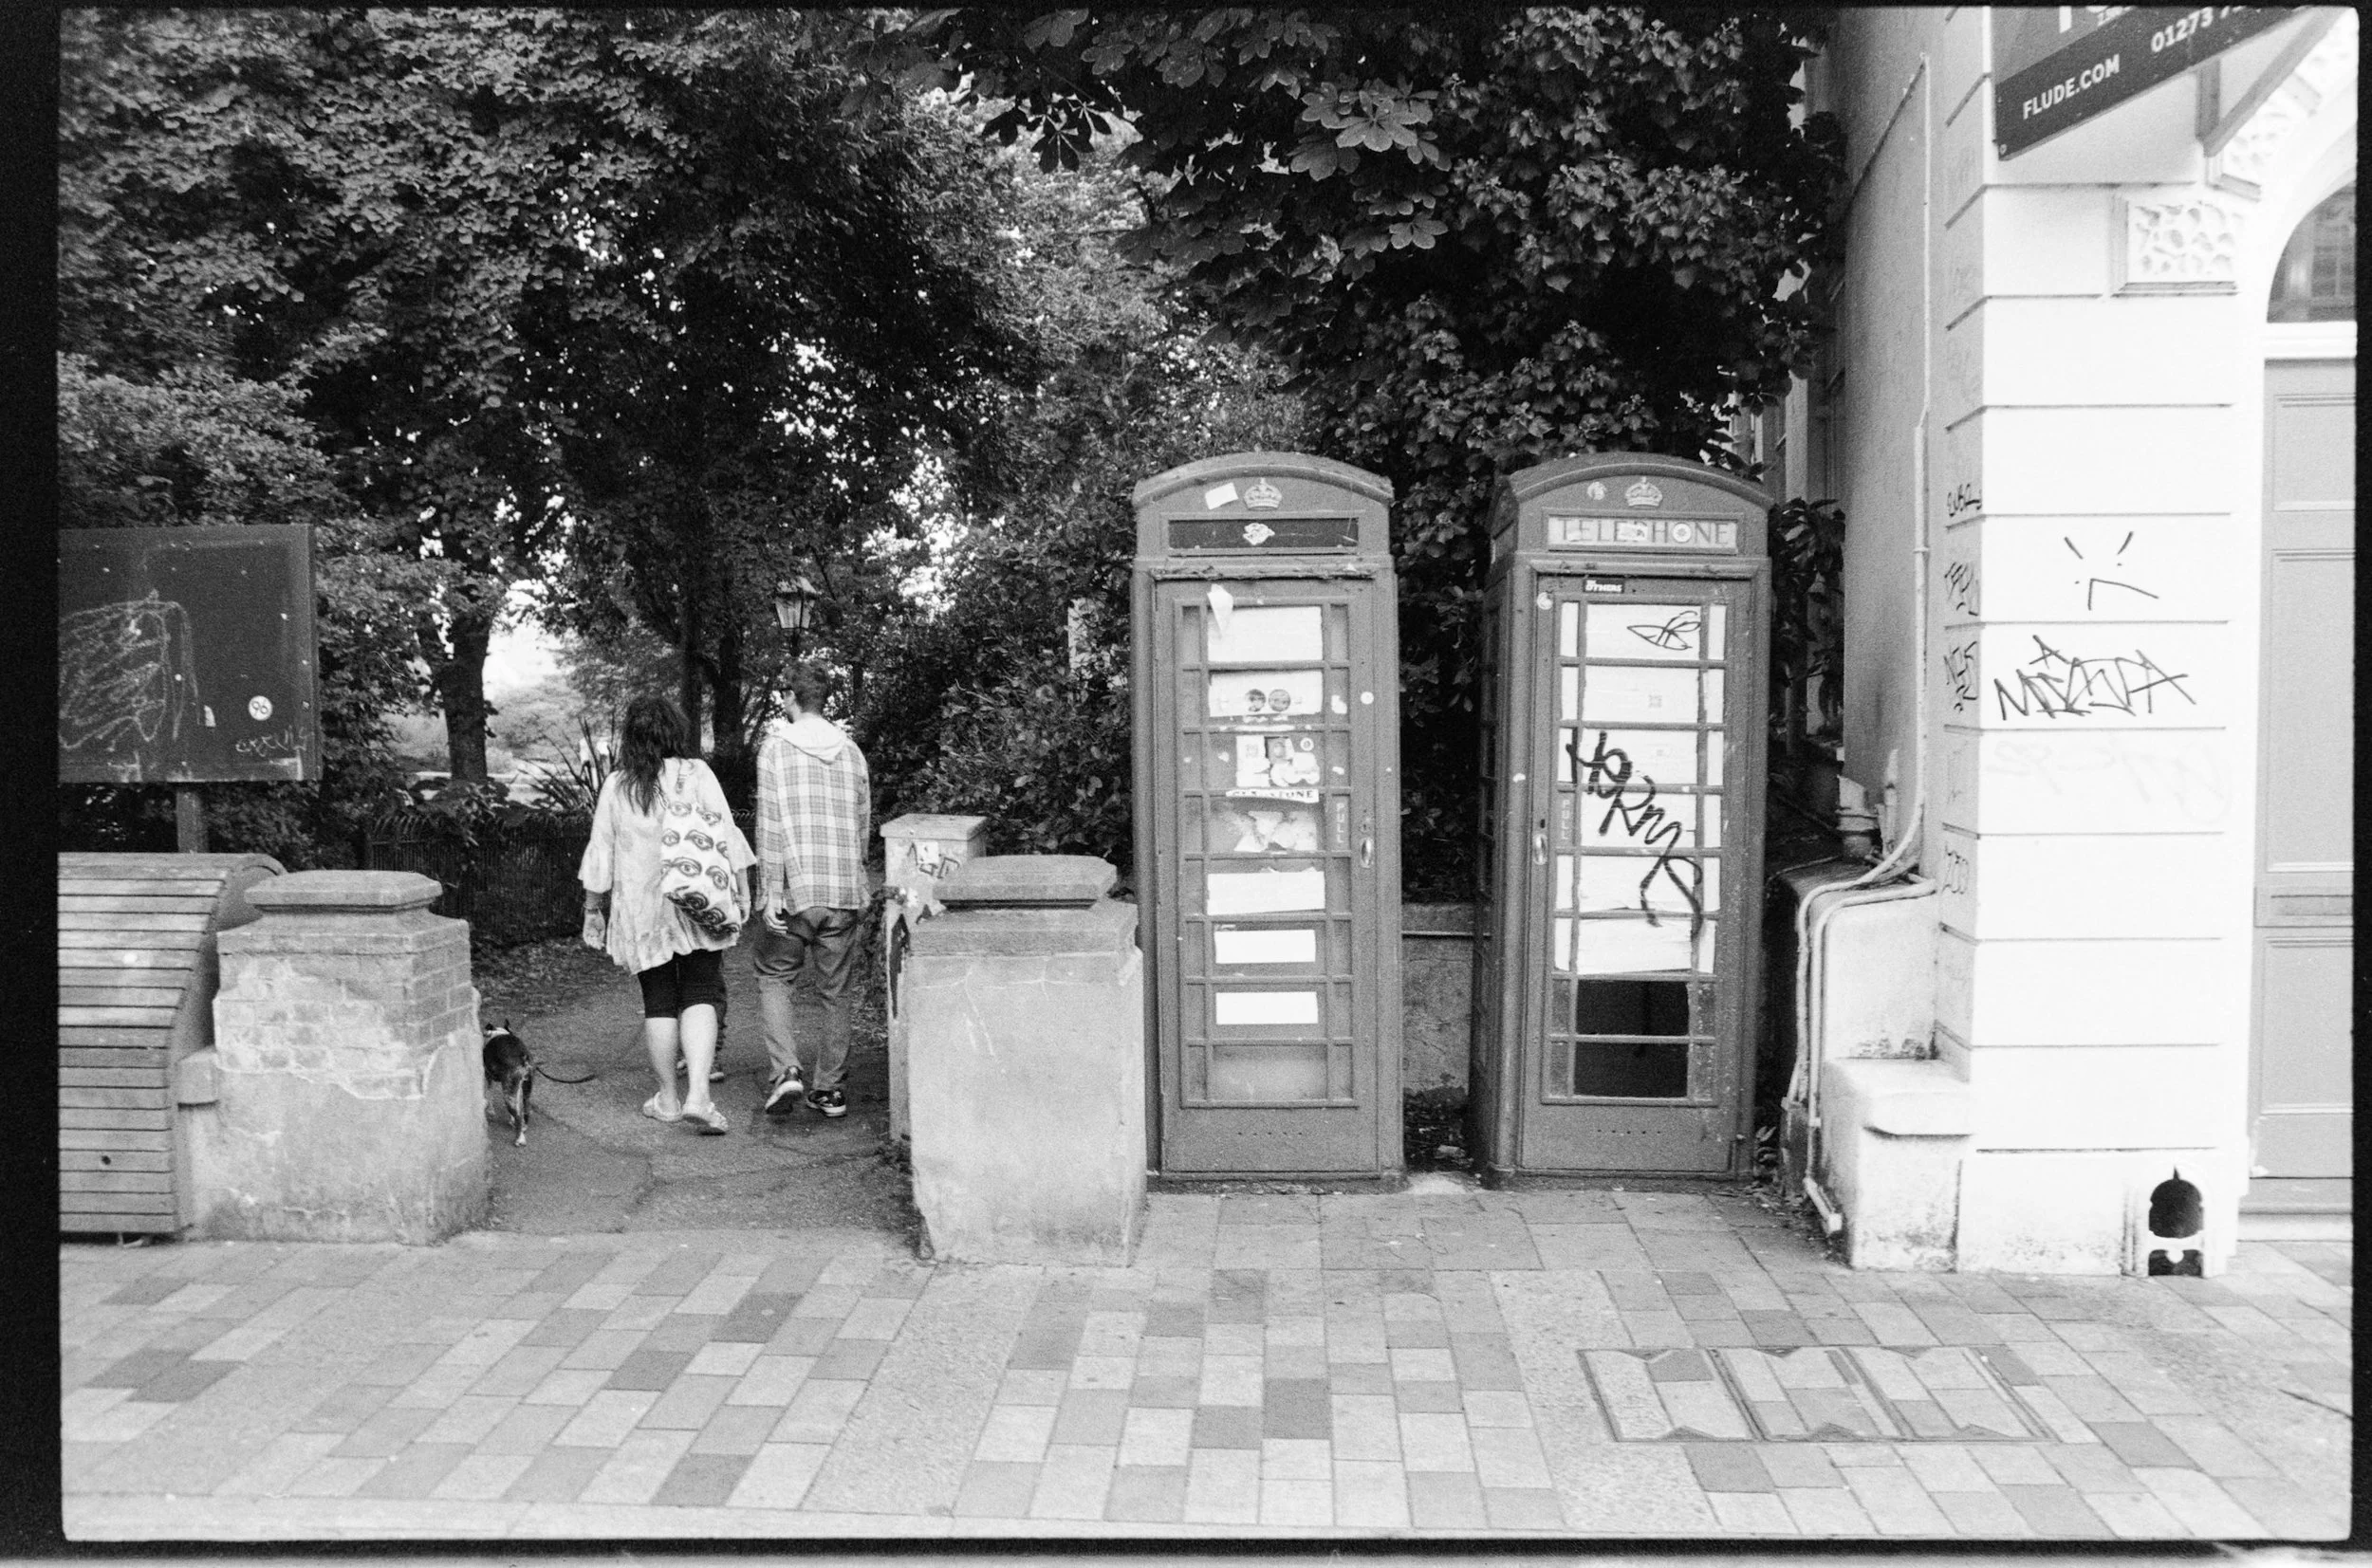
A jaunt upto London also warrants a stroll along Oxfrod Street and the like to photograph the shoppers. As I moved toward the National Portrait Gallery, I spotted a man in a heavy coat and earmuffs. The 28mm creates a unique "environmental portrait" where the subject is clear, but their surroundings—the ornate metal fences and London stone—tell the rest of the story.
Final Thoughts on the TTArtisan 28mm
For a fraction of the cost of the Leica Summaron, this lens delivers a lot of character. It’s sharp in the center, has a lovely vintage-style vignette, and the "clicky" aperture ring is a joy to use. Shooting digital, you are blessed with ‘fixing’ and fall off to the ourside of the frame in LRC.
Using a 28mm forces you to be a participant, not just an observer. You can’t hide in the shadows with a telephoto; you have to be in the thick of it, just like Winogrand.
Until next time, keep snapping.
GAS.....? no the easy life
A New Chapter: Embracing the Nikon F80
For years, my photographic journey has been linked to the tactile precision of the Leica system for both my M10 and M6. Zone focusing and manual exposure. I haven’t been one to embrace or use the Sunny 16 rule. The deliberate, fully manual approach of the rangefinder has been my constant companion, a testament to the joy of slowing down and truly making a photograph.
Weirdly, I have found this to be an irritant on the M6 film camera, but something of a joy on the digital M10. I think this is more to do with the chimping effect, than anything else.
Since dropping my M6 and damaging the film winder (I can’t bring myself to write a blog post about it, but in essence I thought the cameara was attached to my wrist strap, let go of it and watched in slow motion as it hit the floor and bent the aluminium film winder), I’ve been using my Minolta X500 camera with a 28mm lens. I must say it’s been an absolute delight. Whilst zone focusing isn’t a direct comparison to the M6, it’s been okay.
I’ve had a rethink with my camera equipment and considered whether or not to dispose of some of my lesser used equipment. Whilst I loved my Chamonix 45N2 4x5 large format camera, I wasn’t using it at all and decided to sell it on eBay and to require some equipment that I would put to better use. I initially considered buying the Fuji GW670 medium format camera, - the Texas Leica - but couldn’t justify the £1,400+ price tag.
On consideration, I decided to look at acquiring a 35mm auto focus film SLR camera. Something that would be a lot more comfortable on the pocket, and also be put into far much more use than a 4x5 view camera.
The decision to step away from the purely manual world of the M6 wasn't taken lightly, but the F80 offers a compelling proposition. It represents a bridge, a way to explore the capabilities of a more automated system while still retaining the soul and charm of film.
Autofocus - CHECK, auto film load - CHECK, Auto film rewind - CHECK.
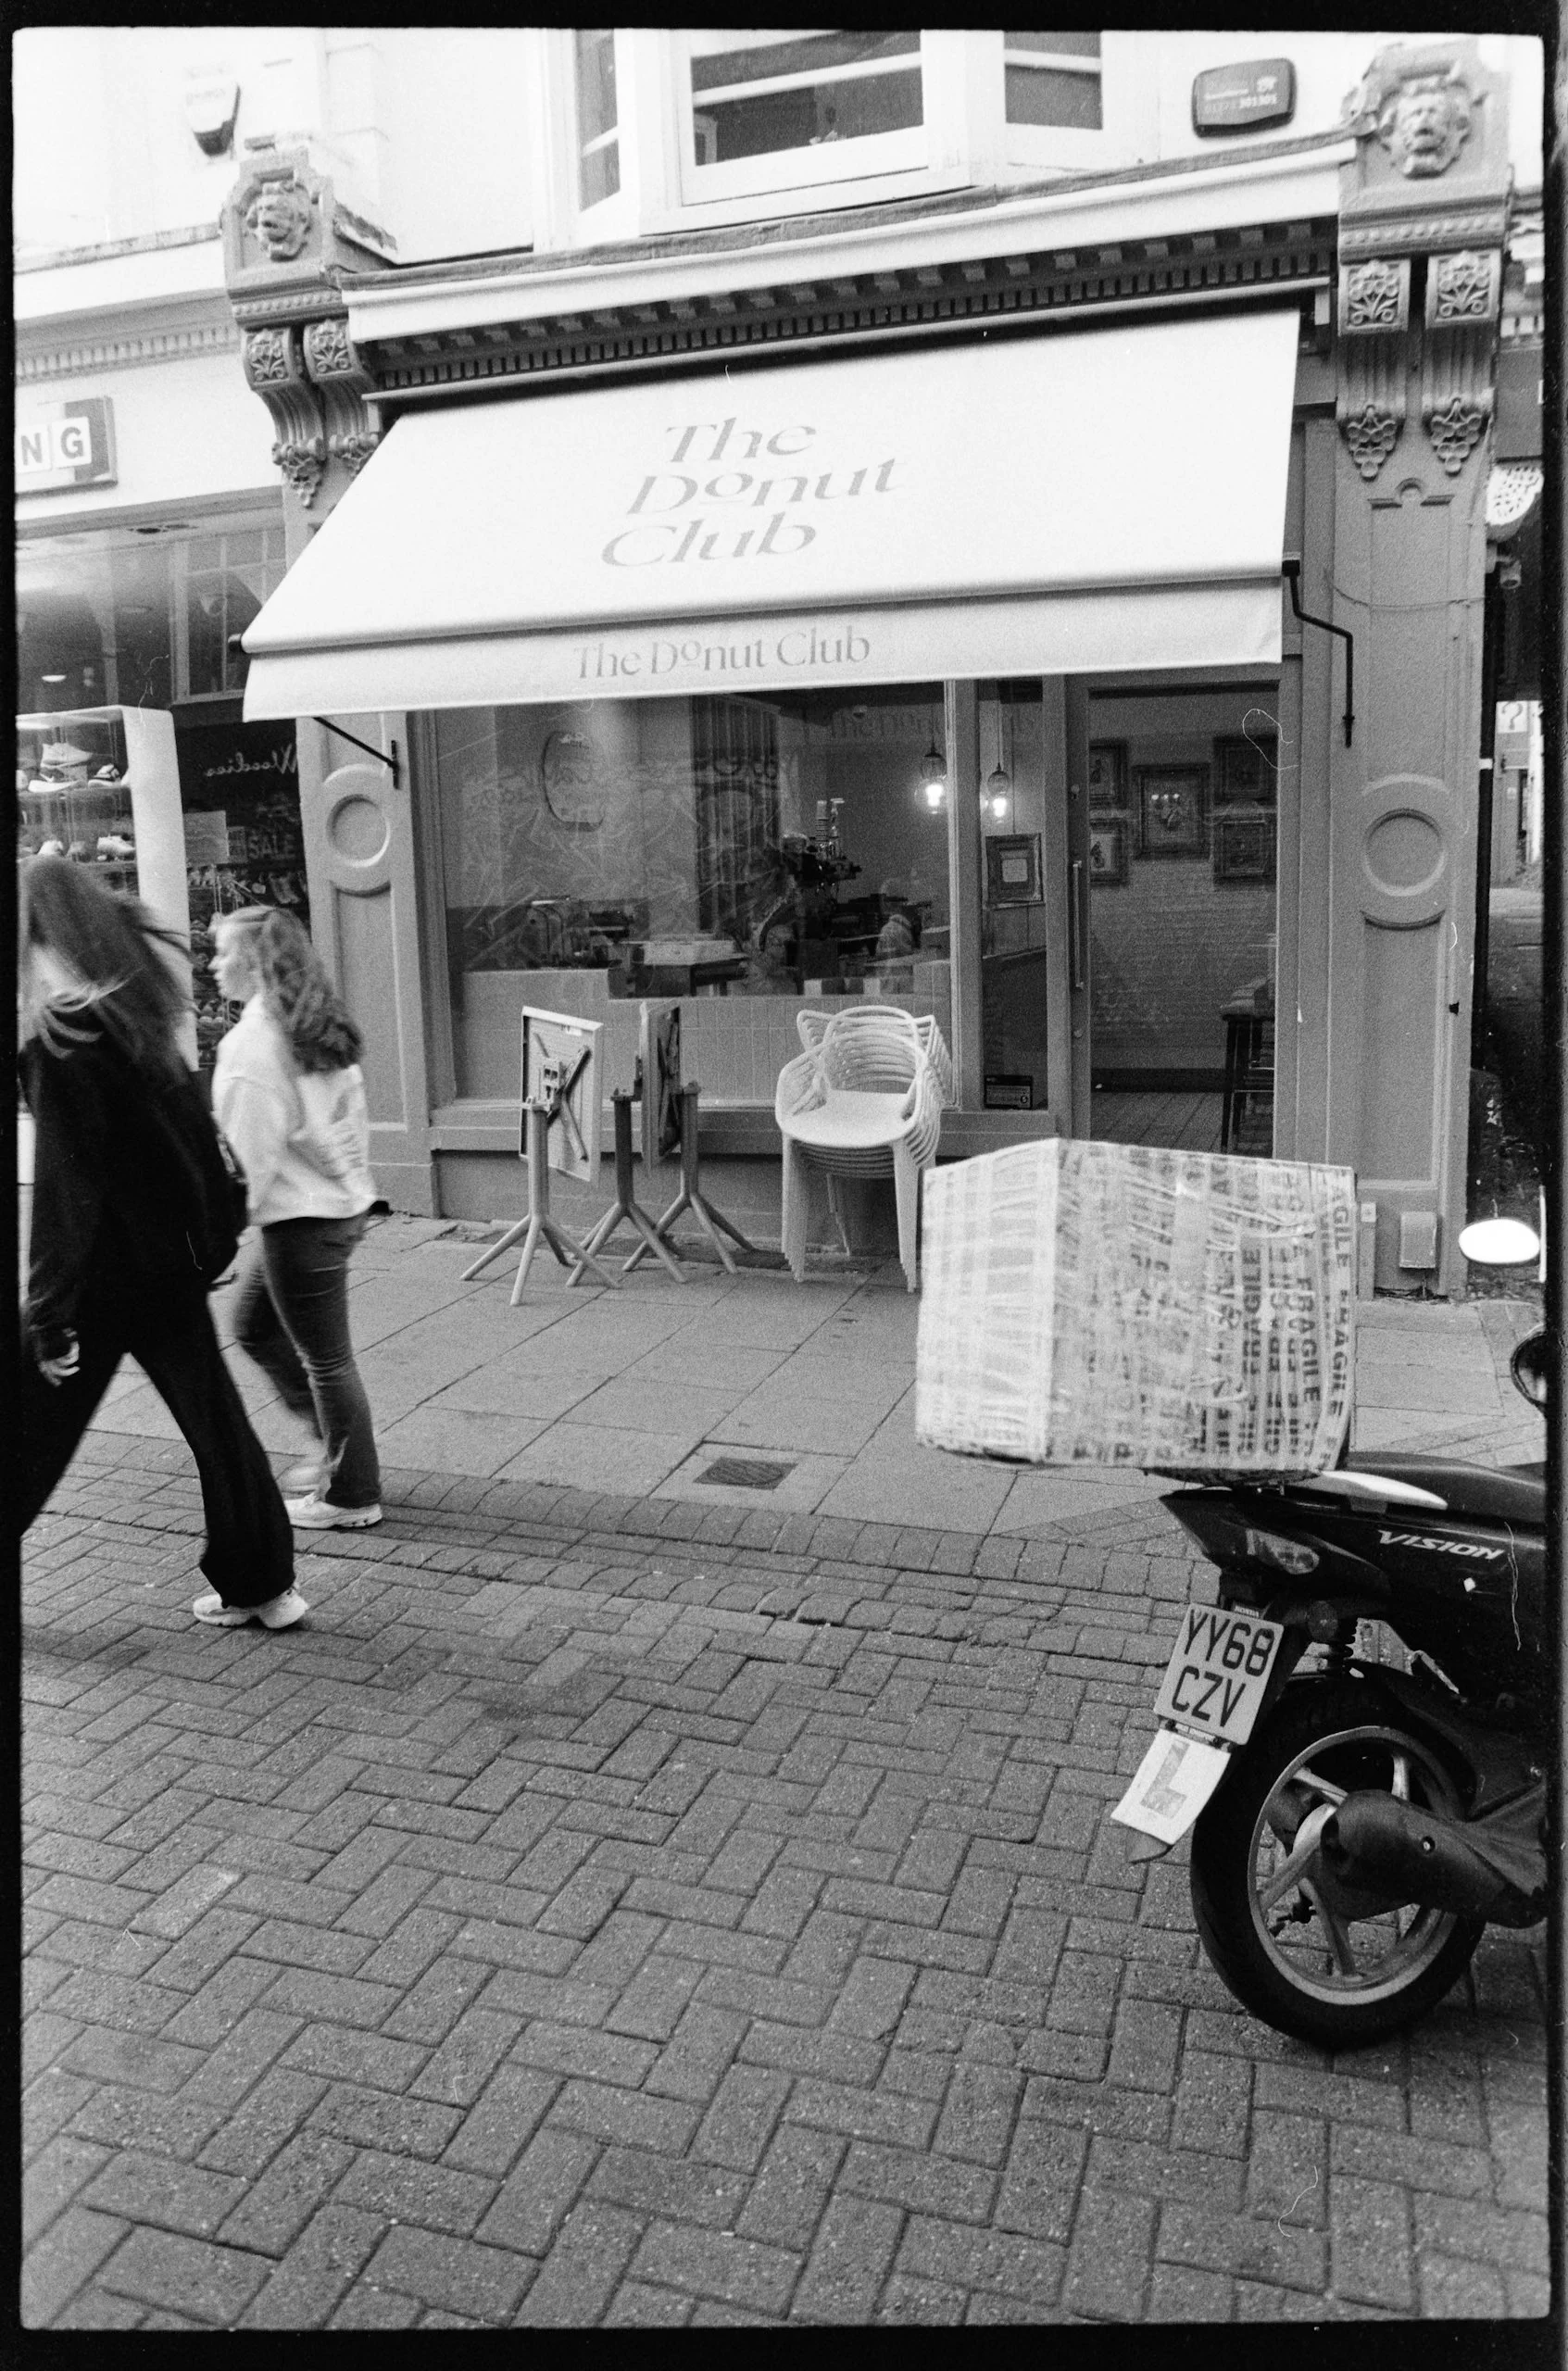
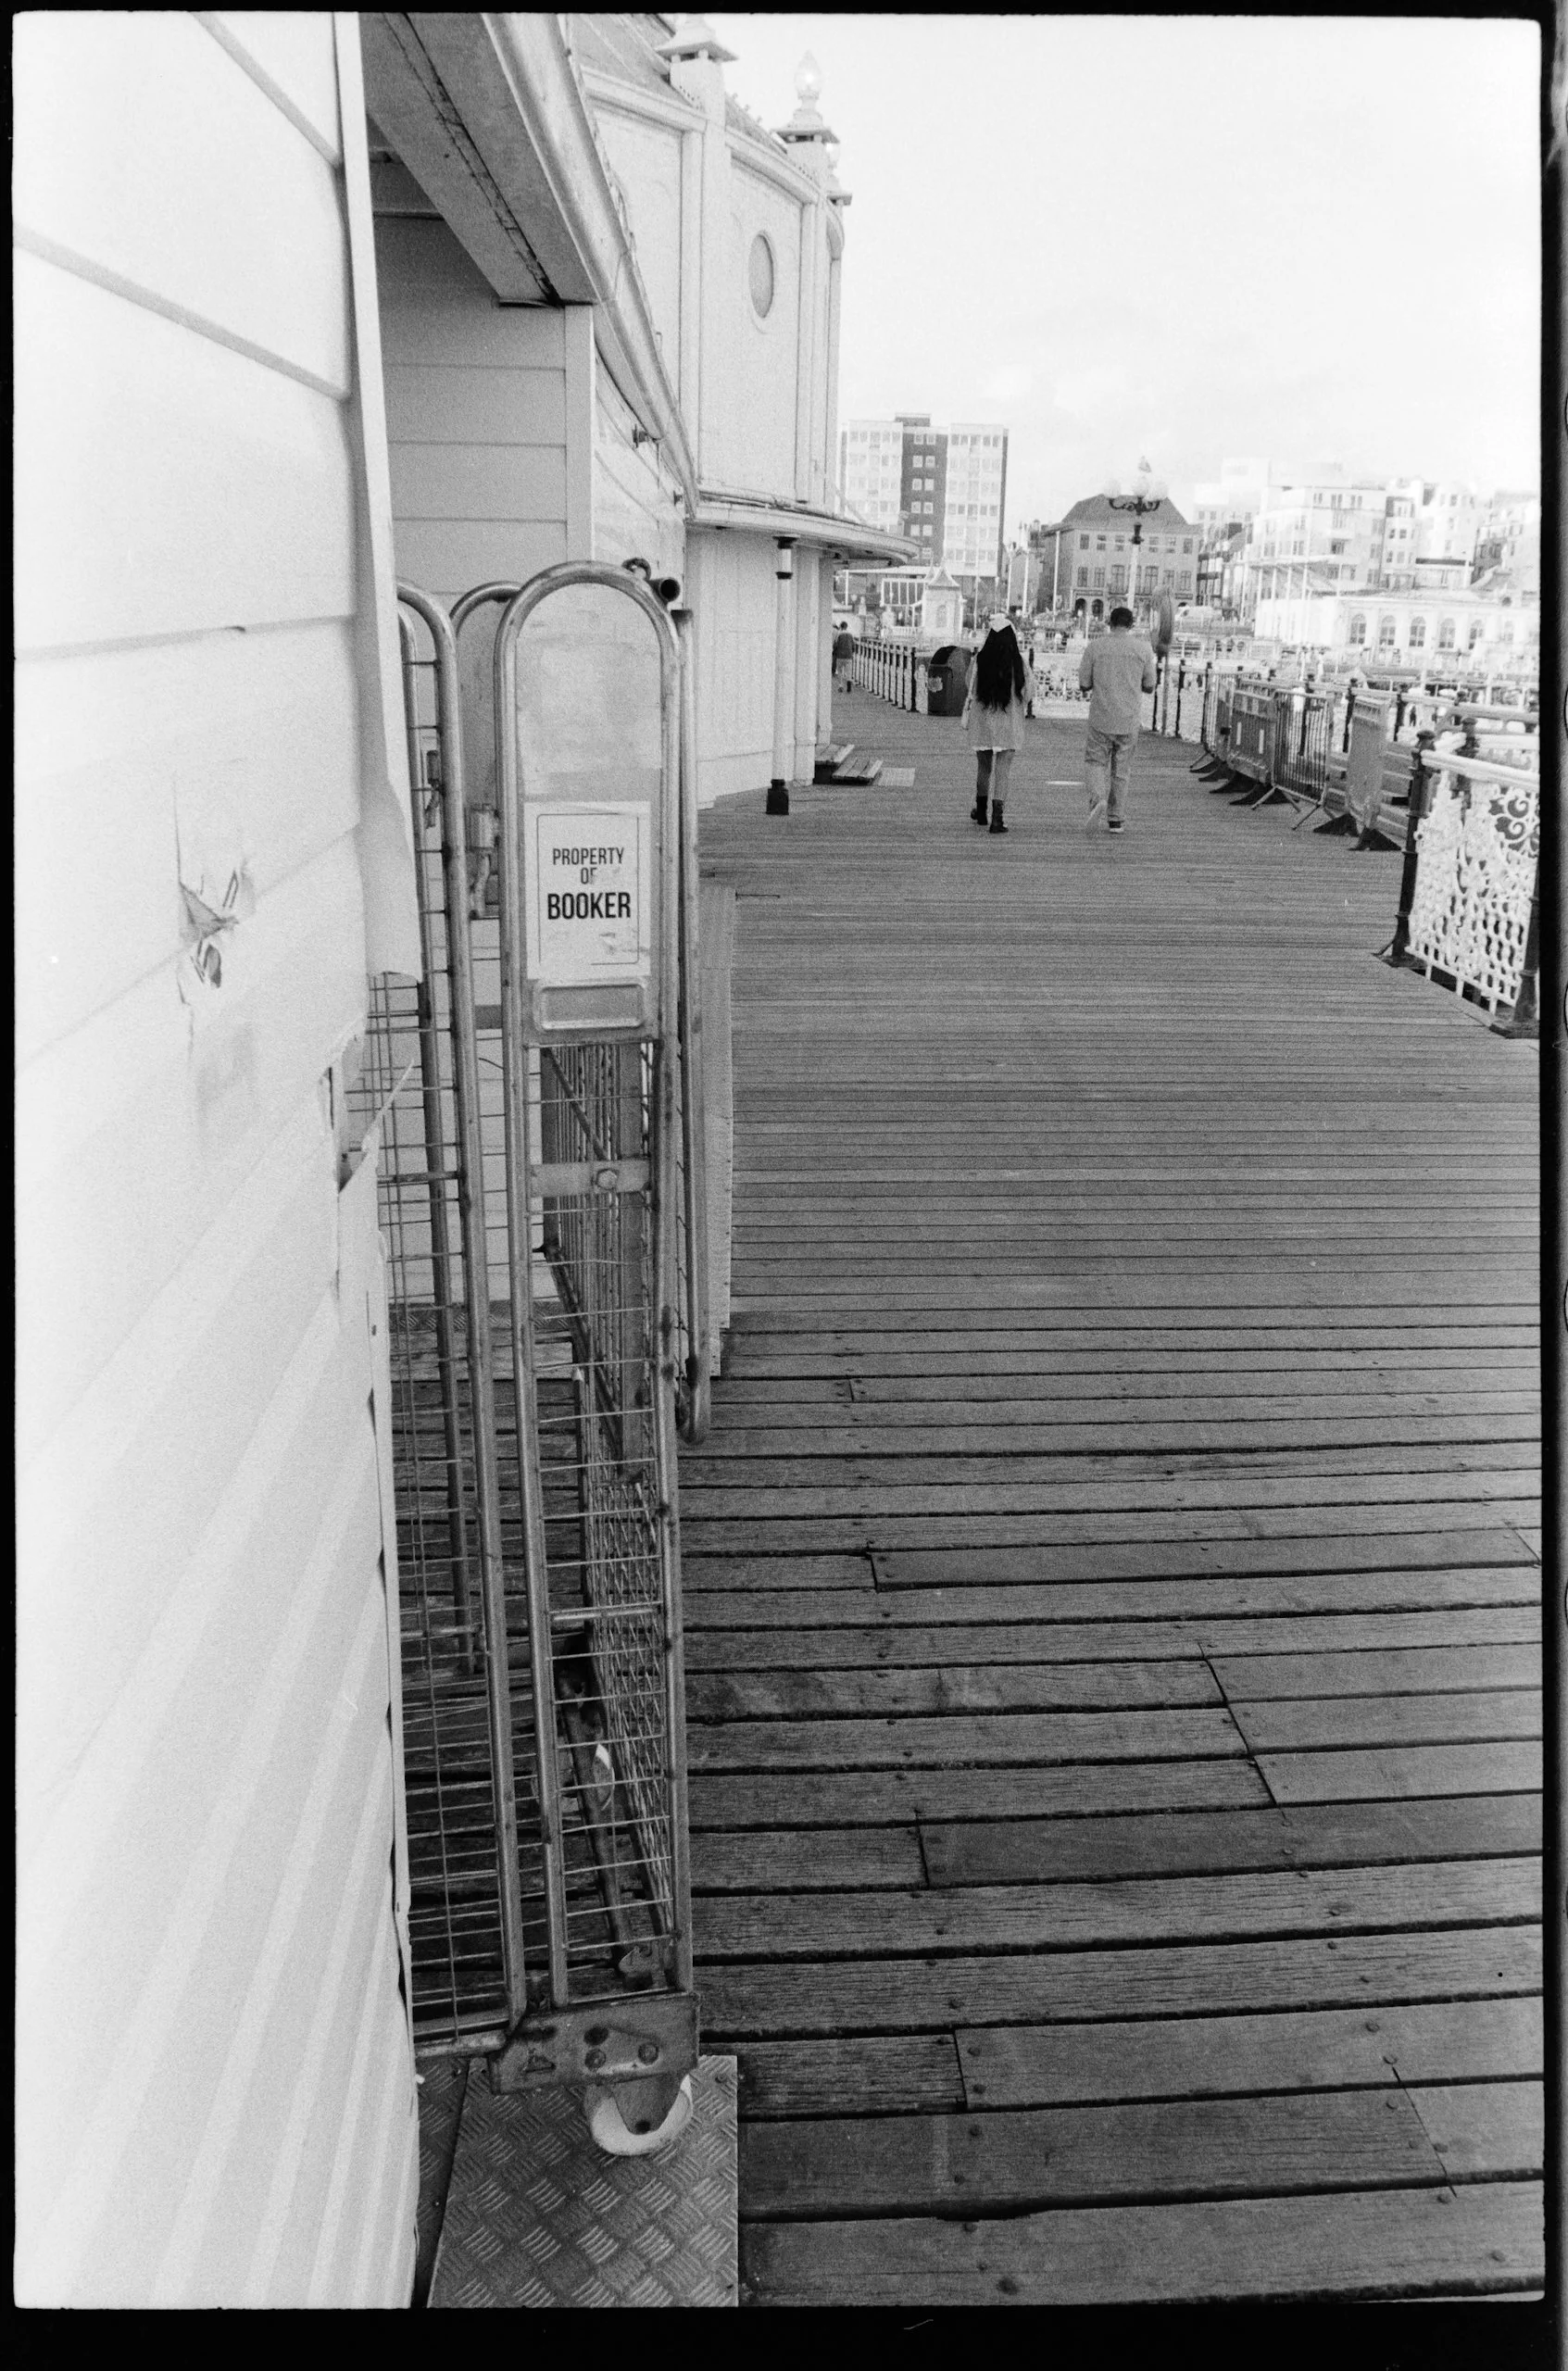
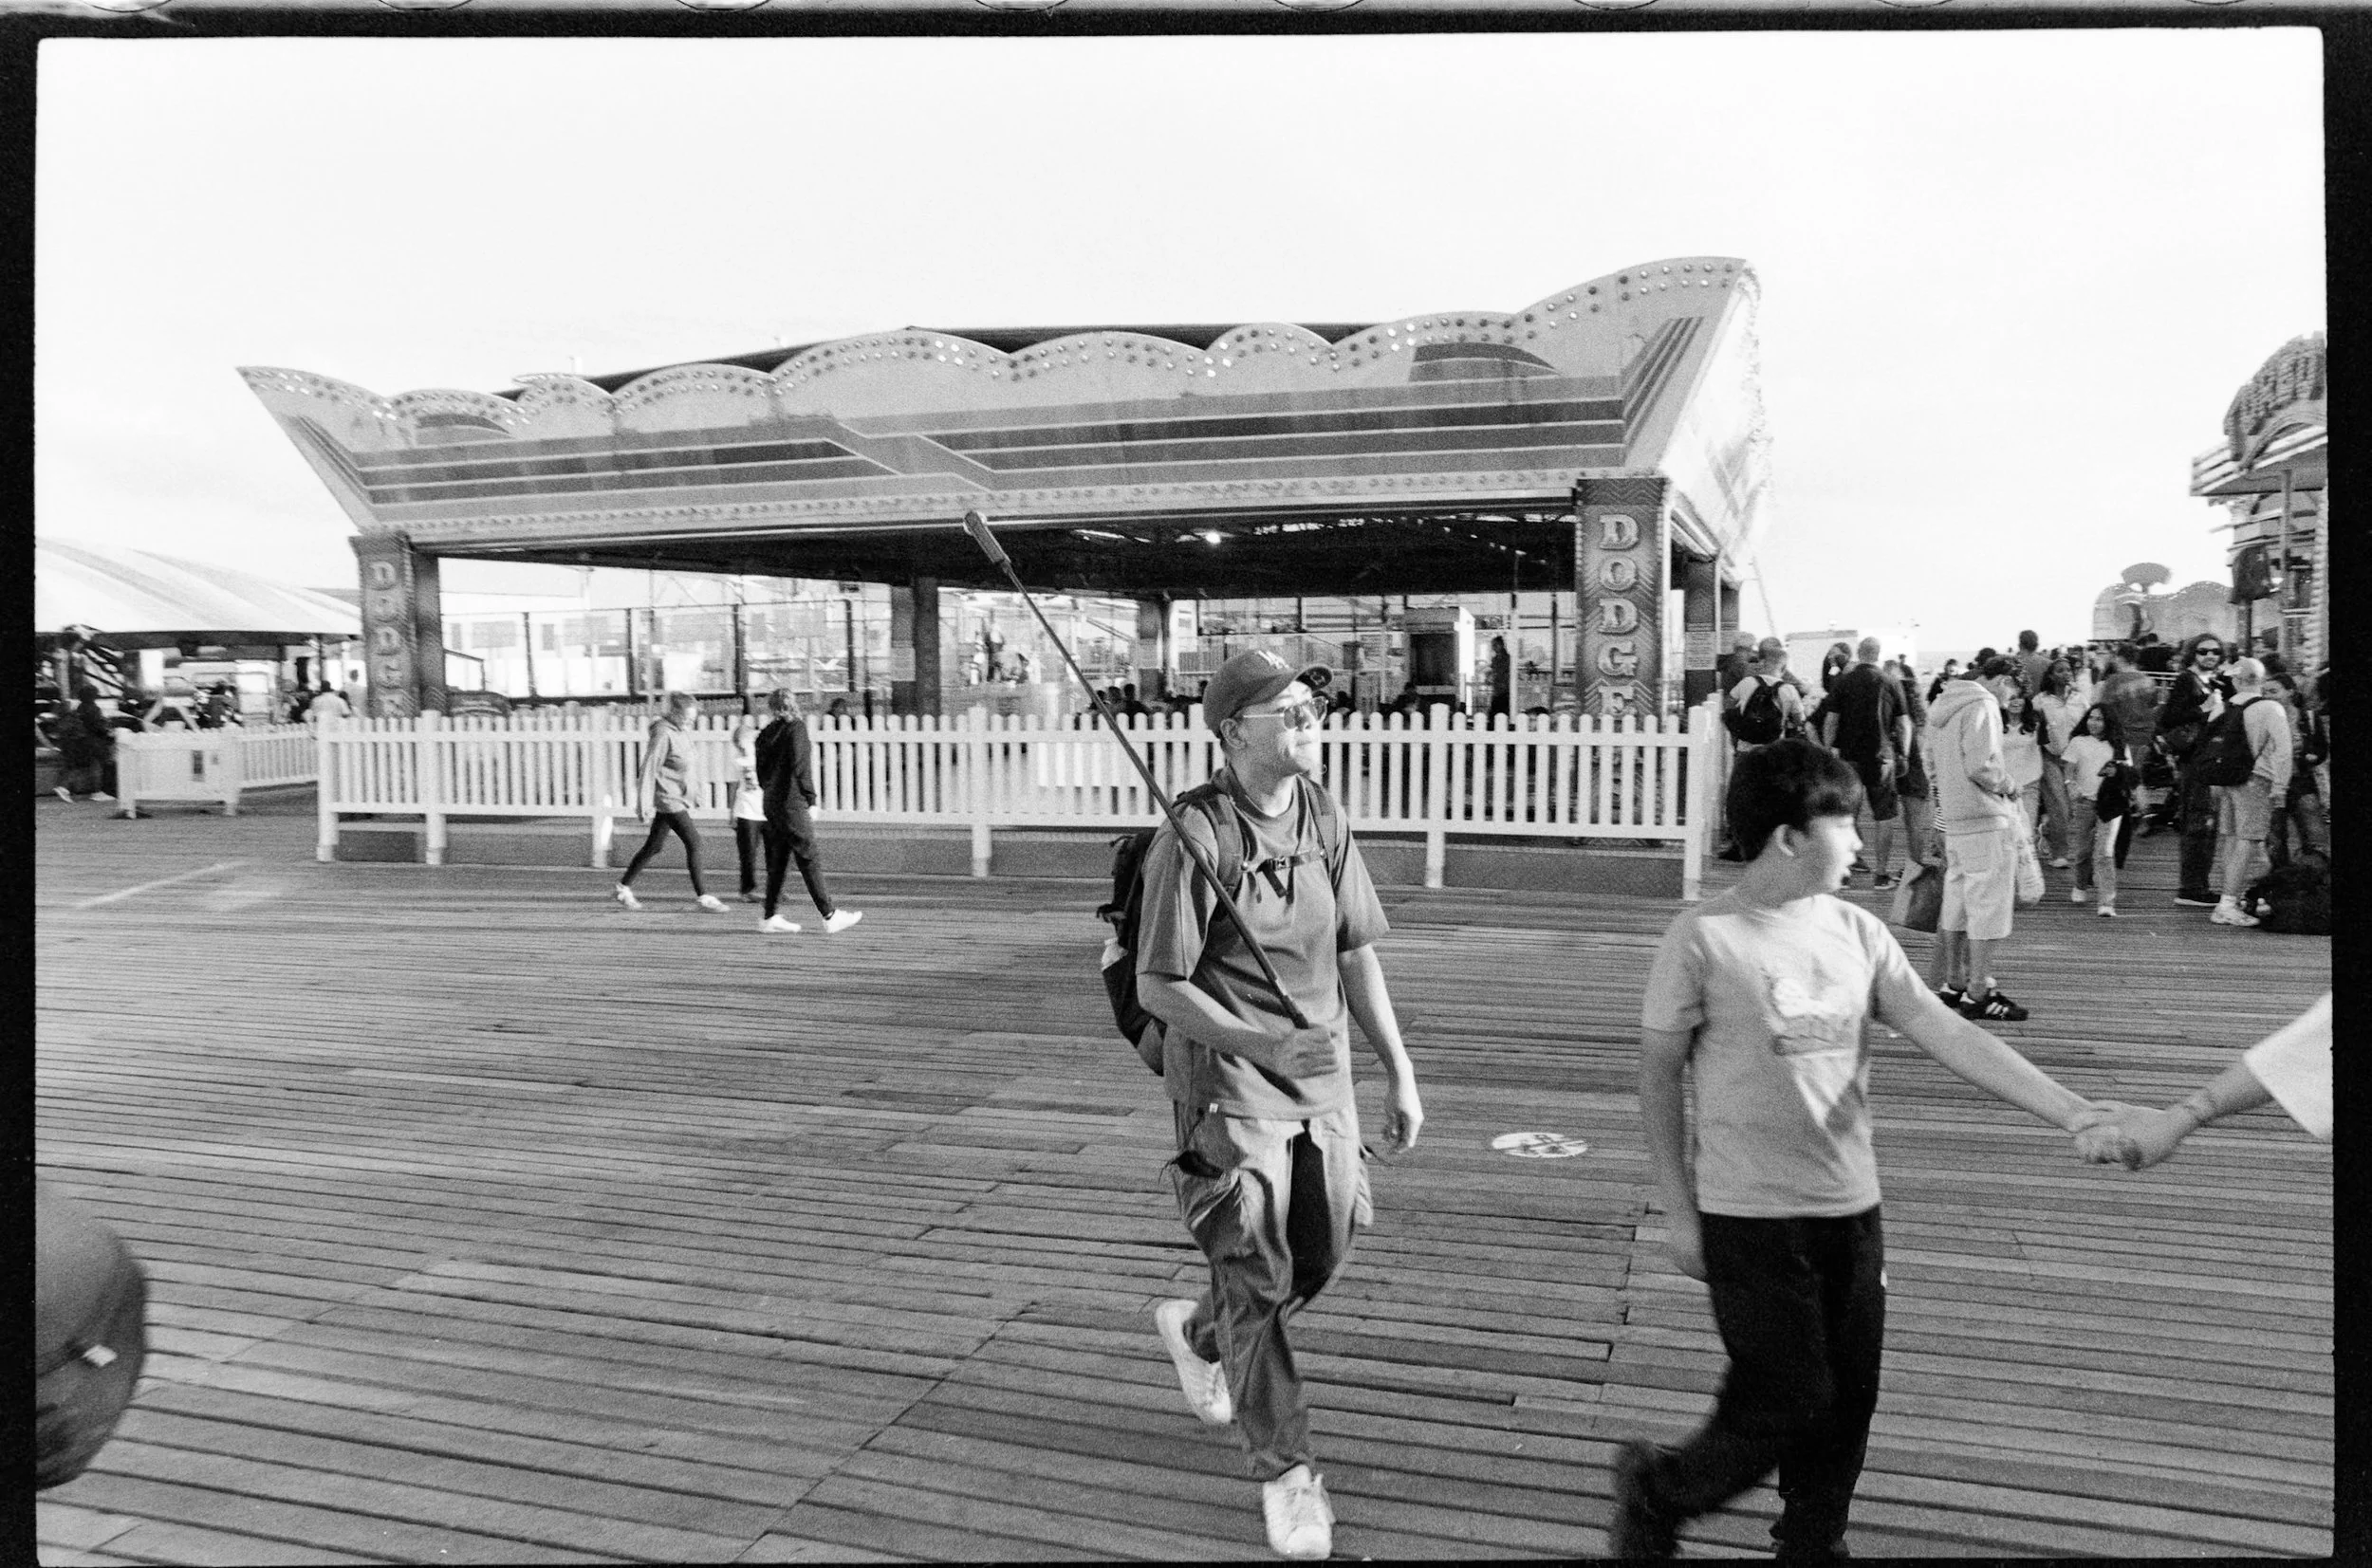
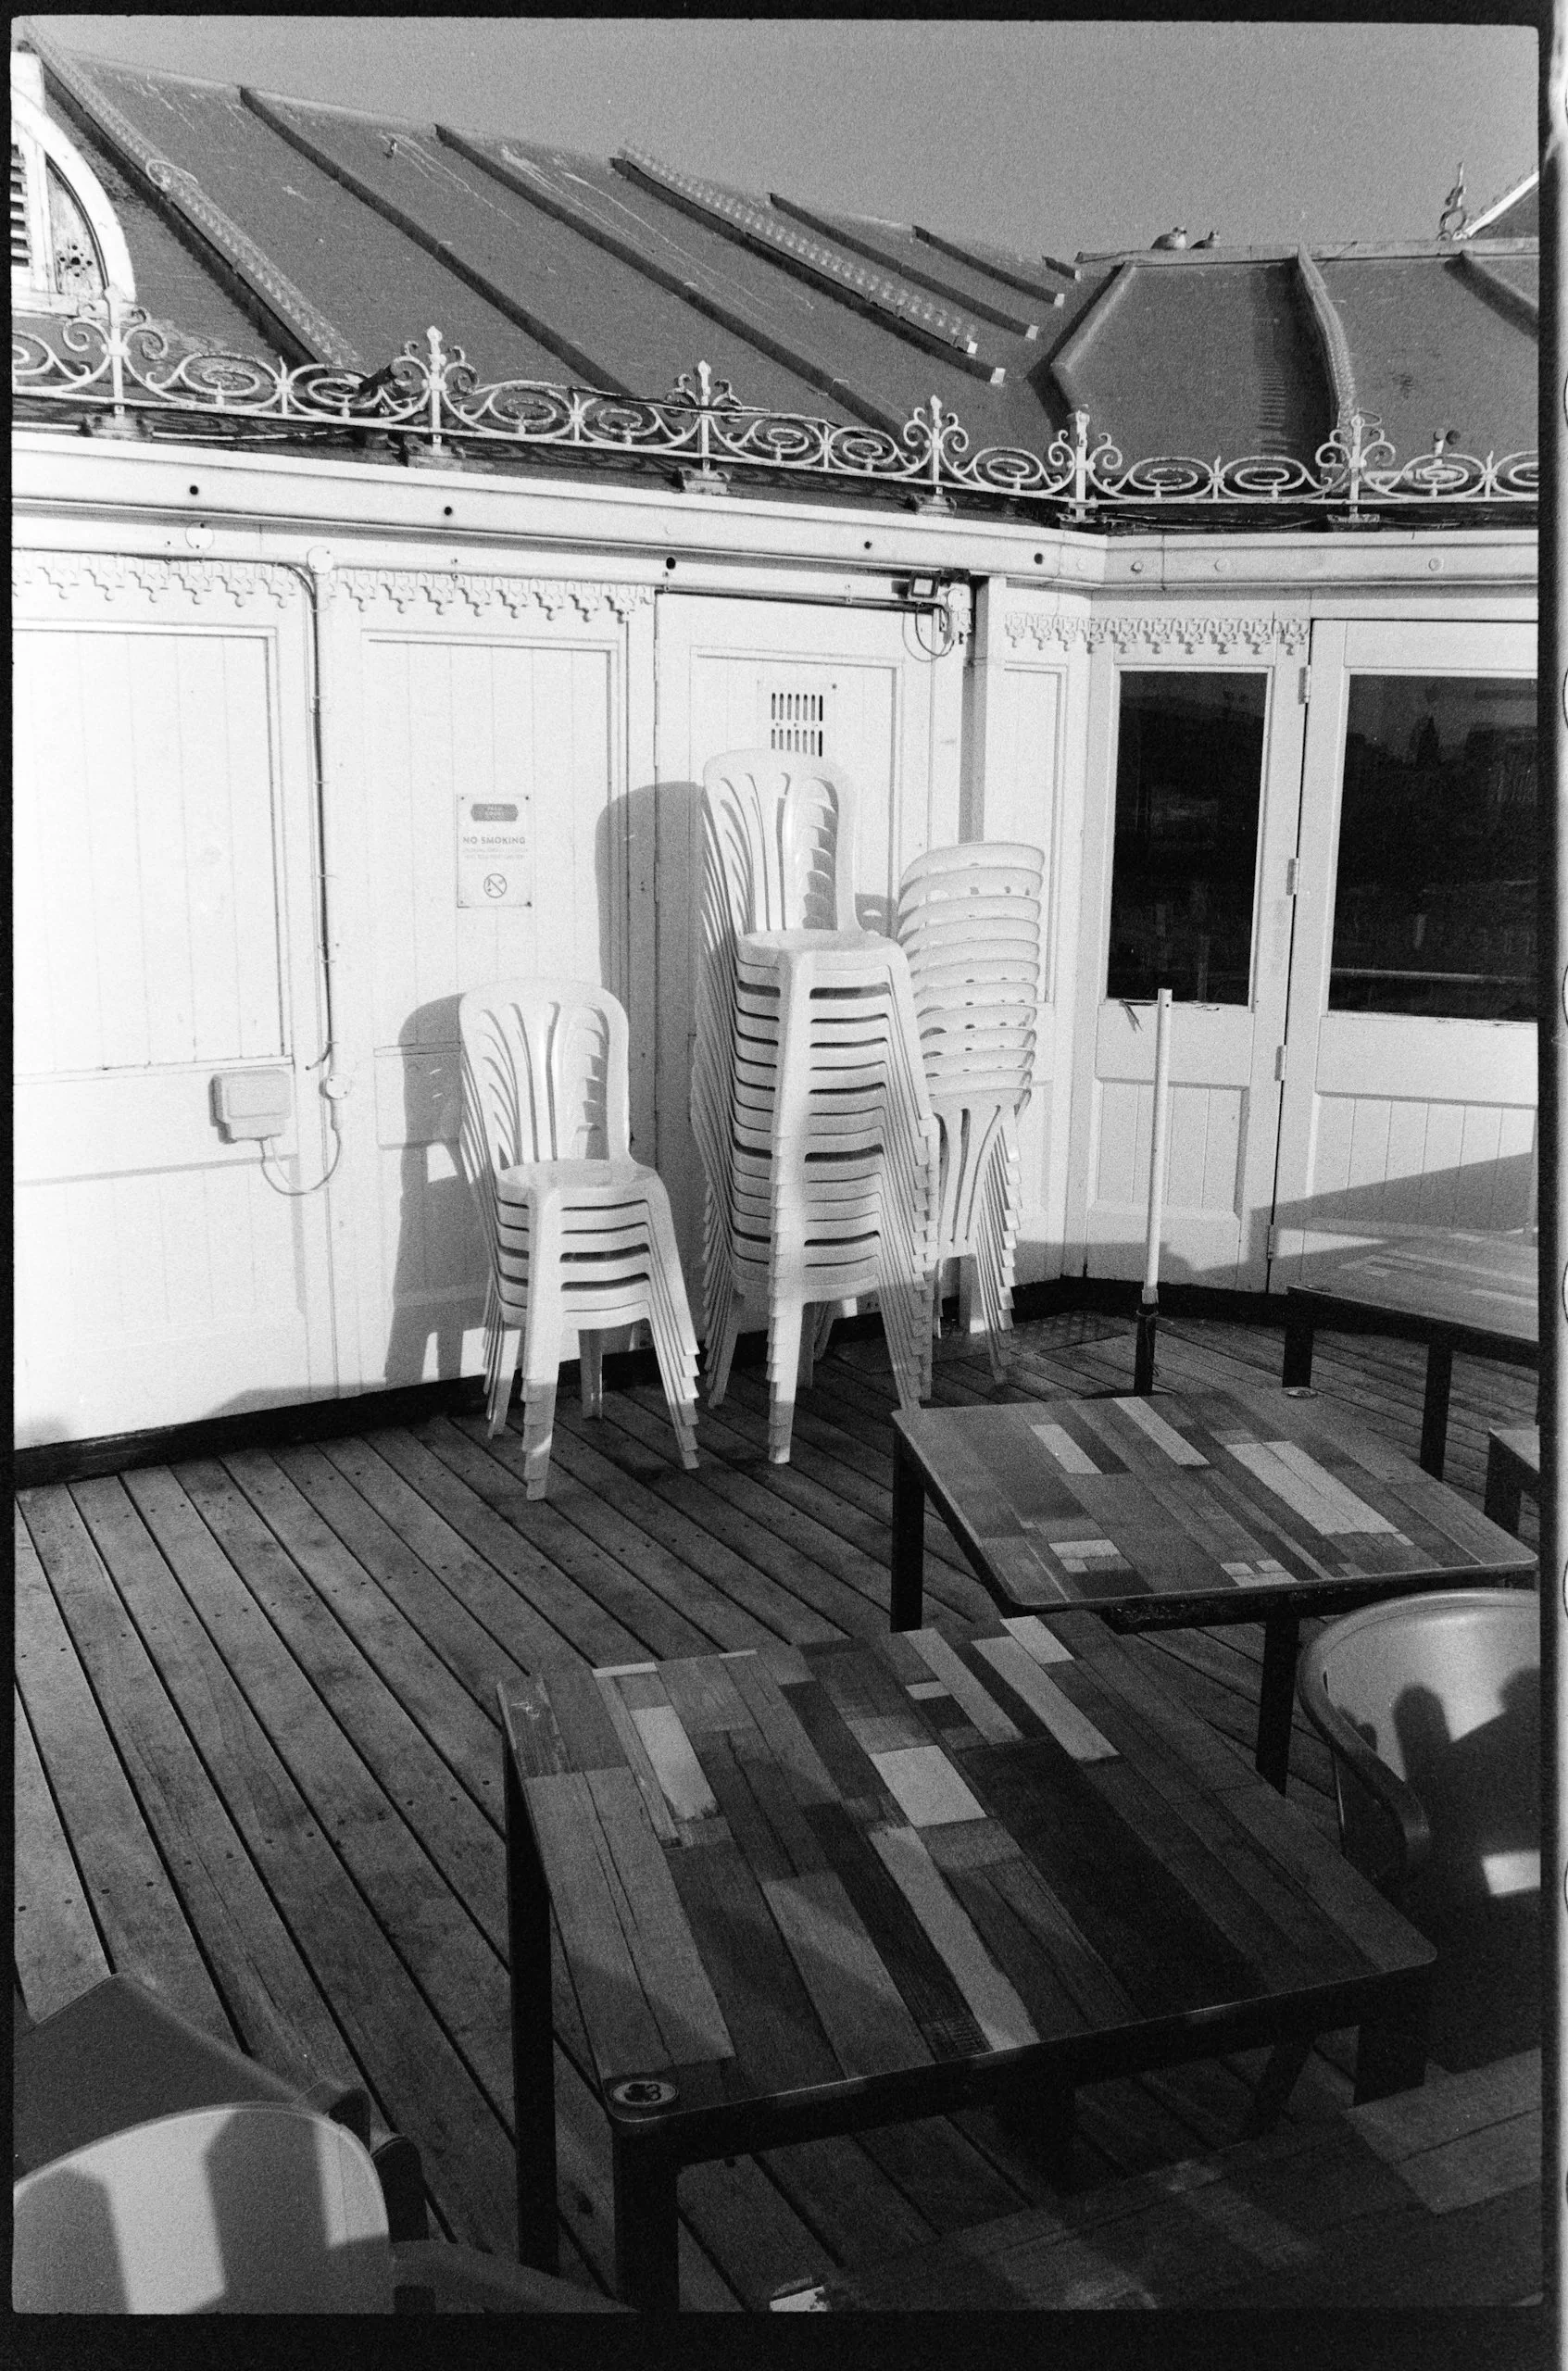
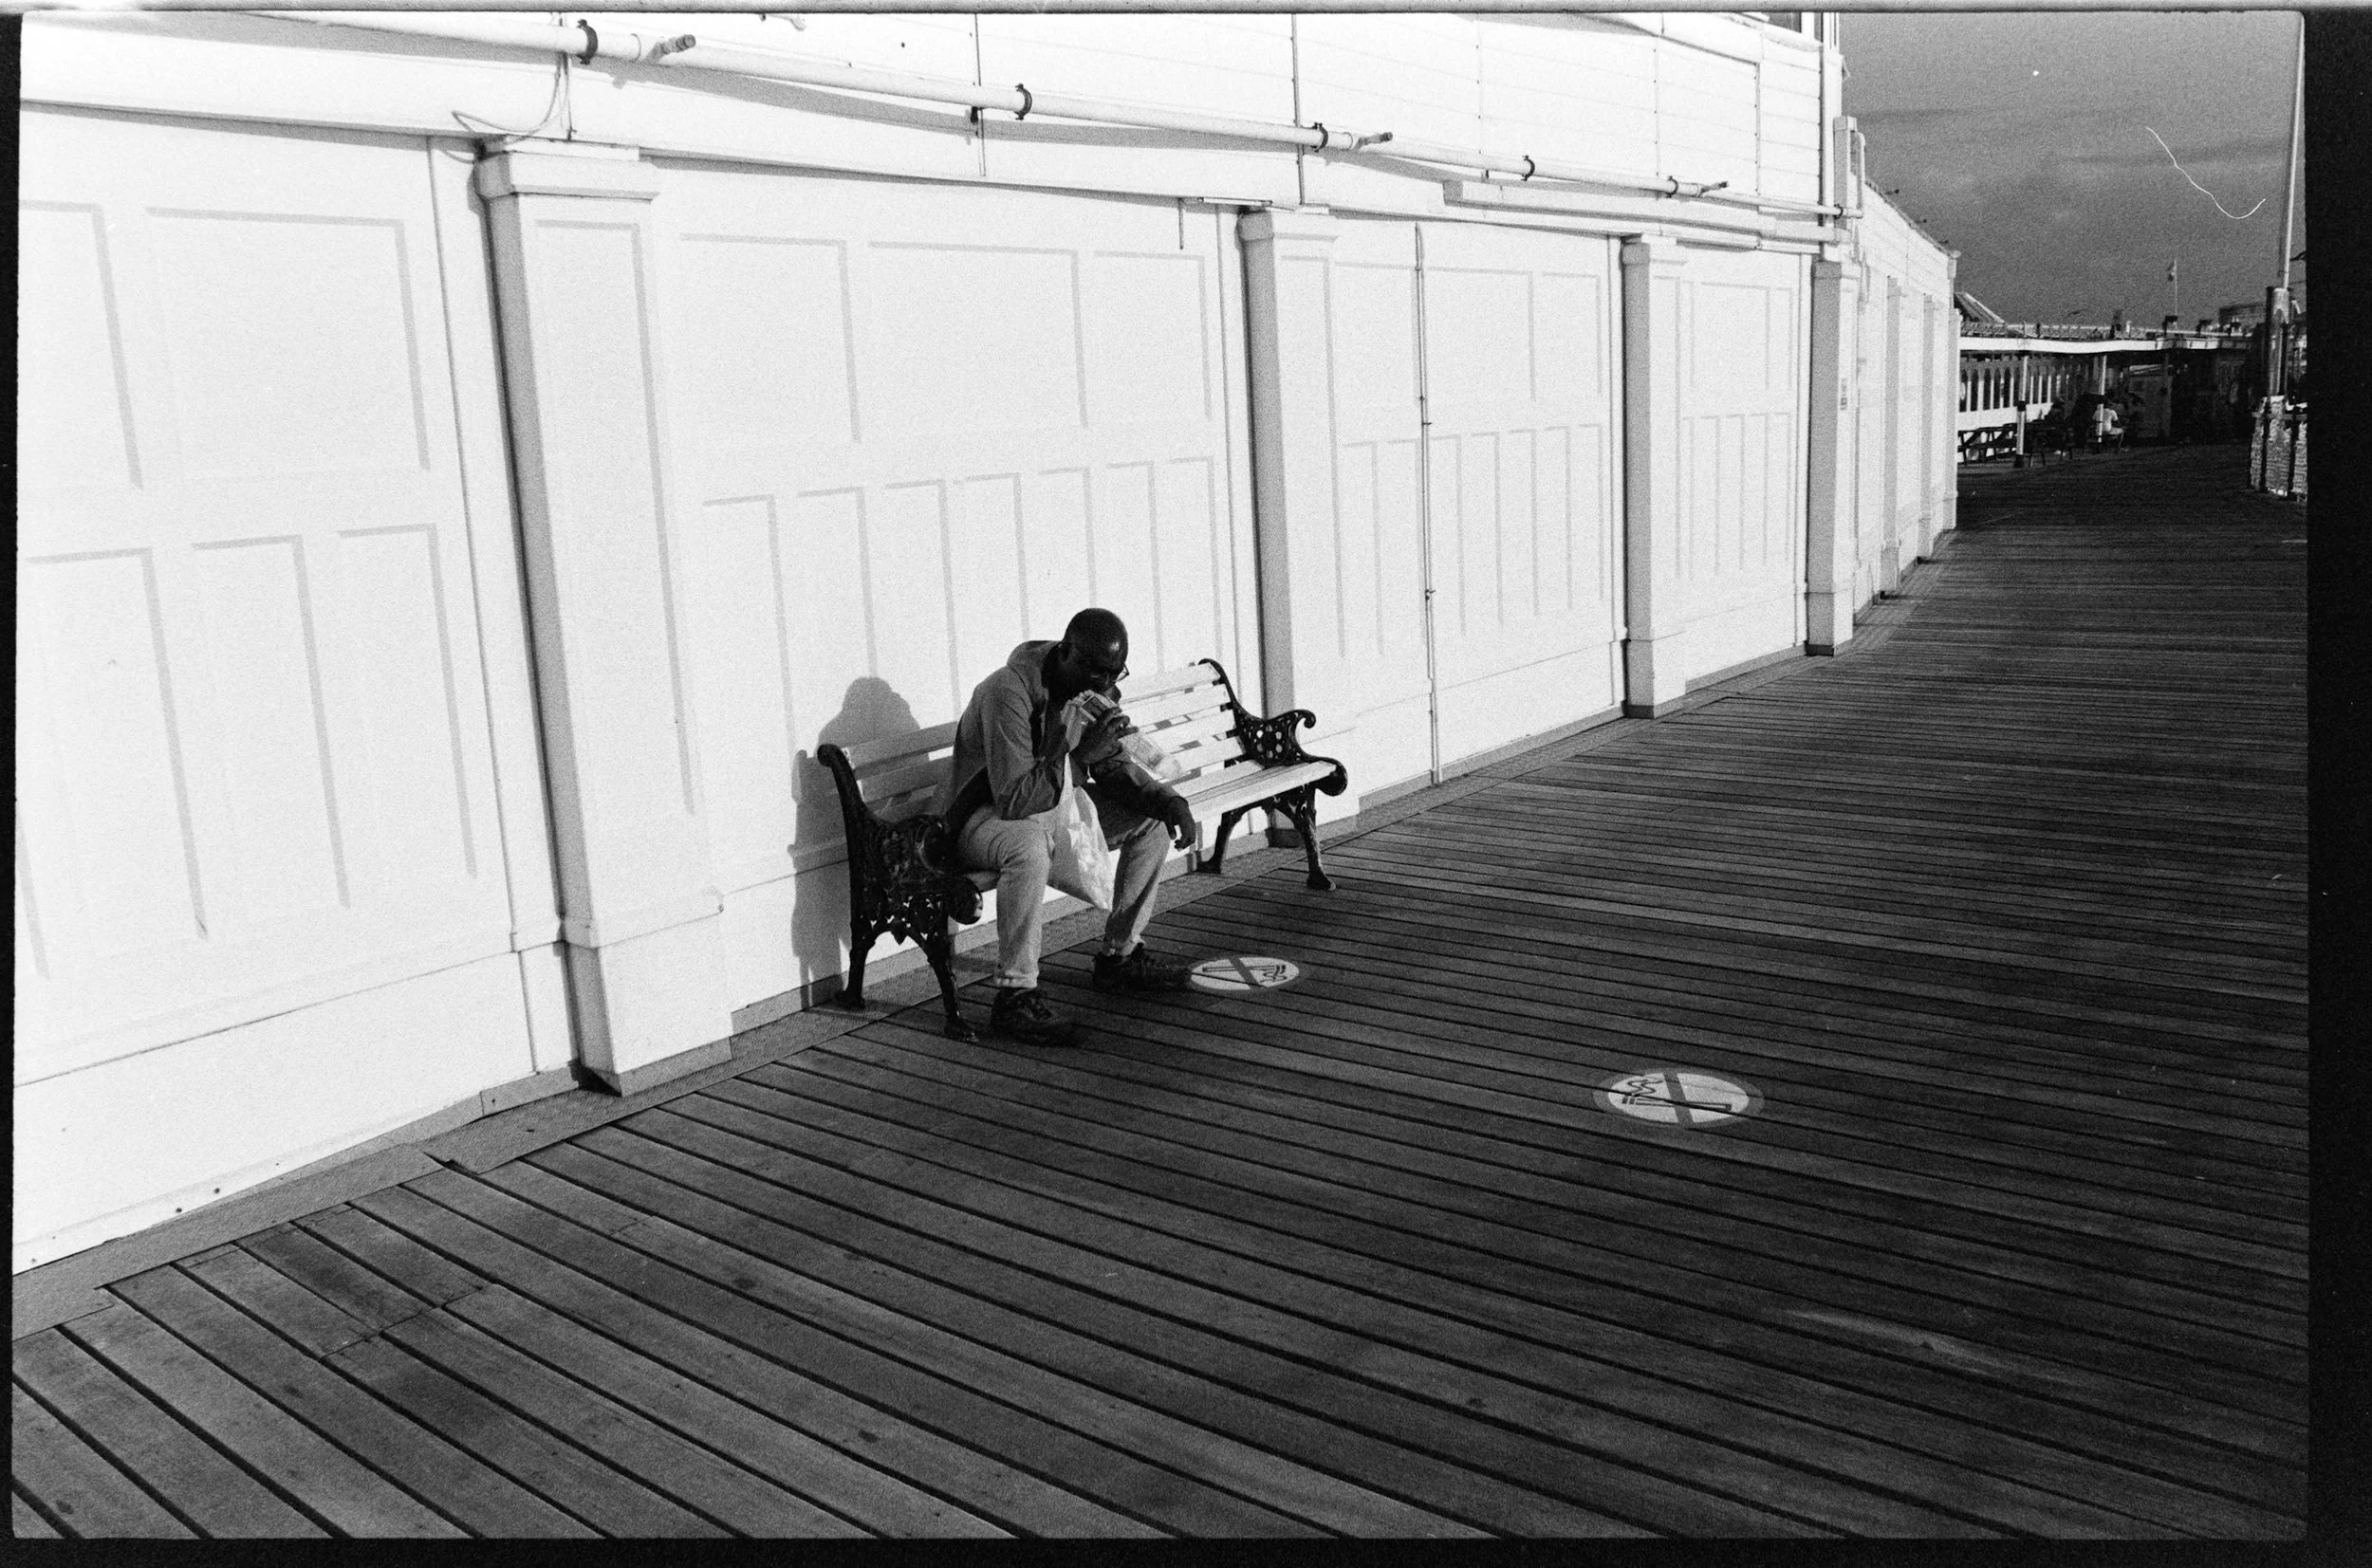
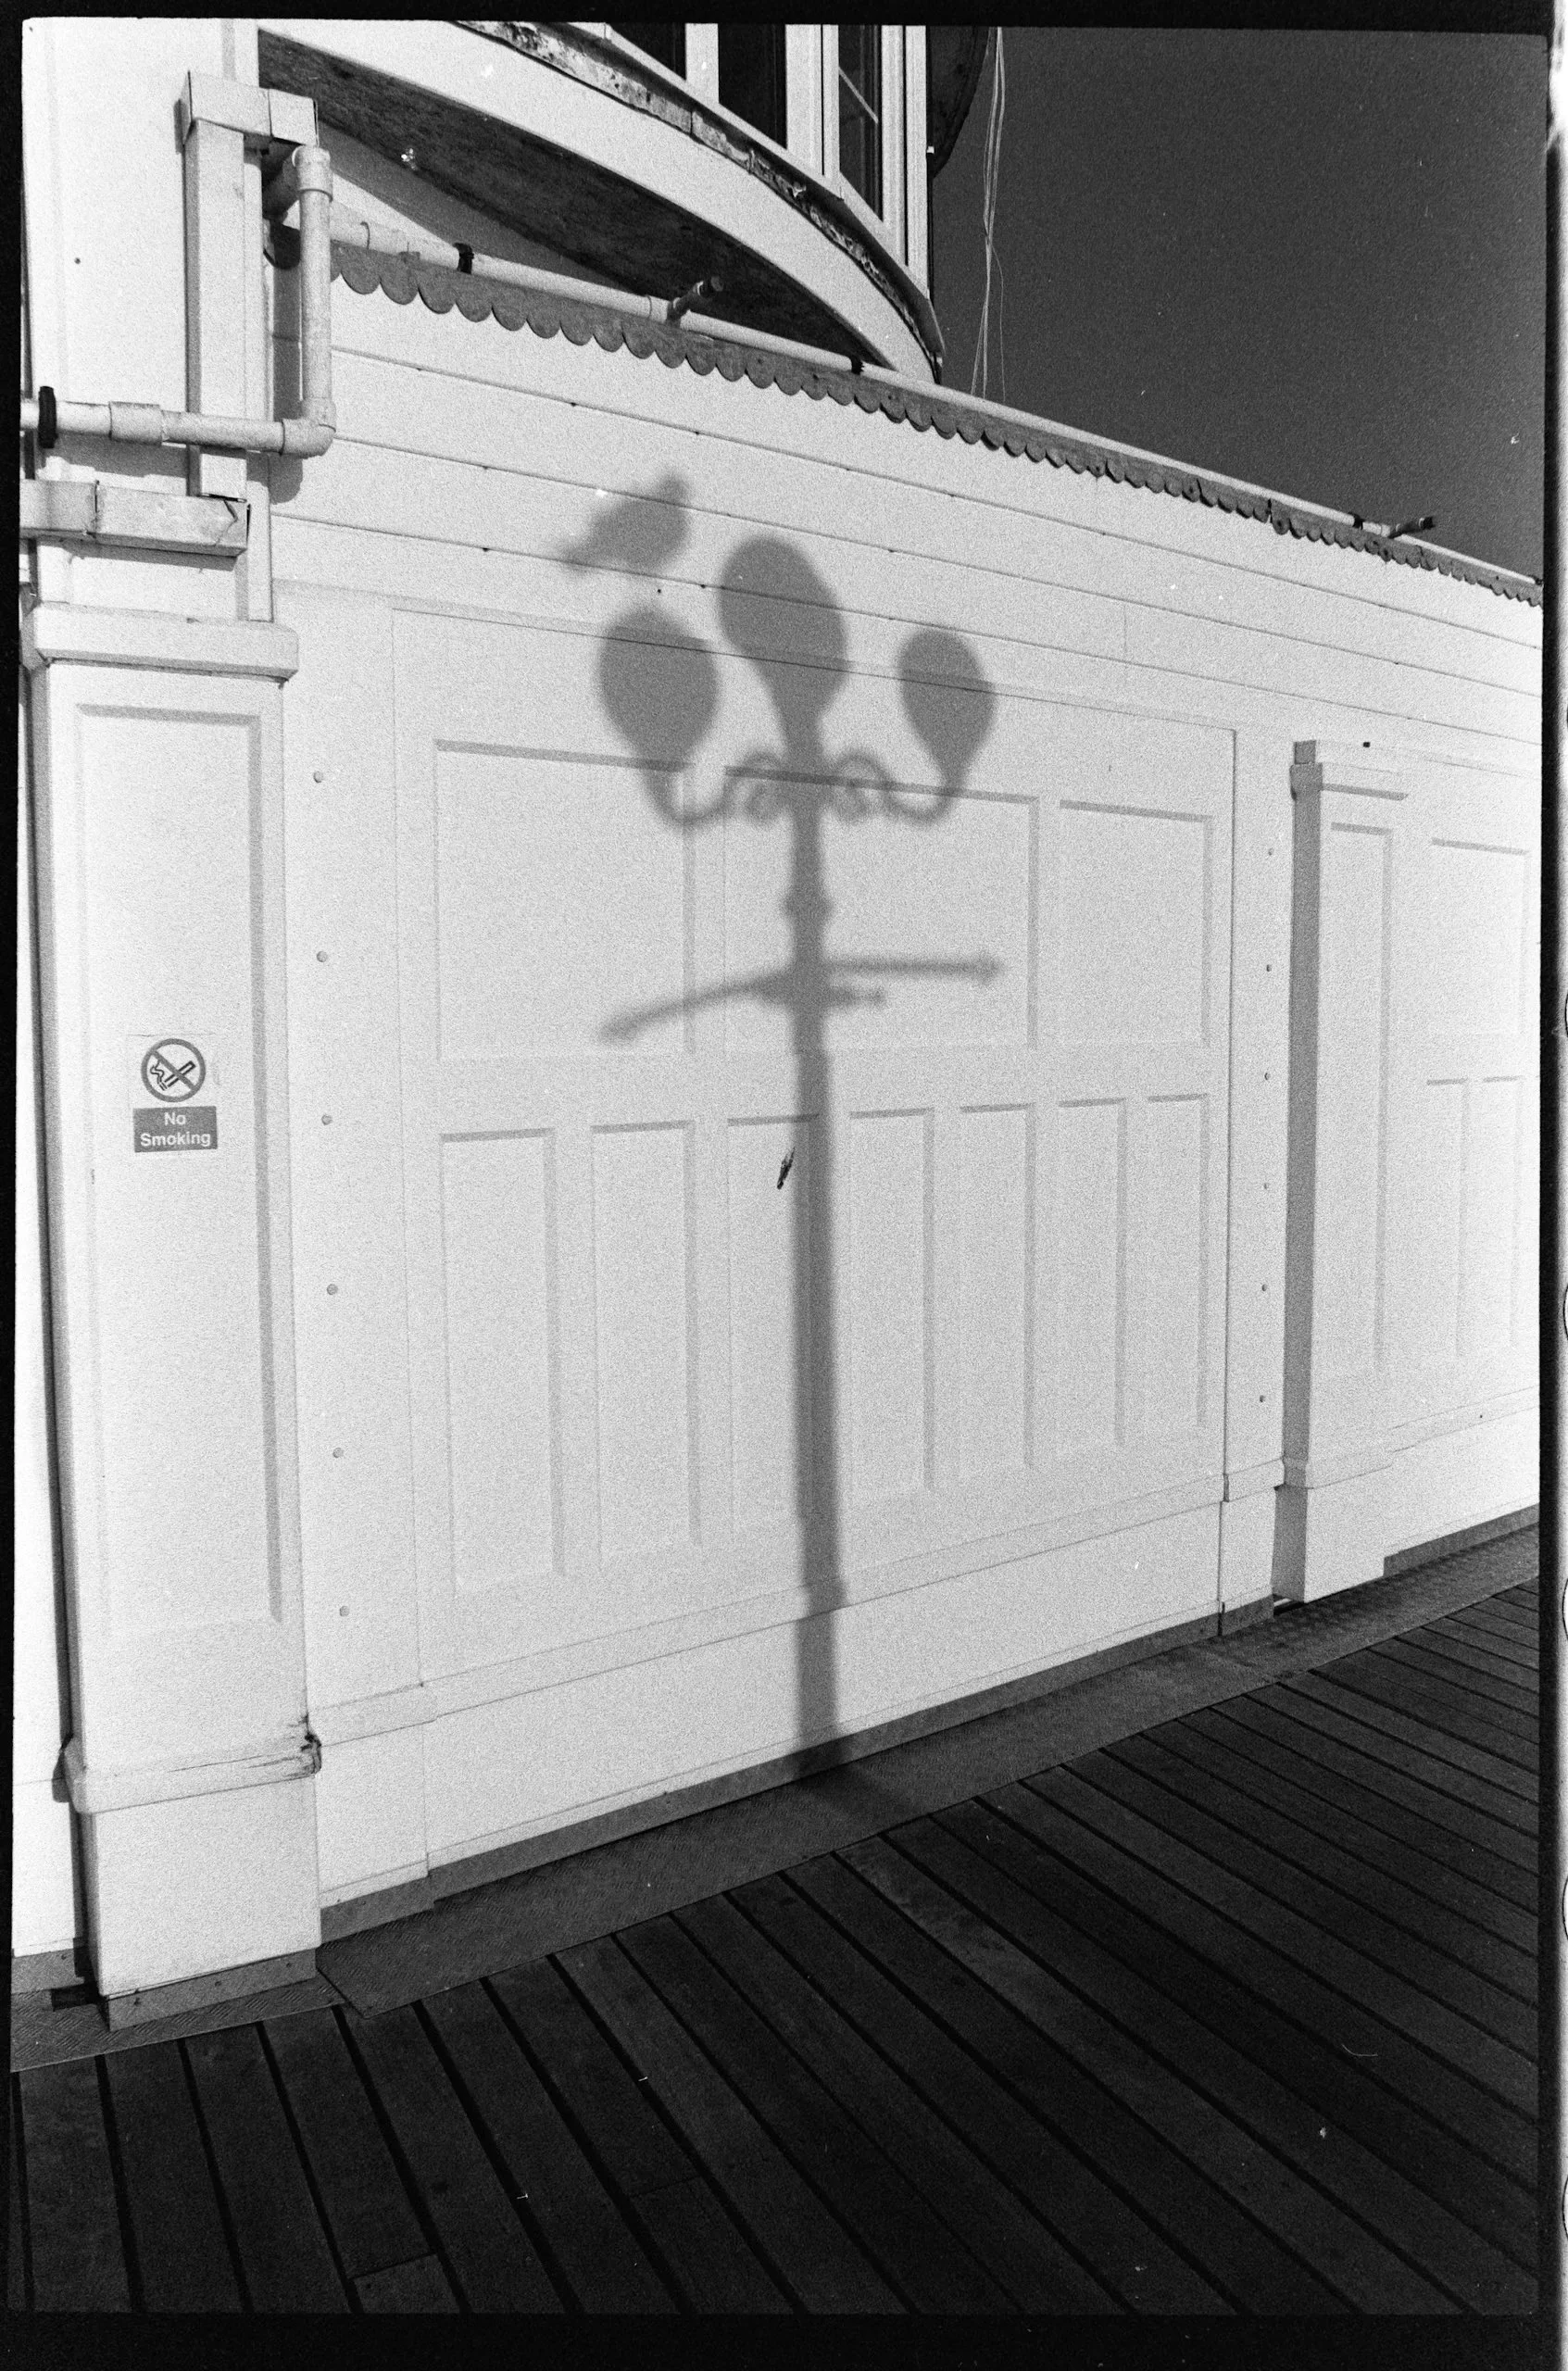
The images in this blogpost, are from the first three rolls, I put through the camera yesterday on Kodak 5222 Double XX film.
The F80, known as the N80 in North America, was a remarkably advanced camera for its time, boasting features that many digital photographers take for granted today.
First impressions are key, and holding the F80, I'm struck by its ergonomic design. It feels substantial yet comfortable in the hand, a far cry from the dense, compact brick of the Leica. The controls are intuitively placed, promising a more fluid shooting experience. I'm particularly excited about the autofocus system. After years of meticulously splitting an image in the rangefinder, the idea of swift, accurate focusing is both liberating and a little daunting.
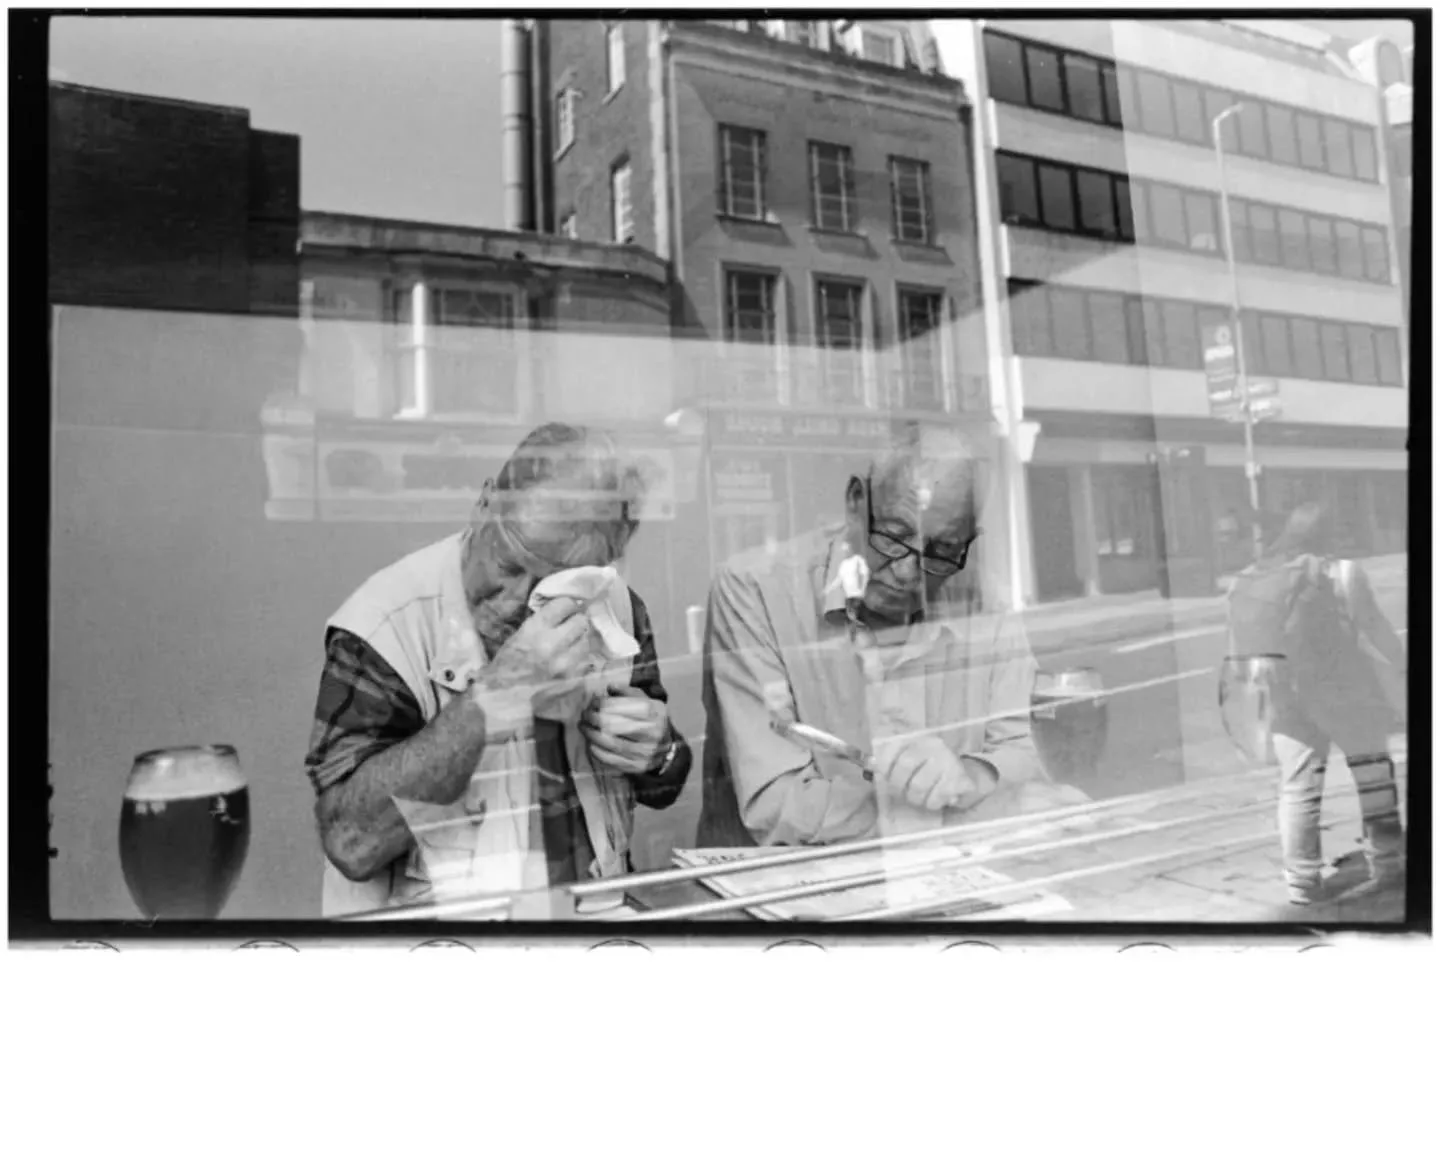
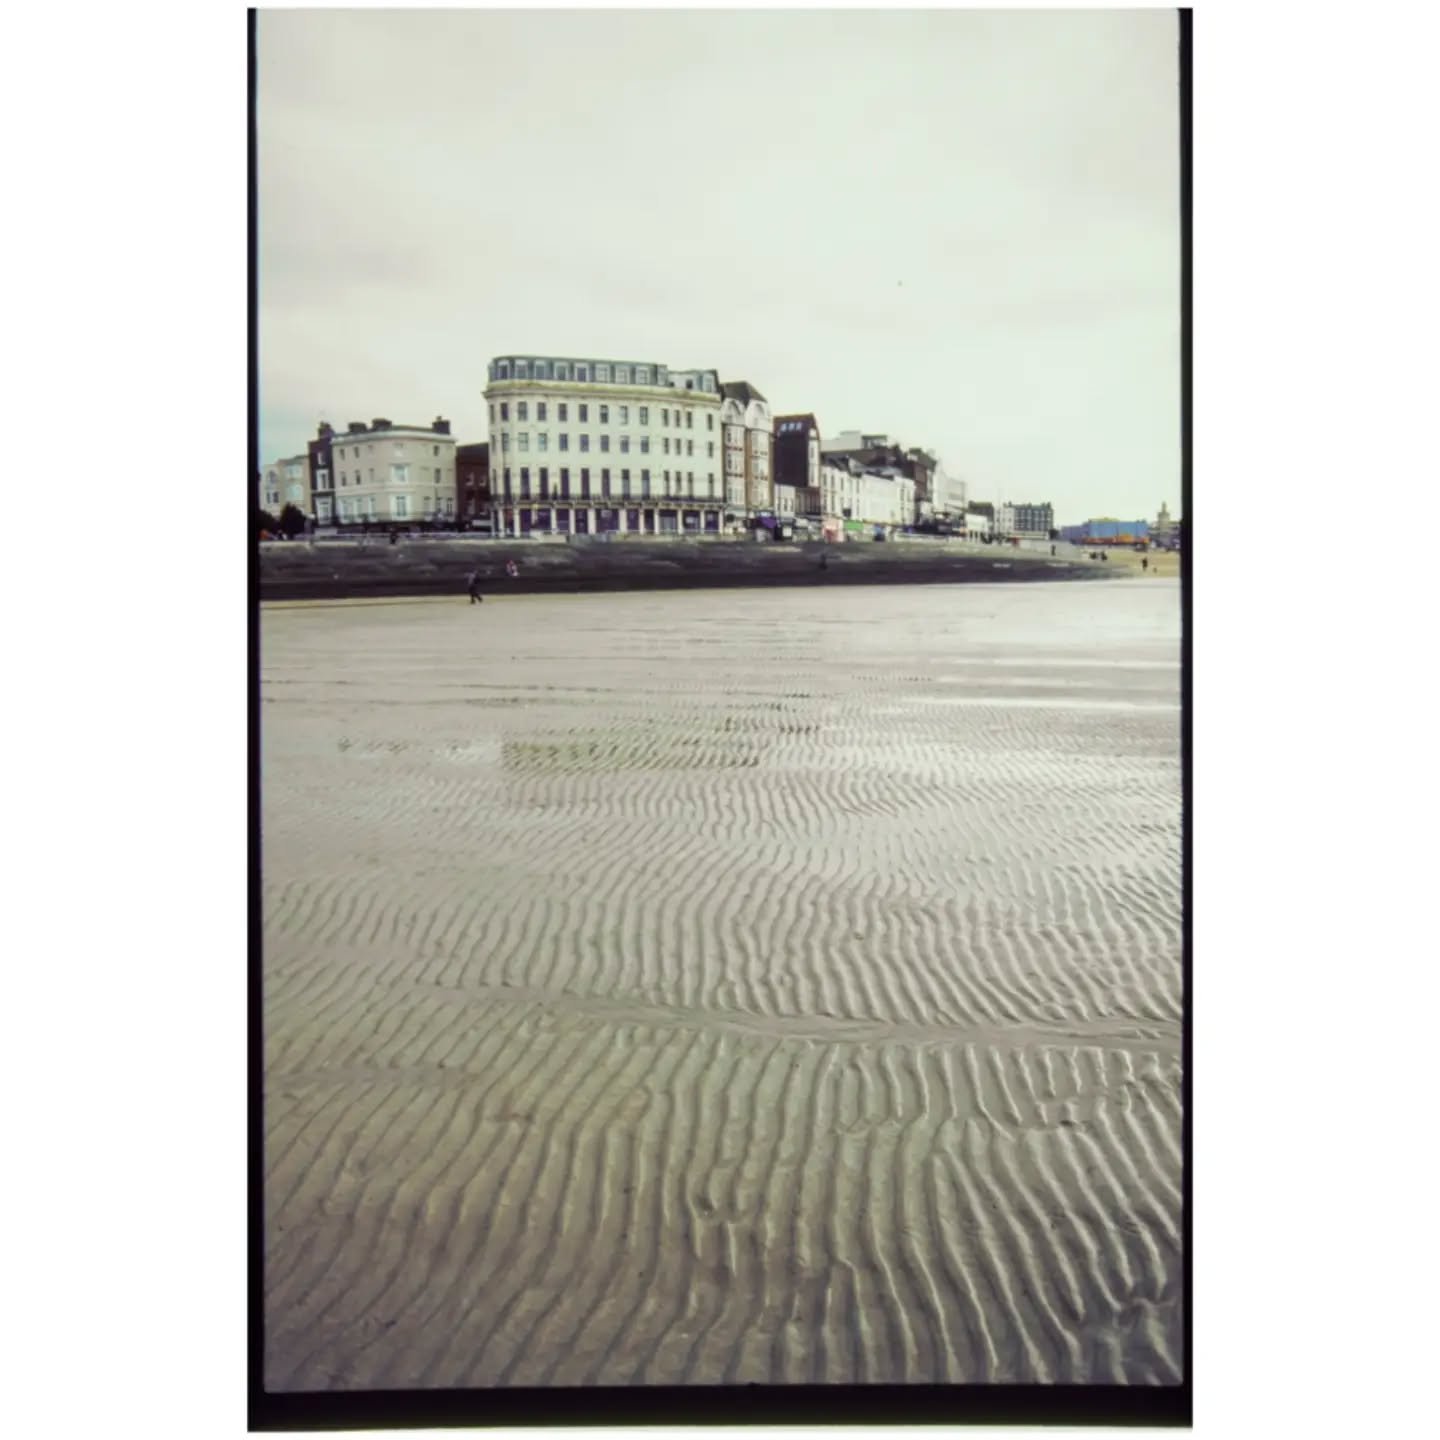
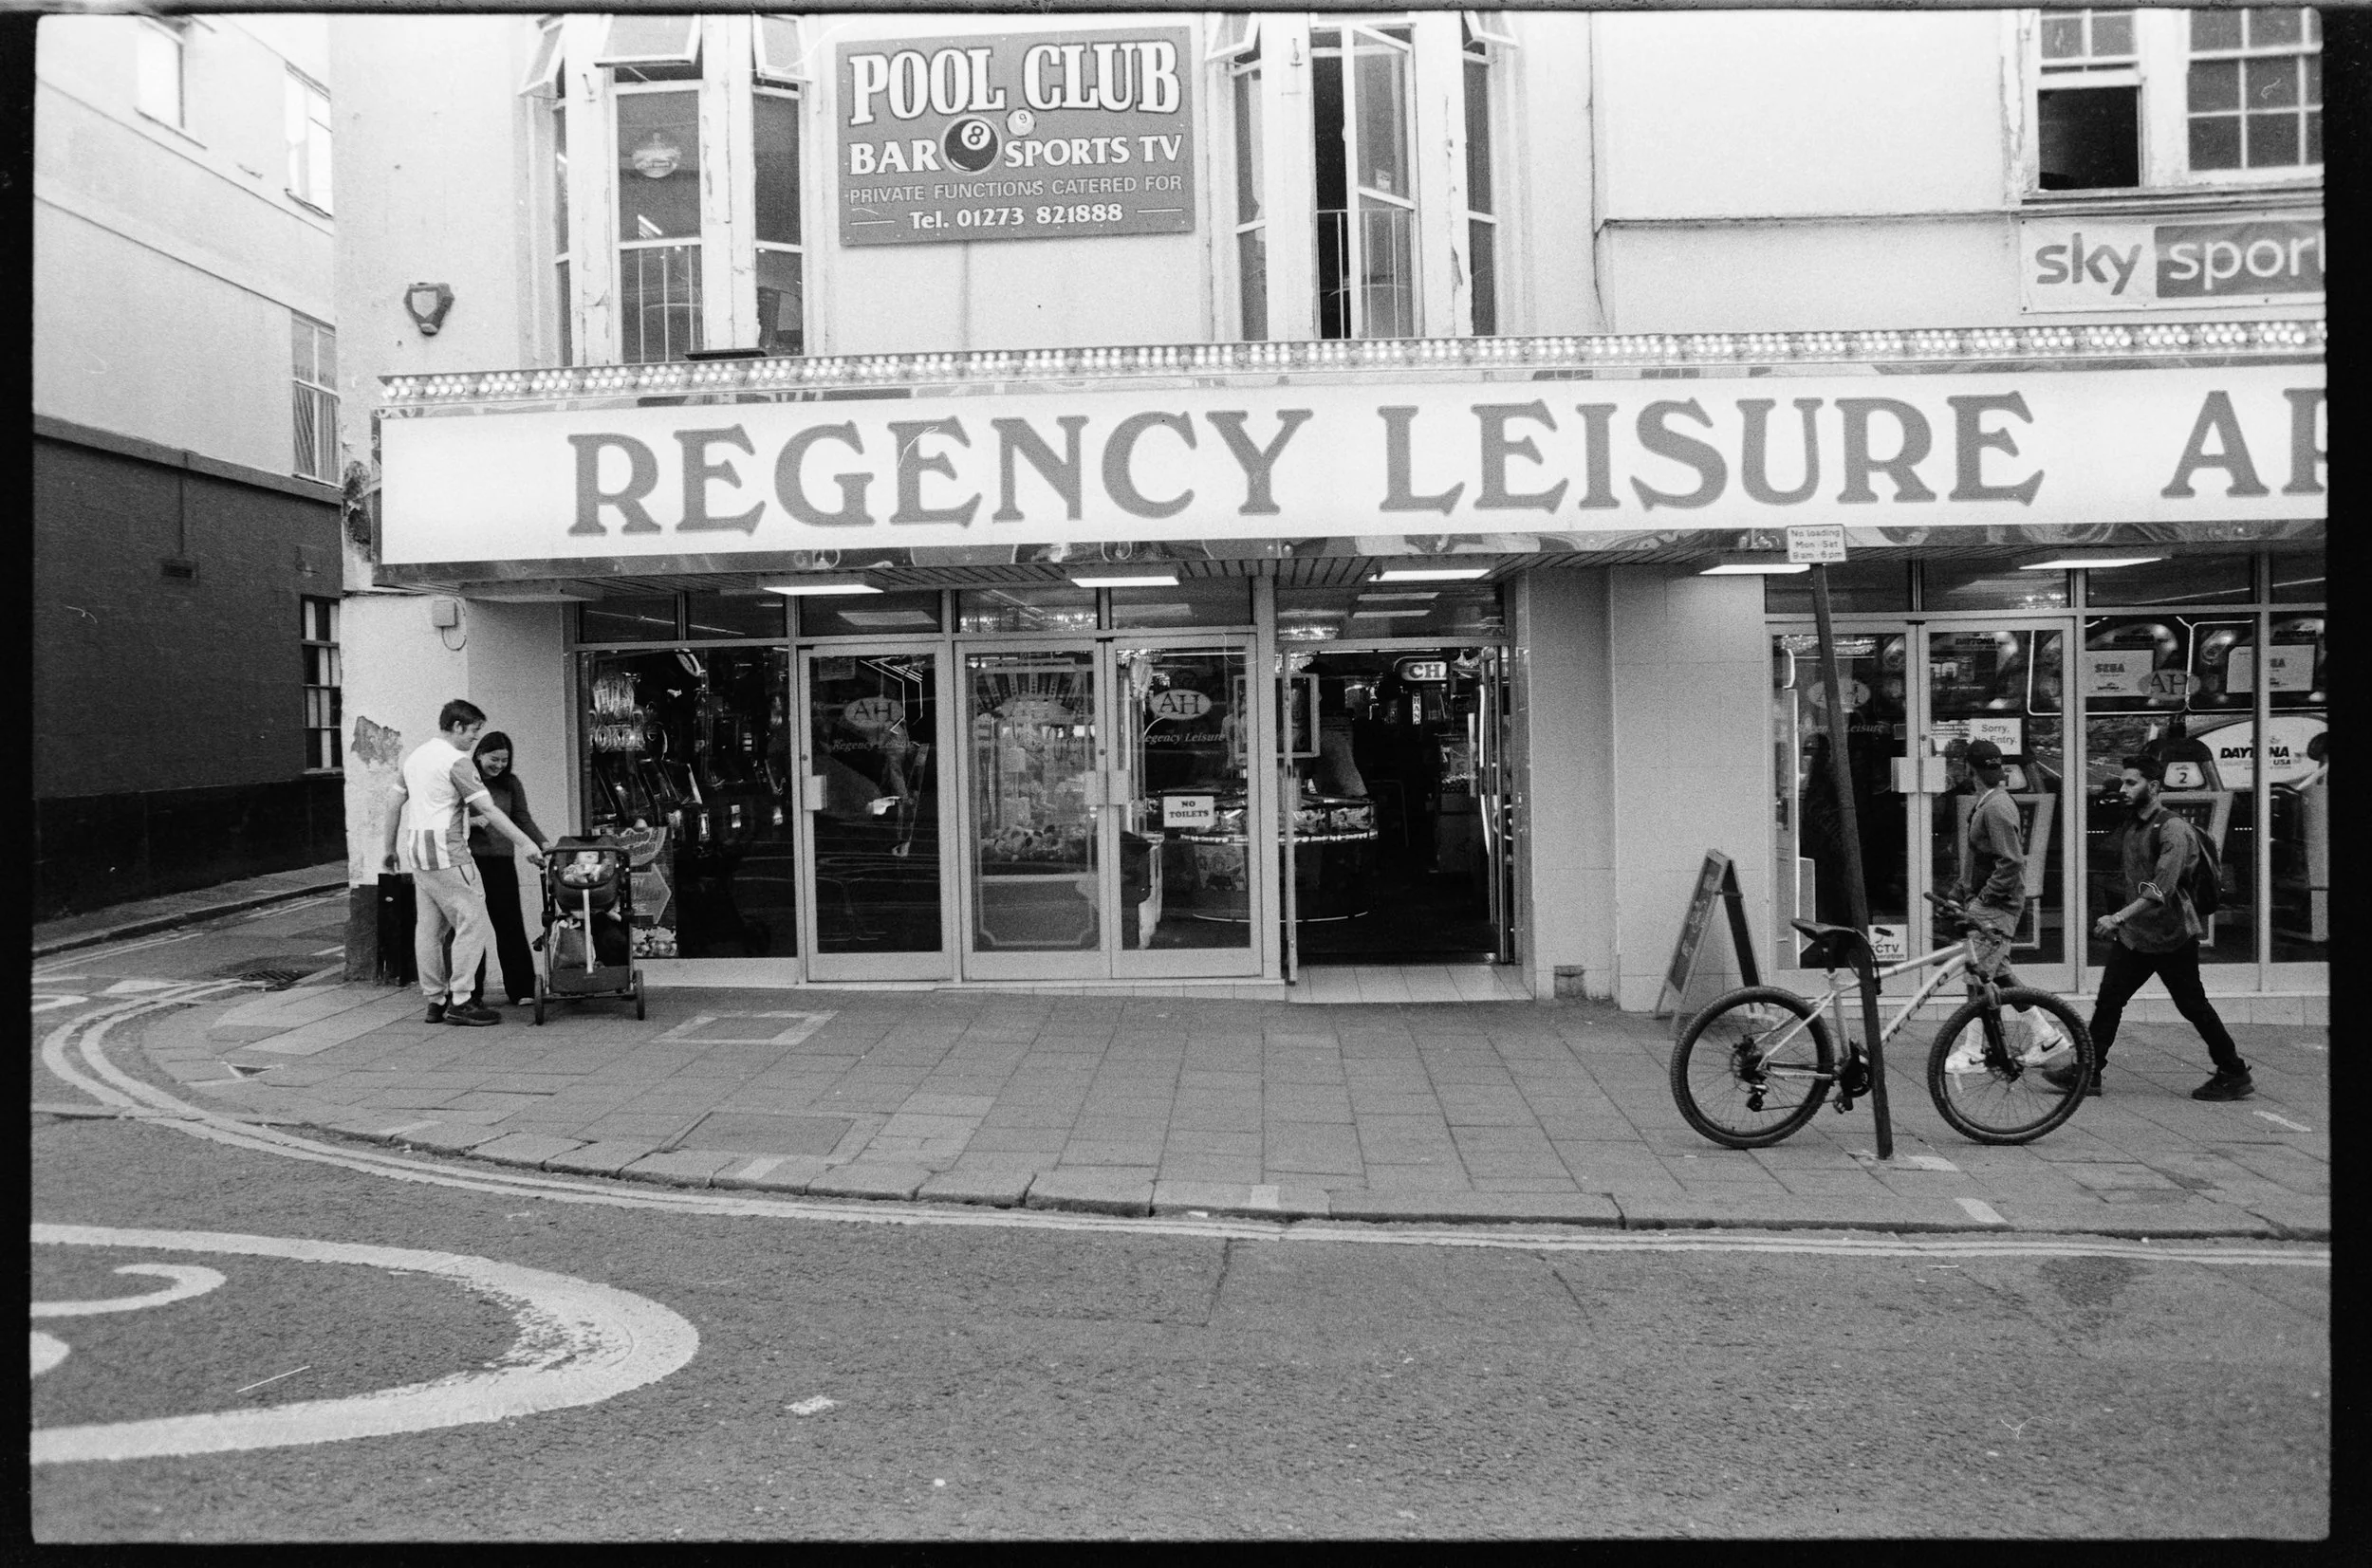
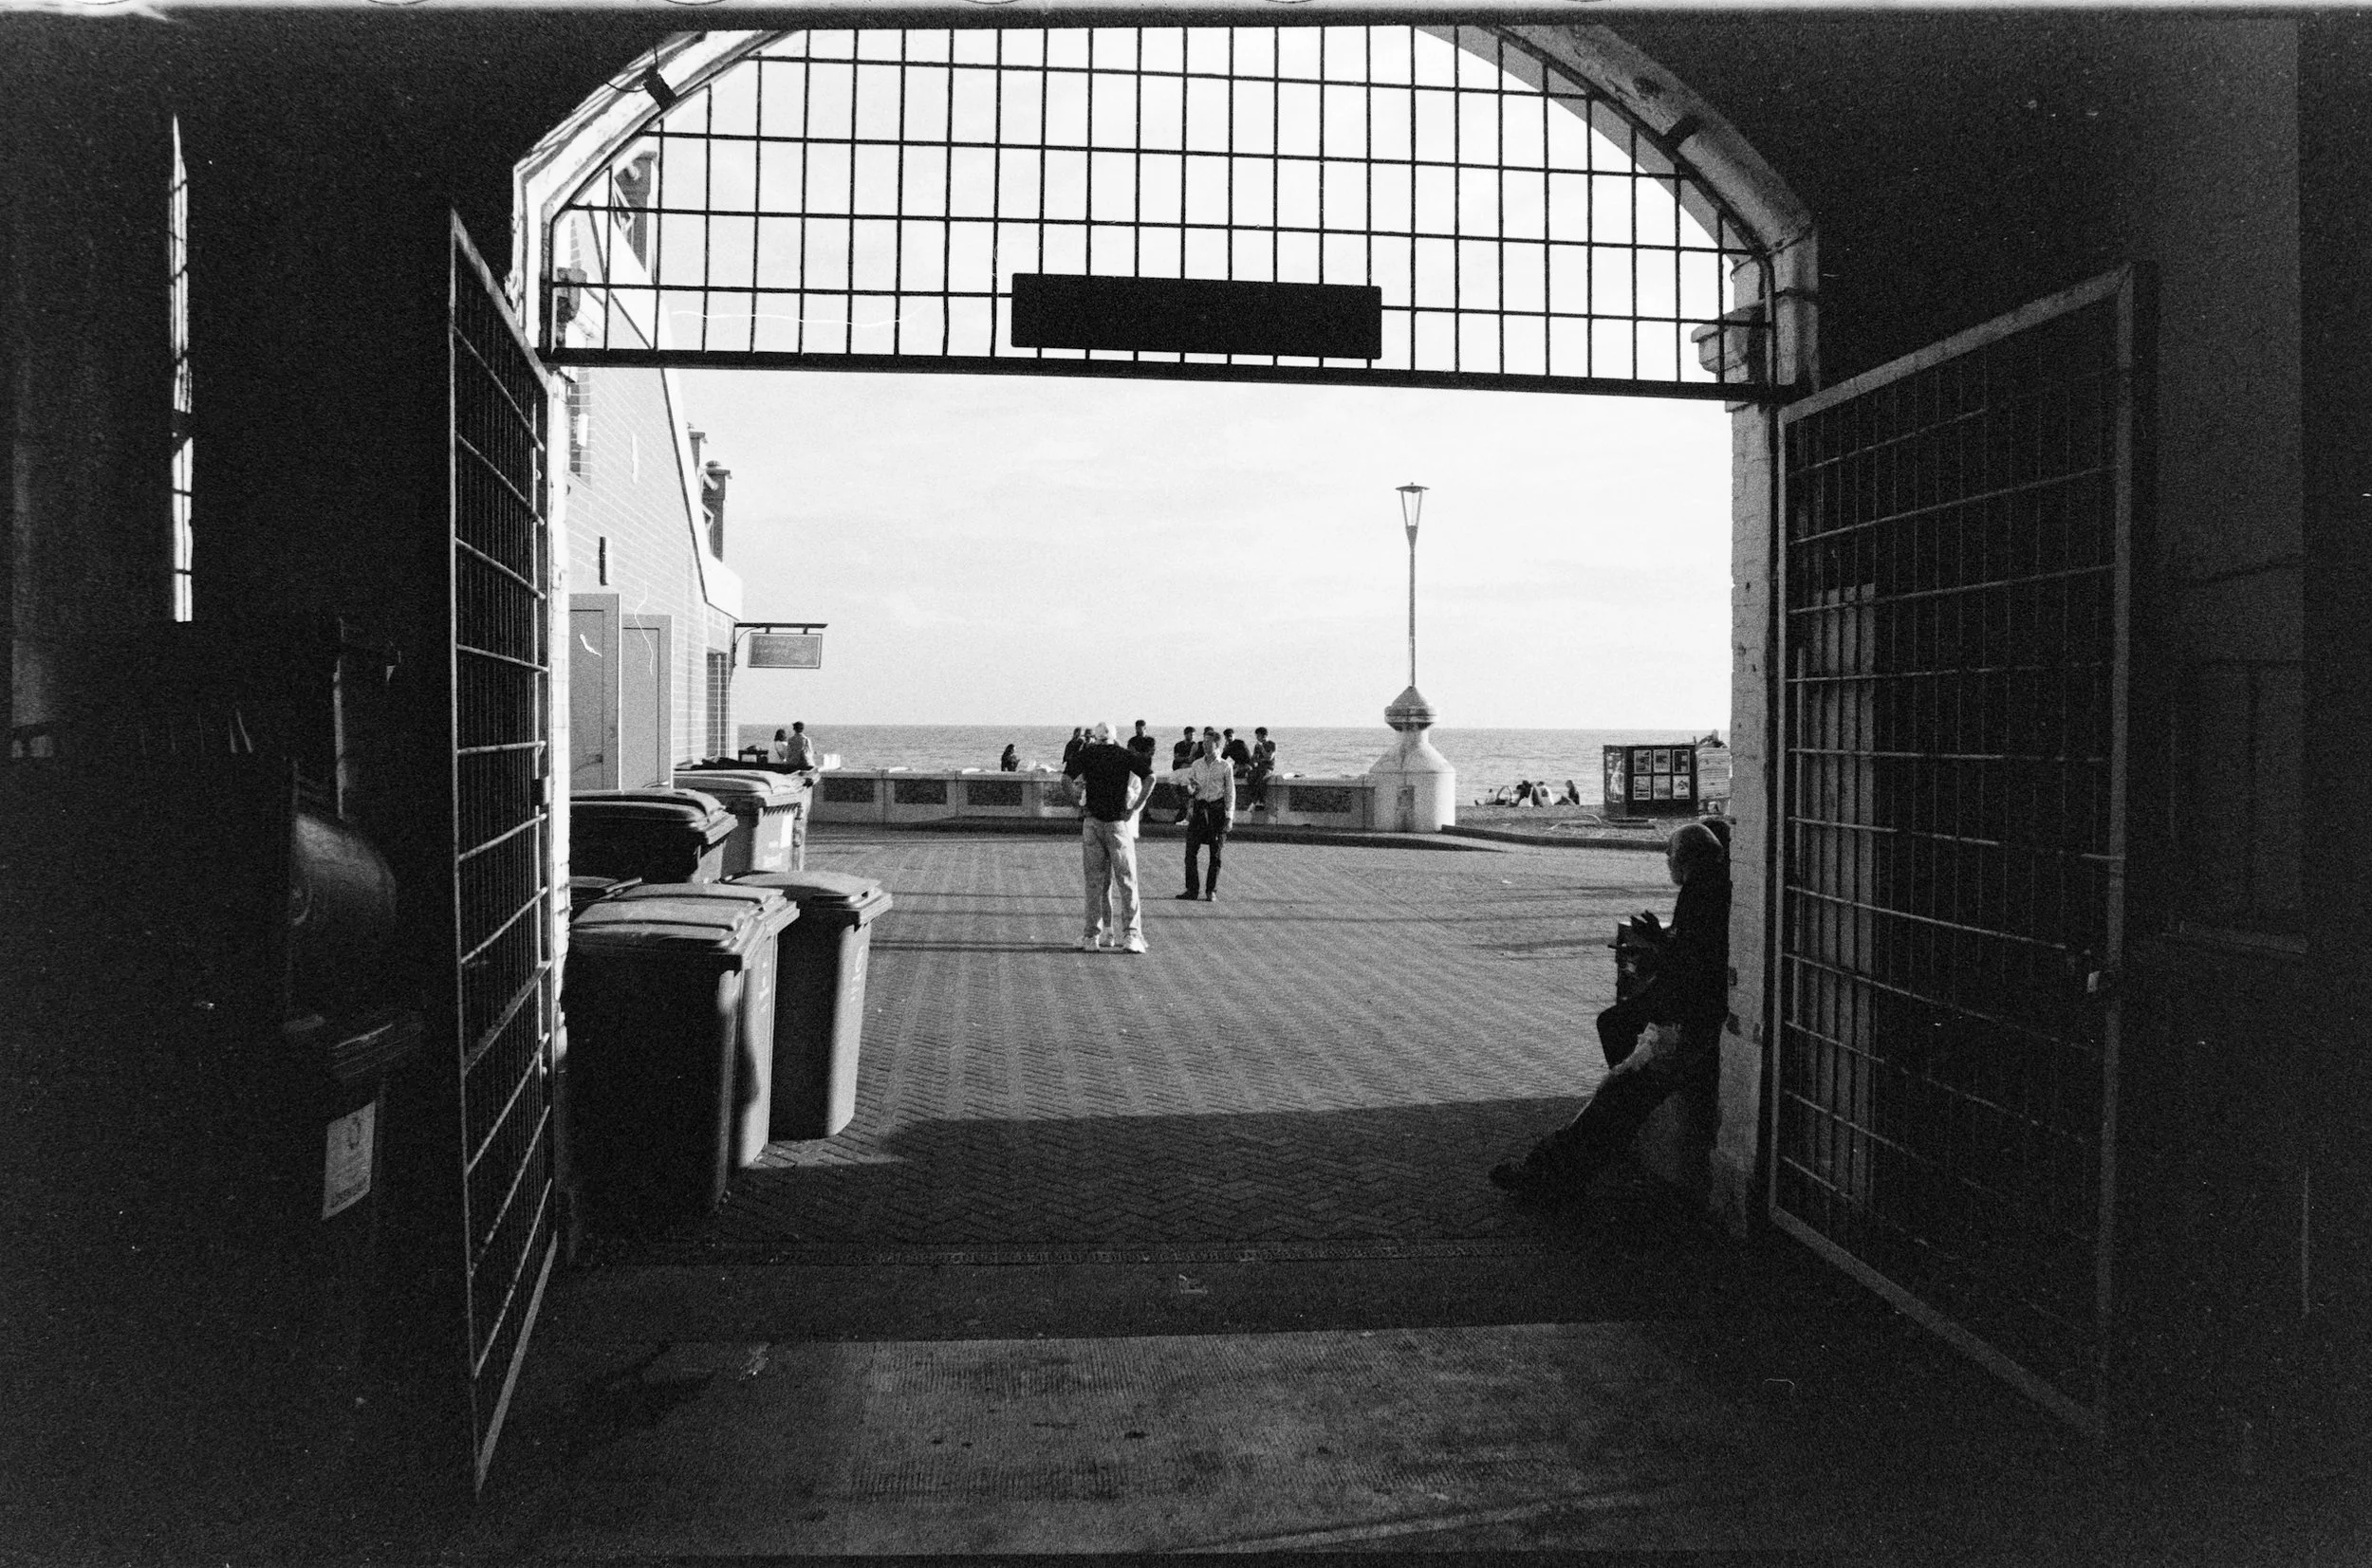
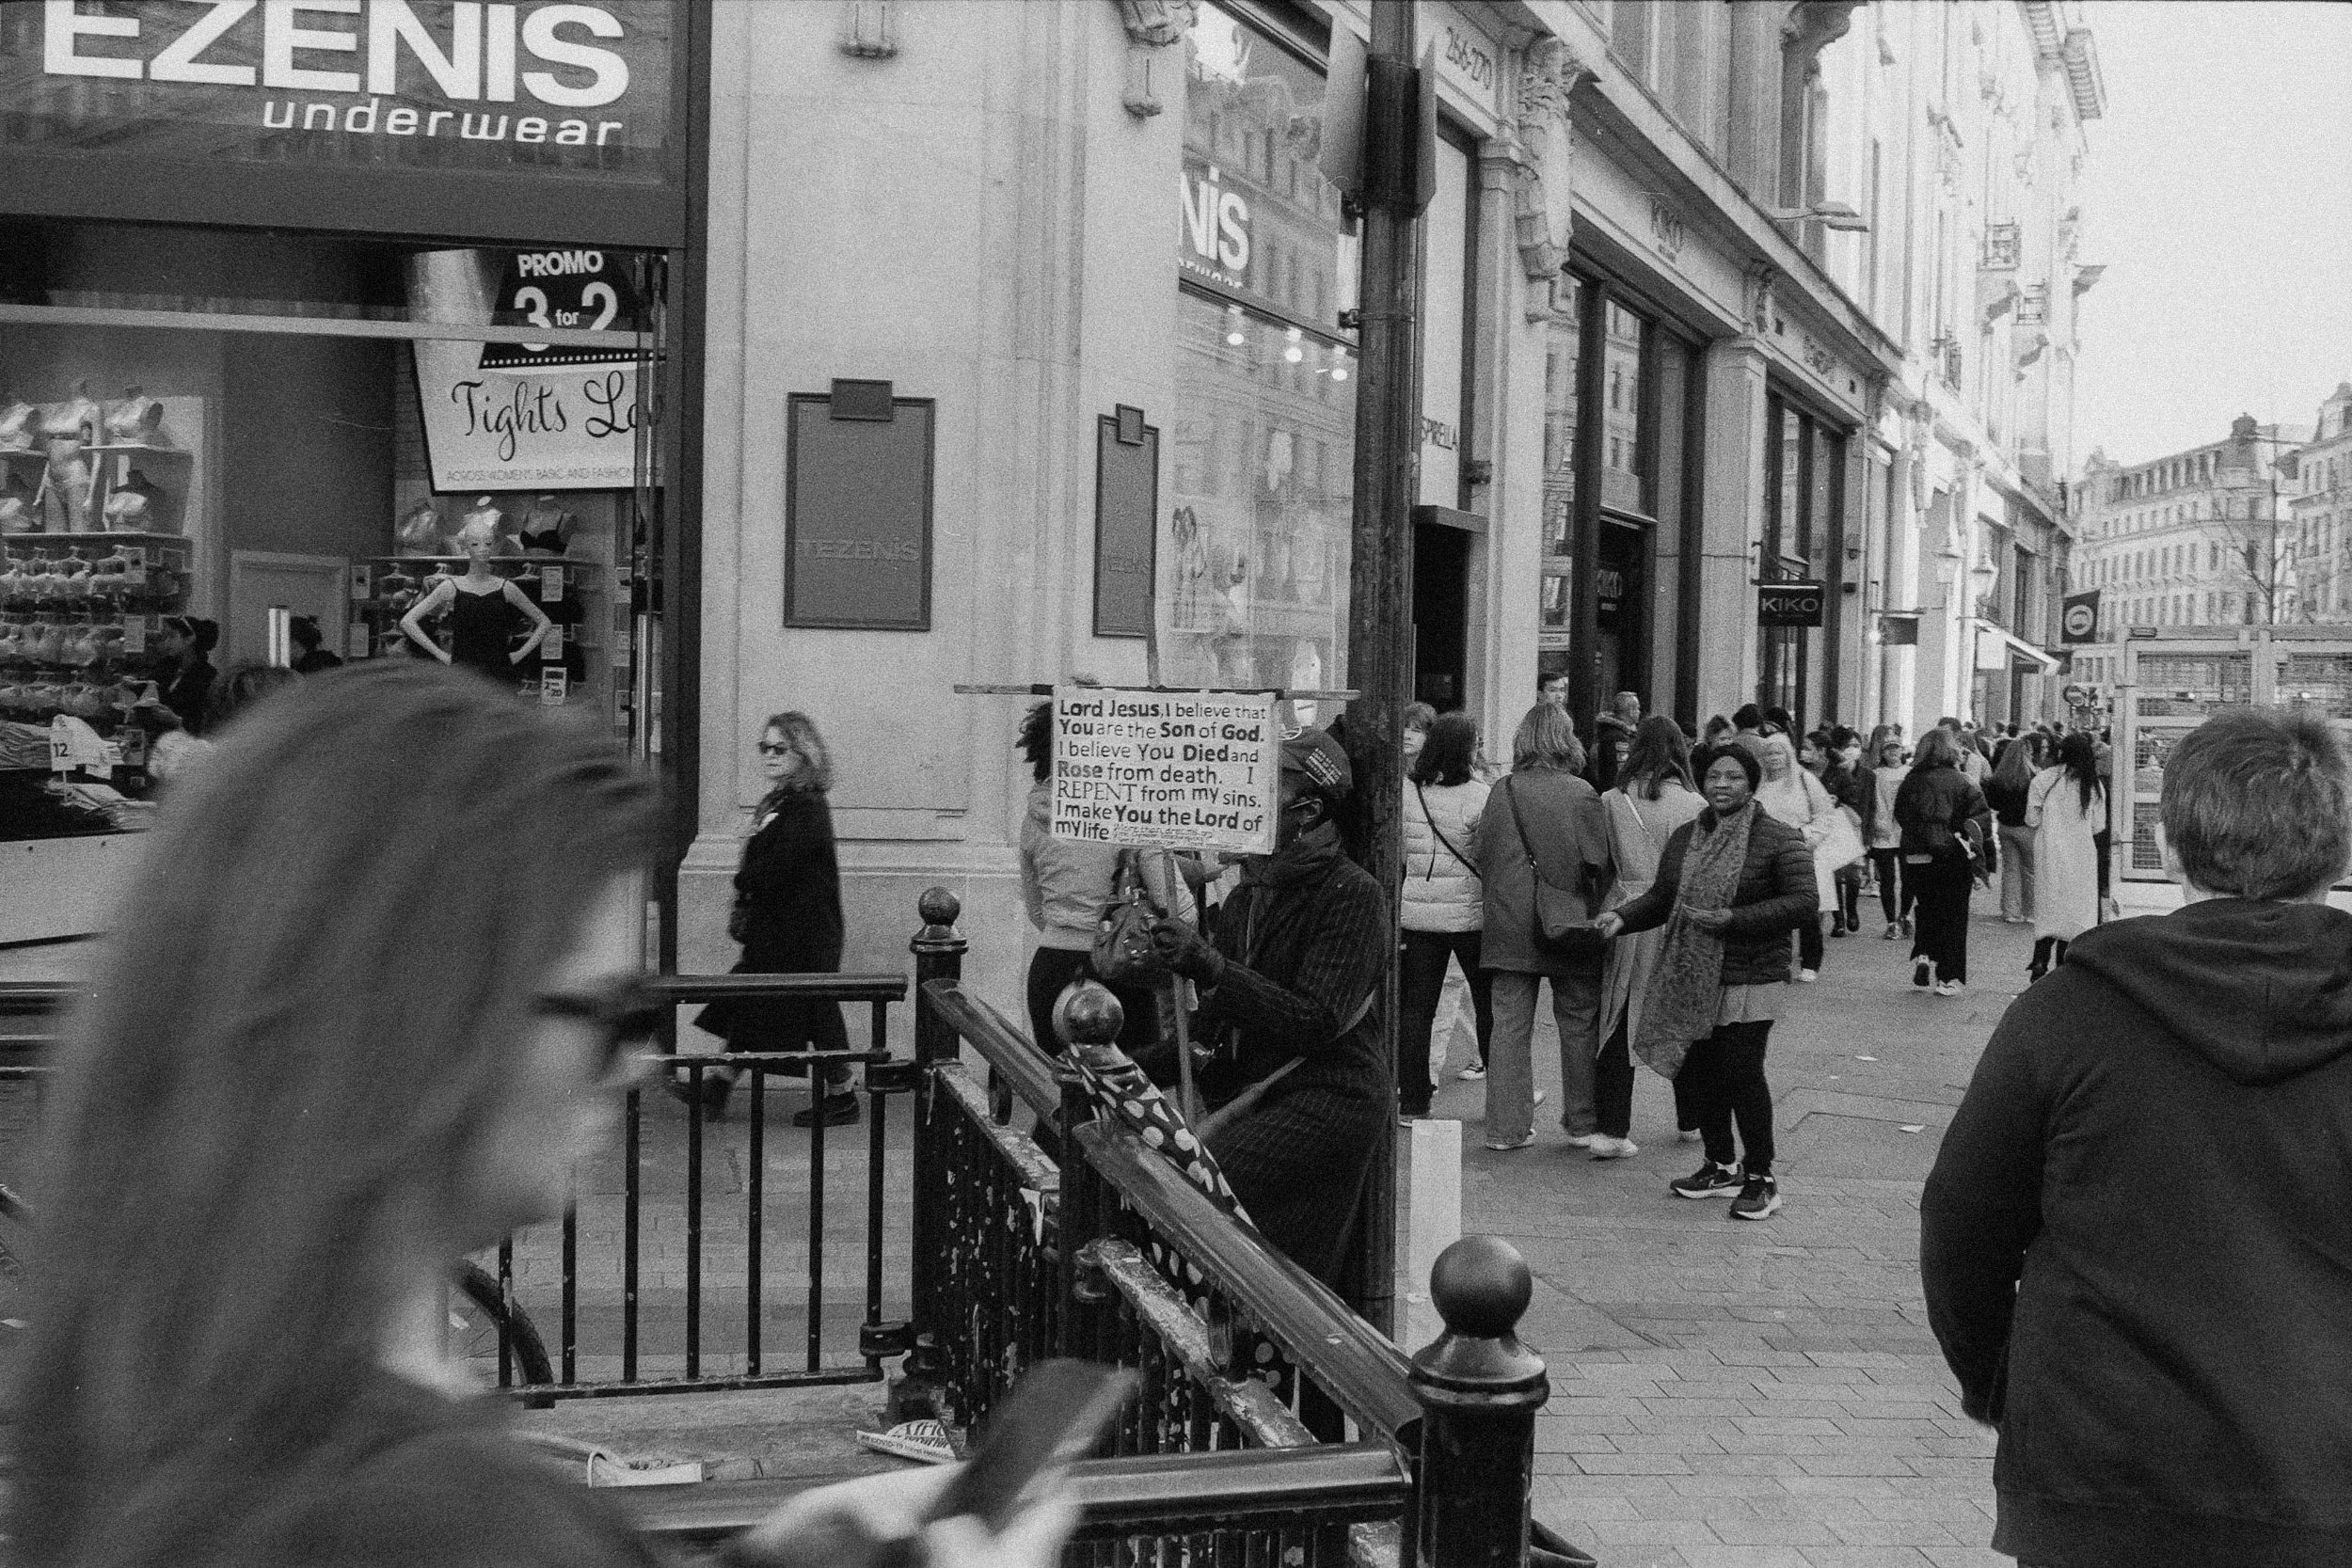
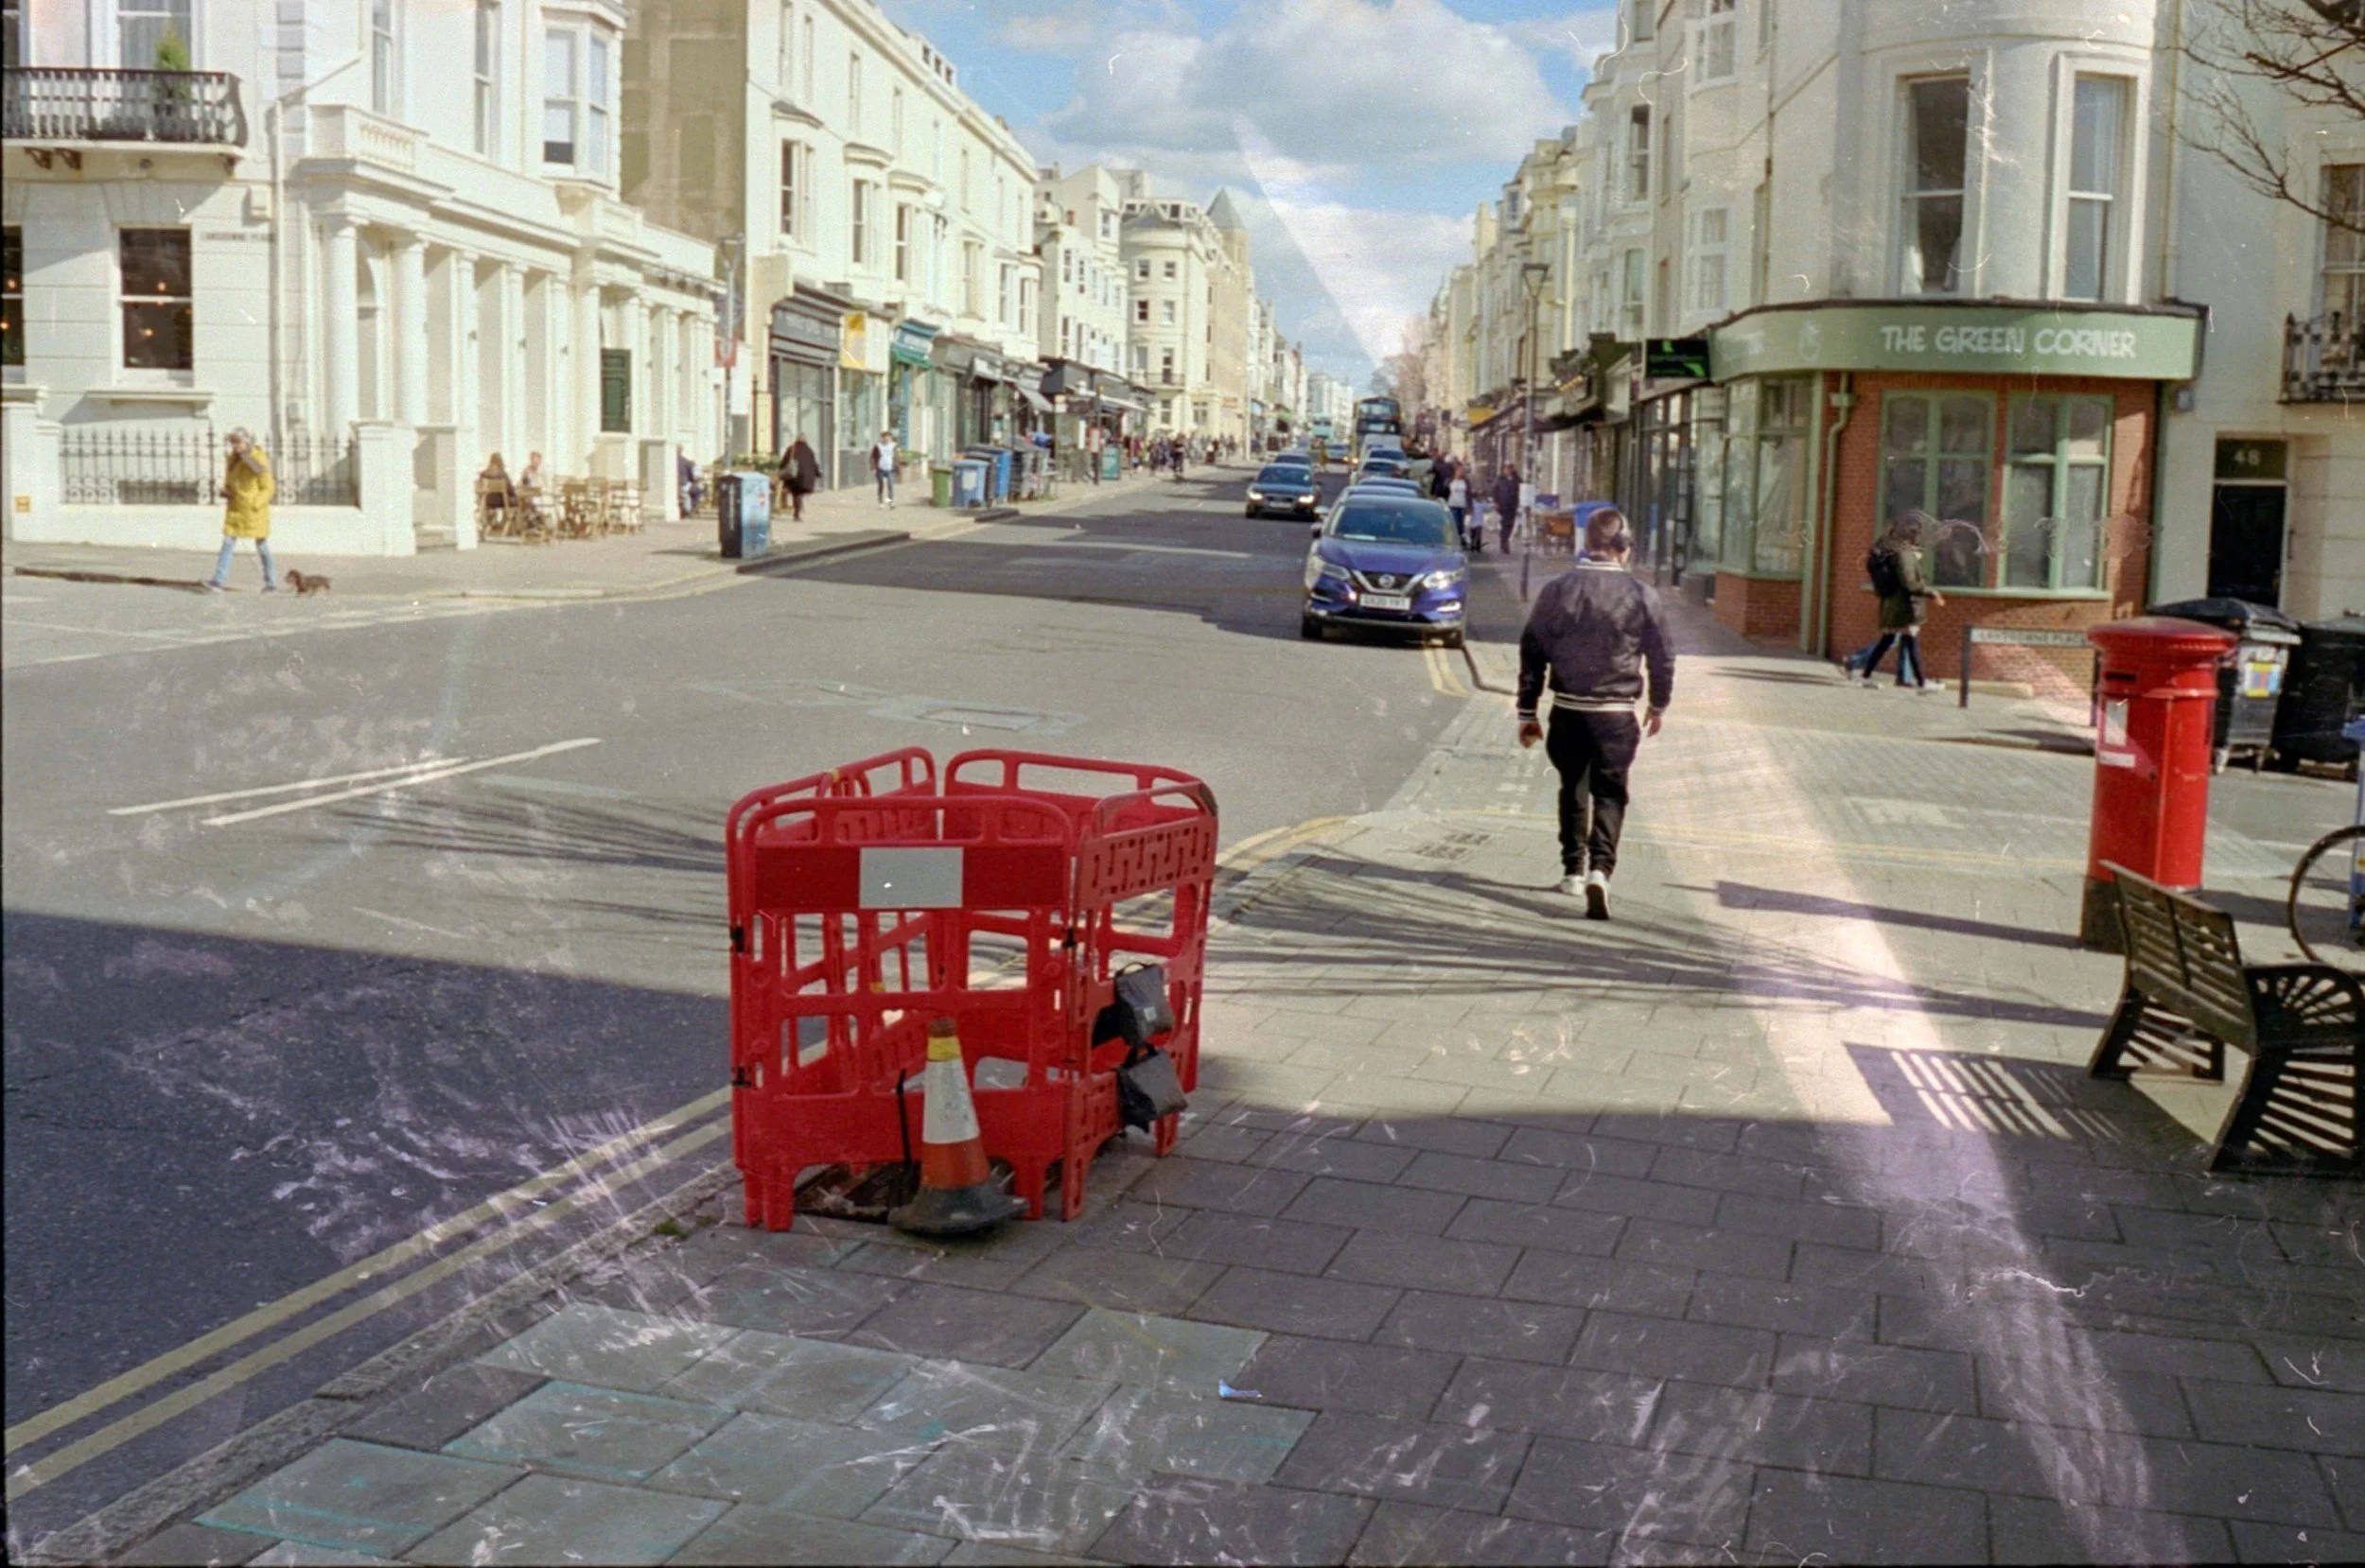
This isn't about abandoning the Leica; it's about expanding my toolkit. Imagine capturing the bustling Lanes of Brighton and Hove with the speed and precision the F80 offers, or perhaps experimenting with its multiple exposure mode to create ethereal street scenes. I'm eager to see how the matrix metering handles the challenging light often found on the Sussex coast, from the bright, open expanse of the beach to the shadowy alleyways.

The F80 also opens up a world of Nikon lenses, and I'm looking forward to exploring different focal lengths and apertures that were less practical with my M6 setup. This camera feels like a doorway to new creative avenues, a chance to experiment with different photographic approaches without sacrificing the beautiful rendering of film.
My first roll has been a very pleasant surprise and I'm already envisioning the possibilities. This isn't just a camera; it's an invitation to learn, adapt, and grow as a photographer. Wish me luck as I navigate the exciting new terrain of the Nikon F80! I'll be sharing my initial results and thoughts soon.
Until next time, keep snapping.

Take a stand - Bulk up
March 2022 provided an update for a couple of bits in my photography stable, which were long overdue.
Namely my new approach to sourcing colour film and how I develop it. Also my new process for scanning all my film.
I thought I would write this blog post, as I am sure there are a couple of take aways for other film photographers, or points to consider.

March 2022 provided an update for a couple of bits in my photography stable, which were long overdue.
Namely, my new approach to sourcing colour film and how I develop it. Also my new process for scanning all my film.
I thought I would write this blog post, as I am sure there are a couple of take aways for other film photographers, or points to consider.
As we enter into the spring and summer season here in the UK, I’m always keen to shoot some colour film, for the limited time that the summer light cascades our island.
I’m not one to shoot premium black and white film, my normal go to is Fomapan 400, which in 100ft, costs £40. I bulk load at home and the quality, tonal range and price, suits me down to the ground.


Colour film at present is evidencing crazy price hikes here in the UK. So in March 2022, I decided to invest in a 400 ft bulk roll of Kodak Vision 3 250d from the folks at Frame 24, to go down the bulk loading route workflow I have for B&W. At £180 + VAT + Shipping, this was quite a significant investment, but the maths dictated that for 90+ x 30 exposure rolls, this works out at c. £2.50 a roll.


My only problem was how to spool 400ft into 100ft reels for the AP Loader??
I saw advice on Reddit, that you could spool the film around the cardboard roll from the centre of a toilet roll, inside of a changing bag. For me, this didn’t work, as I found it too labour intensive, my hands got too hot and left too much sweaty residue on the unexposed film, as outlined in the photos below:


After further research, this lead to the world of 3d printing and a Creative Commons license for the following print schematics. A better video working example, can be found here. I have spoken in the past about the excellent community spirit of the film community, which is demonstrated fully by the designer offering his design for free.
A further search, sourced a 3d printing house in Nottingham, who fulfilled the order for £43.
Next up is the (not so) daunting stage of removing the remjet layer from Vision3 film. (an explanation of what remjet is, is here).
Its essential that commercial film developing labs are not sent Vision 3 film to develop, as this will ruin their machines.
This isn't too cumbersome, I found this video on YouTube. In essence, I pre-soak the film for 5 minutes at 38.5 degrees, then pour in the bicarbonate of soda solution for the 2 1/2 agitation, as outlined in the video.
The colour film is then put through the development and blix stage of the development.
Next is the removal of the remaining remjet, for this the secret weapon is a microfibre sponge, I sourced from a local poundshop. This means that you do not touch the film at this stage of the process. For this, I take the film out of the developing reel and hang in the drying clips, I then wipe (and rinse with the sponge) X 3 on both sides of the film, to remove the residual remjet.
I then put the film back on the reel, to complete the stabiliser final stage of development.
Because of the faffing about with the above, I personally add a photoflo rinse stage after stabilising, which removes any remaining stains on the film.


Home scanning has and will always be the bain of the film enthusiast. It's the one process of film that's as close to ‘polishing a turd / editing digital images' in lightroom, it's something that I look to keep as simple as possible, with a rigid and tested workflow.
My introduction to film and in my pursuit to try and manage what some would call the unjust cost in film photography - and also as part of my approach to maintaining a more level of control over the process - I originally invested in a Epson V600 scanner at the beginning of my film journey in 2016, to allow me a ‘one size fits all’ approach to scanning the film that I have been developing at home.
Whilst this journey has been littered with challenges, a steep learning curve, many rolls of ‘spoilt film’ its been a very rewarding one, which I wouldnt change at all.
I think that I have now finally turned a corner and if I can say (with trepidation), is the start of my refined workflow.
Whilst the V600 is a decent beginners bit of kit for 120 / medium format and large format / 4x5, the outputs for 35mm are little more than sub par acceptable, with the ability in getting decent colour scans being somewhat of a lottery. Bearing in mind beginners do not look to expand in to the 120 or 4x5 arena, until a number of years, would deem this bit of kit obsolete?
I had originally given up on using Negative Lab Pro with the V600 as I just couldnt resolve the colour cast that was yielded from my V600 in colour scanning, but I have now discovered that this appears to be entirely the route cause of a cheap amazon light box (read buy cheap by twice).
Until recently, things changed. I was able to ‘invest’ in the Complete Basic Kit for 35mm and 120 Film Scanning by Negative Supply. What a sublime piece of kit.

The copy stand is milled from aluminium and the film holders are produced in plastic (fair cheaper than the original aluminium ones). Its compact and can be set up in seconds.
Where this kits excels is the quality of the lightbox. I elected for the dearer version, producing 99 nits of light.
The speed of this process is night and day compared to the V600 and silverfast software.
The negative supply setup can scan a roll of film in 90 secs, compared to 5-10 minutes on the V600.
I use my mark 1 Olympus OMD EM5 micro four thirds camera for scanning, and convert the .orf raw file into a tiff file in Photoshop. As this is a 8bit file, I import these files into Negative Lab Pro in lightroom and select the ‘tiff prep' option.
This is a part of the NLP that's essential to remove the colour cast on images. I then run the software with standard settings, but I prefer the noritsu to frontier scanner.
I then save the image as a copy and then delete the original positive image of the film negative.
Thats it.
On review some folk send their film to labs, as they do not have the time and/or inclination to develop at home, me I am too much of a spend thrift , but more importantly, want the broader engagement with the entire process.
The above whilst post investment is an excellent workflow to save a few quid, this is probably best fulfilled if undertaken within a group to share the investment costs.
400 ft of Vision 3 250d is £222 for 92 rolls of film or £2.40 per roll, so shared with a group of 5 or 10 folk is very reasonable, compared to the current price of portra 160, 400 or 800 at £15+ or colorplus and gold consumer film now nearing £10 a roll.
Something to consider. Until next time, keep snapping.
Buy cheap, buy twice.
I’ve been using a bulk film loader for my black and white film, for the last 4 years, coupled with developing and scanning my own film its a real A to Z process of film photography. Thoroughly engaging and cheap!
Whilst the investment into the system is c. £150 (£60 for the bulk loader, £20 for the reusable canisters and then a bulk roll of film), the (financial) benefits are soon reaped.
I historically have taken this ‘mindset’ to the next level, more often than not, buying non premium film stock. This has historically suited me well. As a single parent to two kids, I have historically had very limited time to shoot on a weekend afternoon, or generally in good light.
As my kids are now 13 and 17, we are getting out a little later on the weekday evenings and also at the weekend.
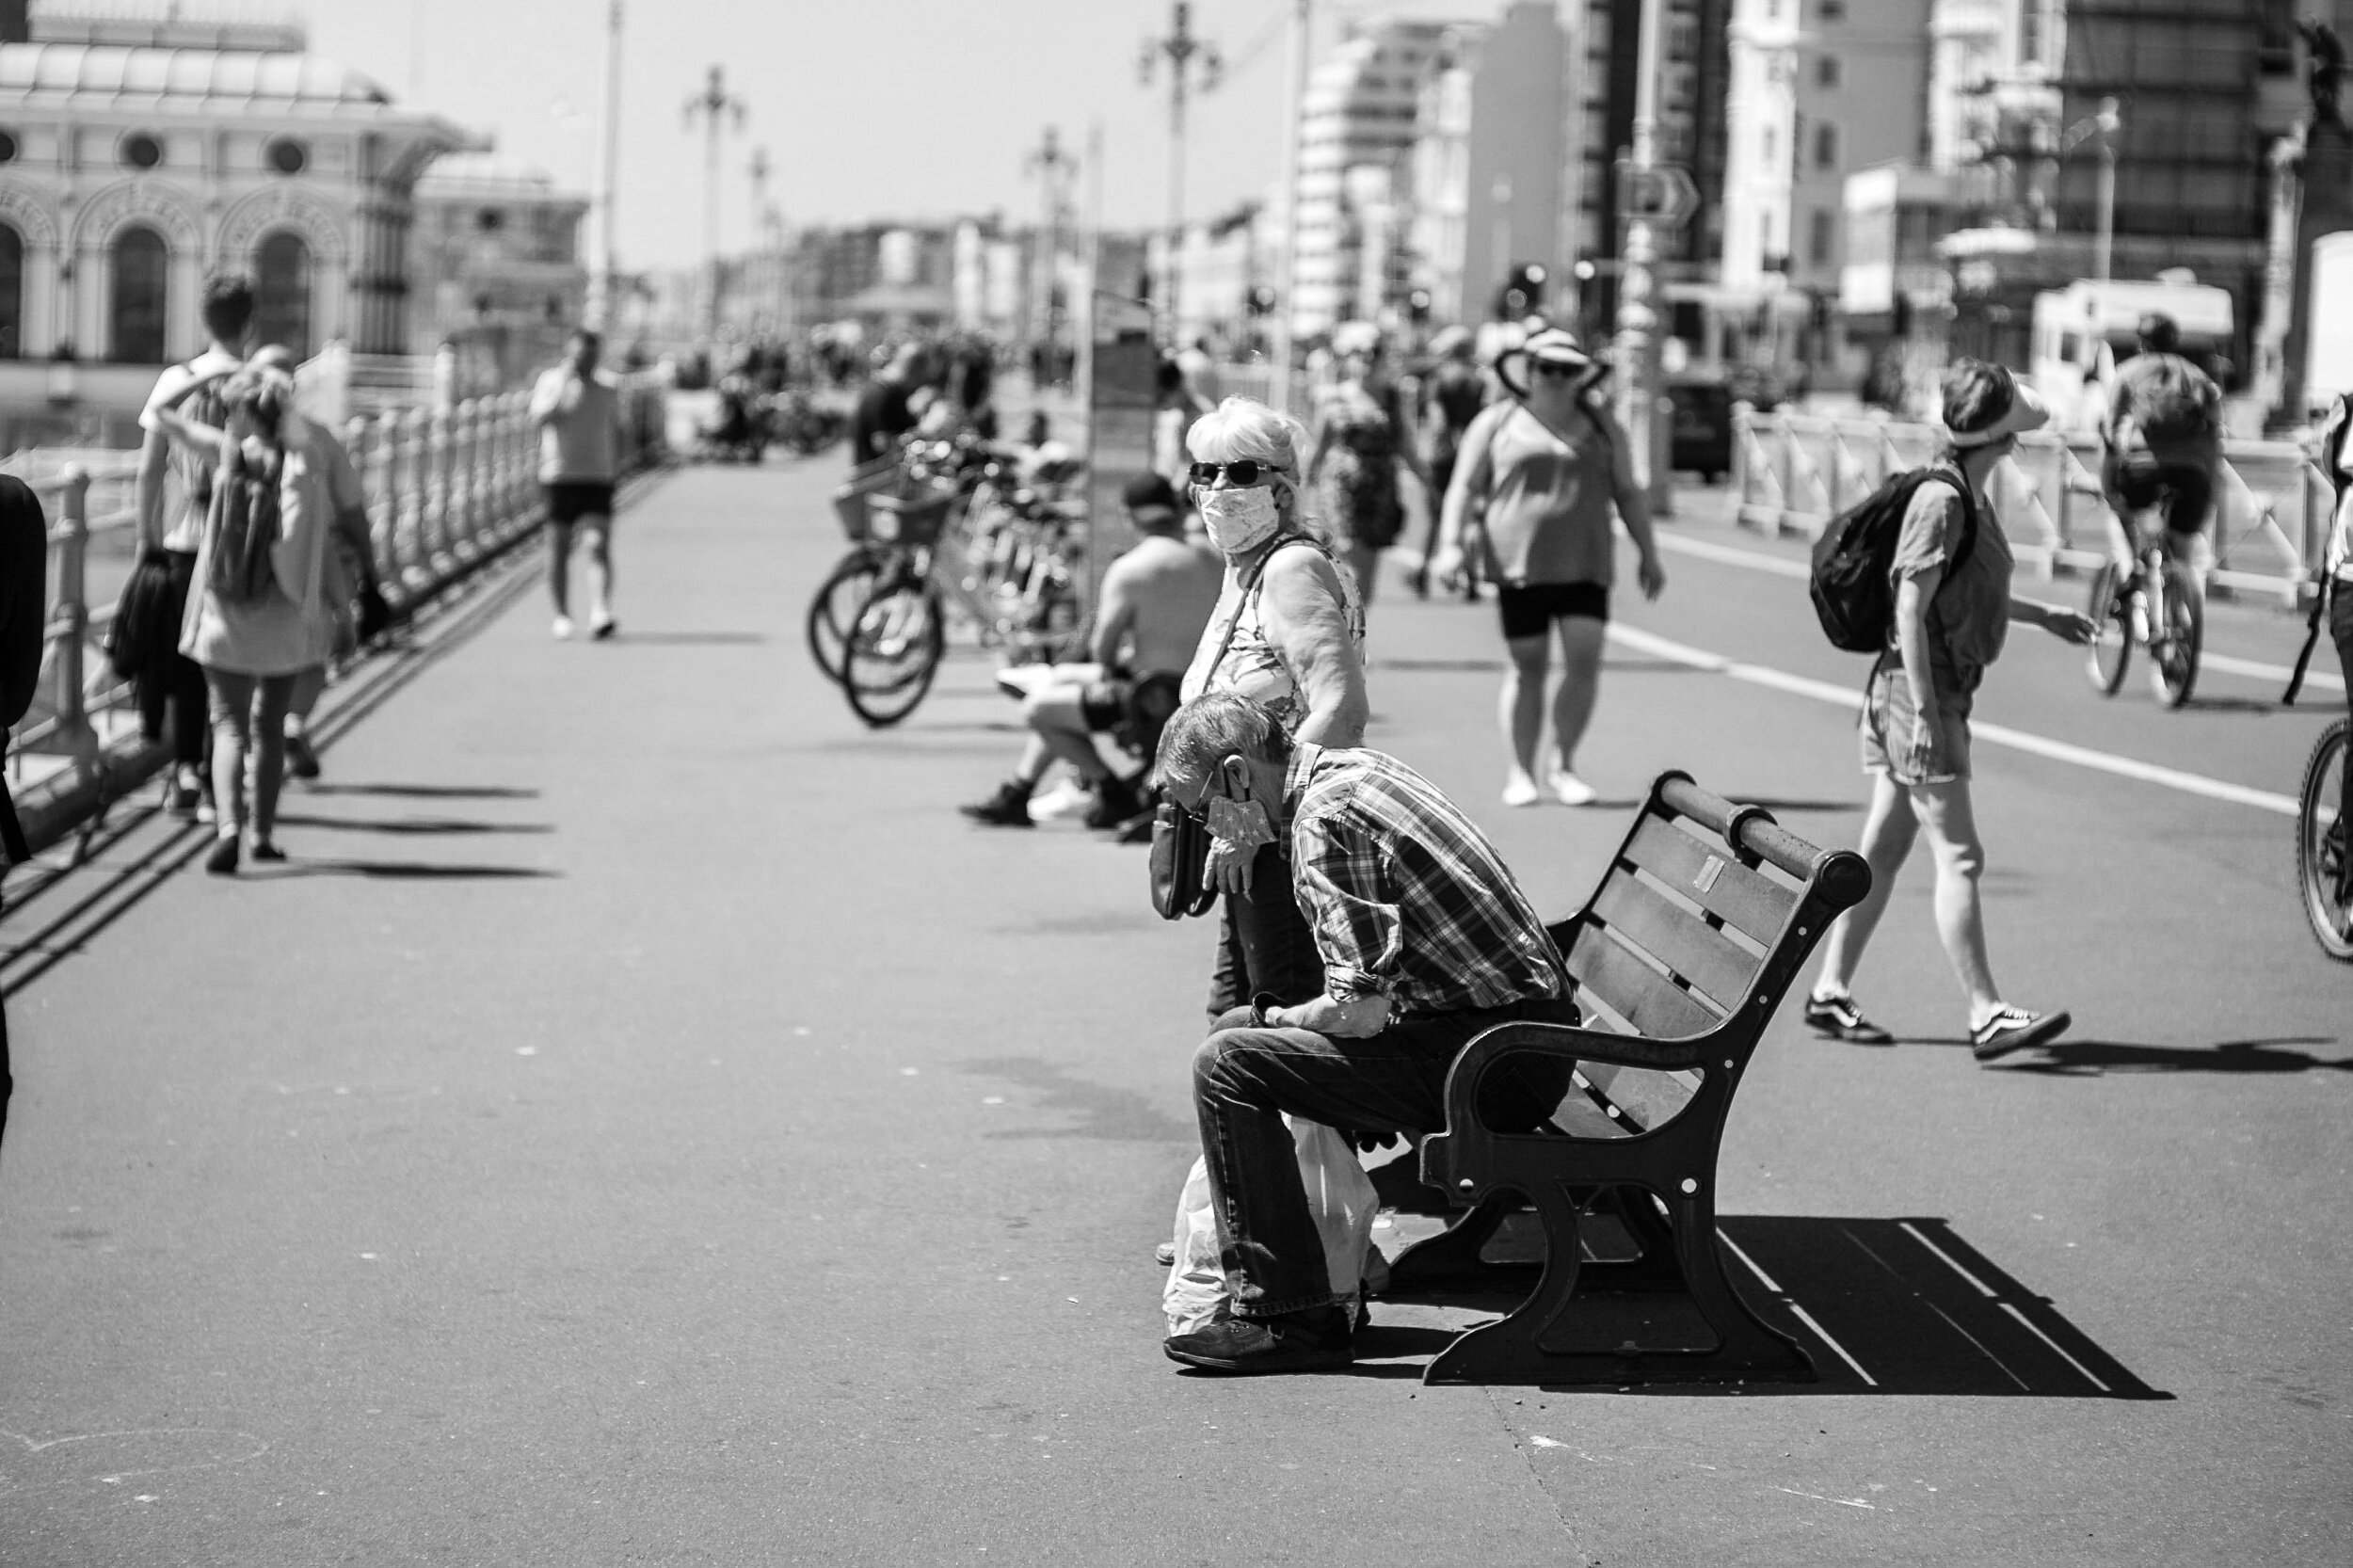
As part of my ongoing 12 month Brighton Beach - Winter Summer project, I wanted to get out of an evening to cover the social scene as we enter into Spring and lockdown / restrictions relating to COVID-19 start to unwind.
I decided to buy a 100ft bulk roll of Ilford HP5+, as the film has a strong reputation for excellent latitude.
I went out on Monday of this week, to see the sights of the beach sea front. Sunset was at 17:31 and I was shooting from 16:30 - 18:45. With this in mind, I loaded up the Leica M4P, set the light meter to 1600 and shot away.
Thoughts in a word. …………WOW!
Whilst shooting Ilford HP5+ at box speed or iso 200, I have generally found the tonality pleasing but a little flat (when shooting in daylight), which is why I generally preferred the denser / grainier look of Kodak Tri-X 400 or cheaper stocks, such as Rollei Retro 400s:


That said, my outing this week, pushing Ilford HP5+ to 1600 has been a rebirth. I have been blown away by the tonality and lack of excessive grain, especially when I am using a flatbed Epsom V600 scanner, which is renowned for having poor capabilities, regarding 35mm film negatives:


Not only does iso 1600 allow for late night shooting, it also allows for excellent zone focusing options at f16 in good light for street photography.
I load the reusable canisters for 24 exposure rolls, so I expect to get circa 25 rolls from the 100ft roll of bulk film. That works out at £2.79 per roll.
Until next time, keep snapping.
A selection of the images within this article are available for sale on the Website or Etsy Store, if you would like to enquire about something else, please click the email icon at the foot of this page.
Nifty Fifty.......? .......... go on then.
I’m frantically getting out and about before lockdown 2.0 or the weather puts a stop to it, the idea is to build a catalogue of photos to edit over the winter.
Yesterday was pretty pleasant in Brighton. Folk out and about enjoying the last rays of summer / autumn sun rays.

I’m frantically getting out and about before lockdown 2.0 or the weather puts a stop to it, the idea is to build a catalogue of photos to edit over the winter.
Yesterday was pretty pleasant in Brighton. Folk out and about enjoying the last rays of summer / autumn sun.

I actually bumped into a photographer yesterday, we were both CHIMPING, gave an acknowledged nod to each other. Having a chat for a couple of minutes, the fella was from London, and was enjoying his maiden trip to Brighton.
To change things up, I started using my 85mm, which I used as part of my ongoing COVID19 coverage here in Brighton, I just love the compressed images and the bokeh, these are ideal for environmental portraits and street in general.
I have also queried why I have not been interested with the 50mm, I think the very reasonable prices and kit lens status, had pushed me away from it, numpty!


I’ve been reading quite a few photo books since March 2020, to get some creativity ideas. What I have enjoyed of late, is taking more street portraits and candids.
I acquired a Sony 50mm kit lens for the A7iii, as I’m keen to build on my street portraits, as well as providing a different perspective for my general street photos.
As well as the perspective being that bit closer to that of the human eye of 43mm, the compression allows you to stand a little further back from street portraits, which I’m finding is more friendly when taking candids in the street, compared to the 28mm or less in the face.


Yesterday was World Mental Health day, long may the spirit and mindset of this fella last through the winter.
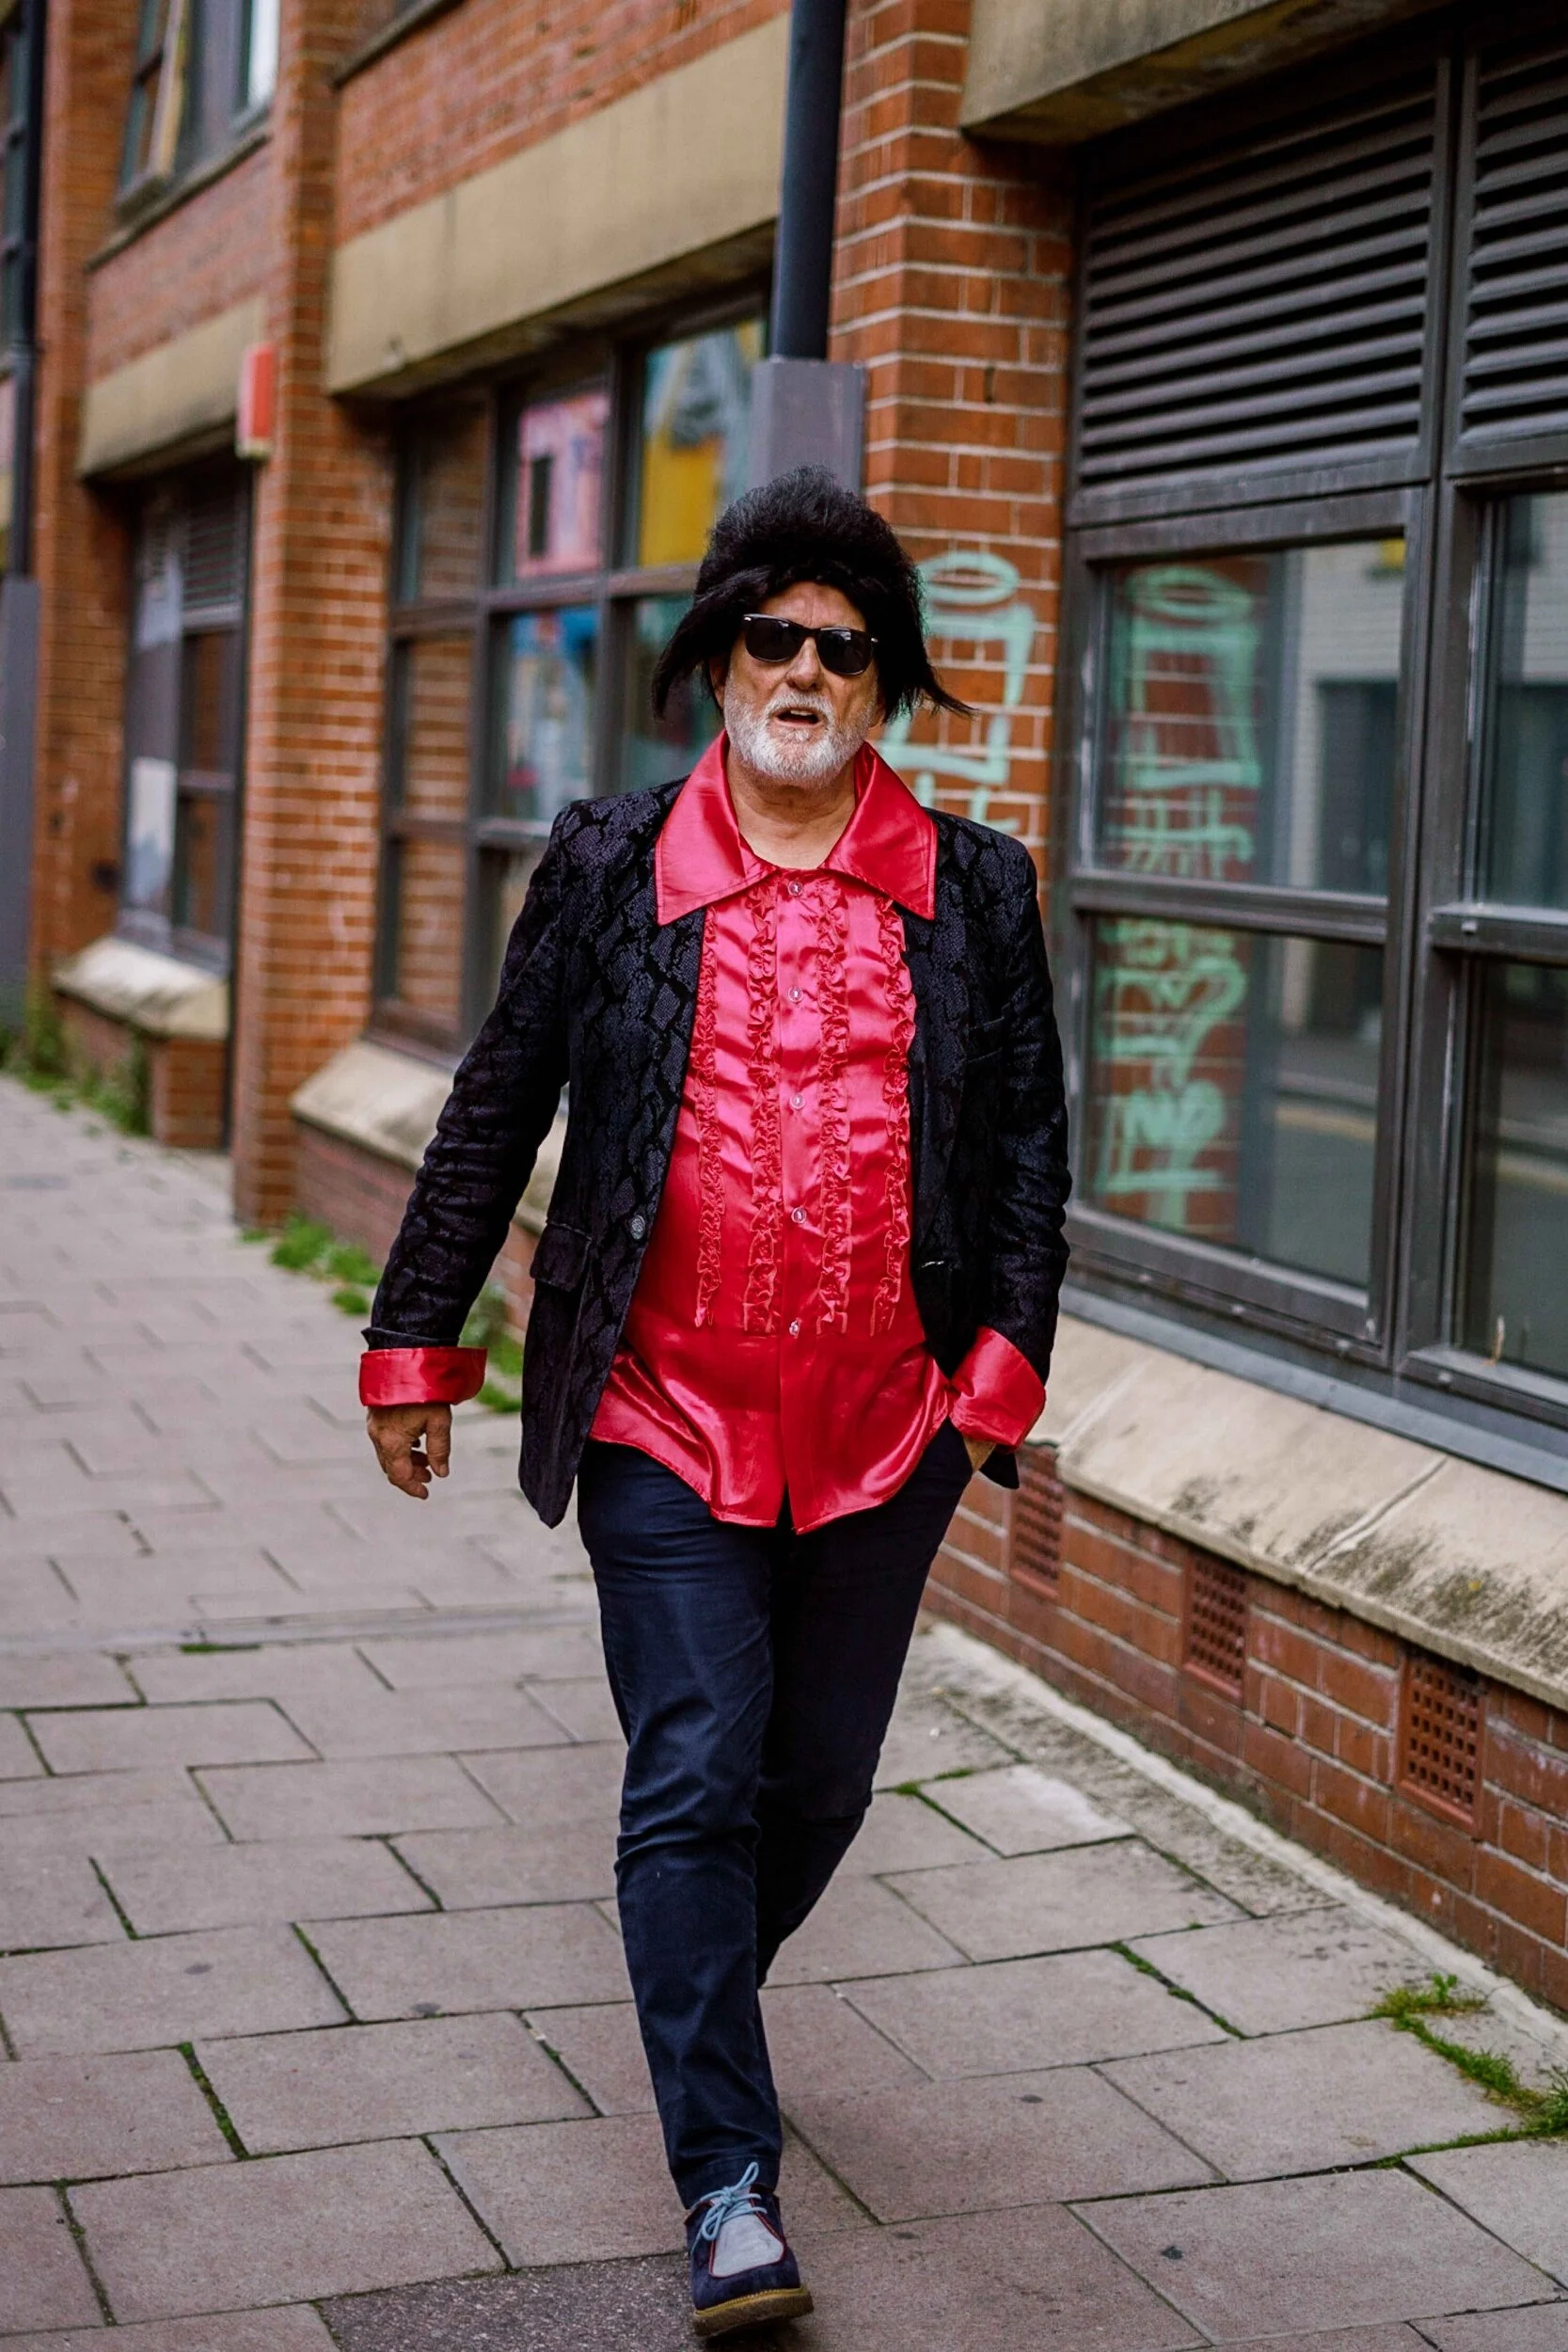
I asked to take his photo, was told sure buddy, when I asked ‘Are you doing to a Stag Do, or a Birthday Party’? he responded ‘Naaa mate, I haven’t been out for a while, so I thought I didn’t dress up’.
Good for you.
Until next time, keep snapping.
A selection of the images within this article are available for sale on the Website or Etsy Store, if you would like to enquire about something else, please click the email icon at the foot of this page.
(Self) Reflection
Whilst I am one to (try and) consciously avoid GAS (Gear Acquisition Syndrome), there are instances when this allows you to look at the same thing in a different light, to give a fresh perspective.
I say this as this is something that I had endured in the past. Chasing camera brands, lens, tripods, £££$$$!
I came across an interesting blog on Sean Tucker’s website, pre covid19 lockdown, which got me thinking about exploring other lens outside of my comfort zone, which is something that I have wanted to undertake for some time.
The above images was taken with an 85mm lens, as part of my COVID-19 ongoing project, documenting the impact on the virus on Brighton / East Sussex.
I love the content that Sean puts out, philosophical in nature, with a slant towards challenging the norm and pushing boundaries. He compared a variety of street photography lens, 50mm, 85mm, 35mm, in several blog posts a couple of years ago.
This idea is further visualised on Kai Wong’s YouTube post, with a comparison of the ‘staple’ 28mm vs 35mm vs 50mm lens.
Whilst the 85mm lens is typically aimed at portrait photographers, where the compression of the lens allows for backgrounds to be produce a natural bokeh, I think it gives an added dimension in street photography.
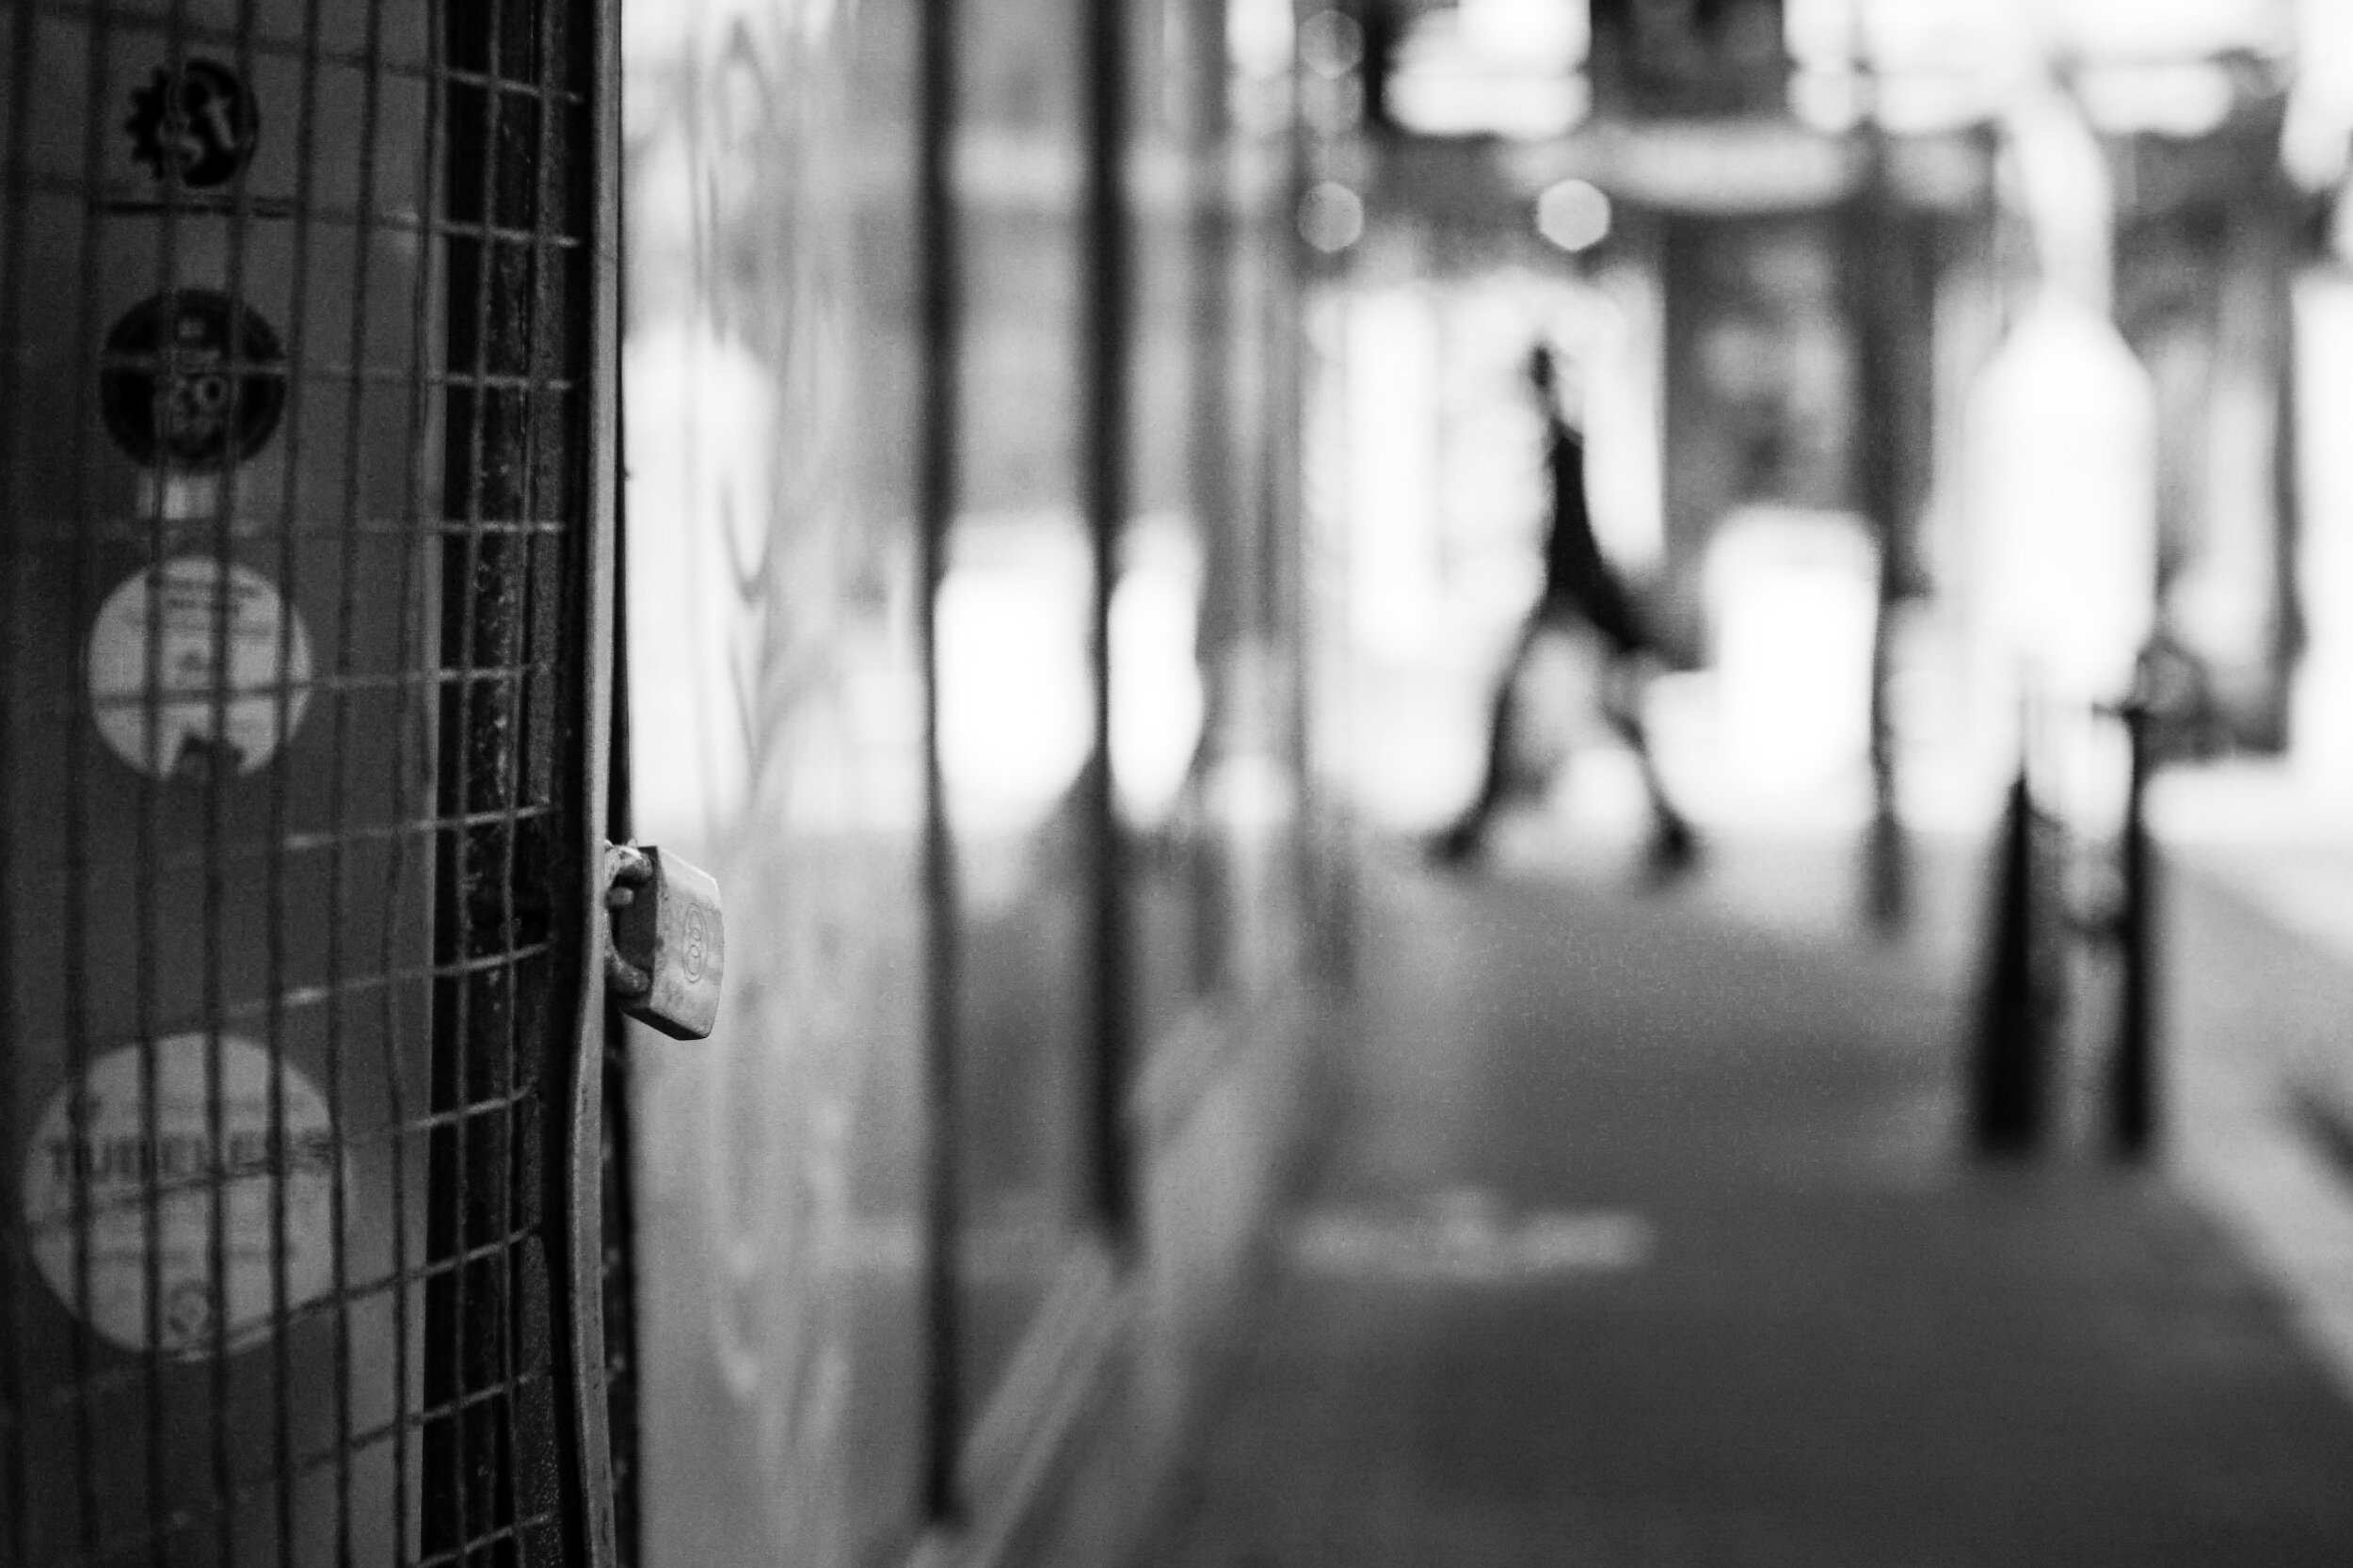
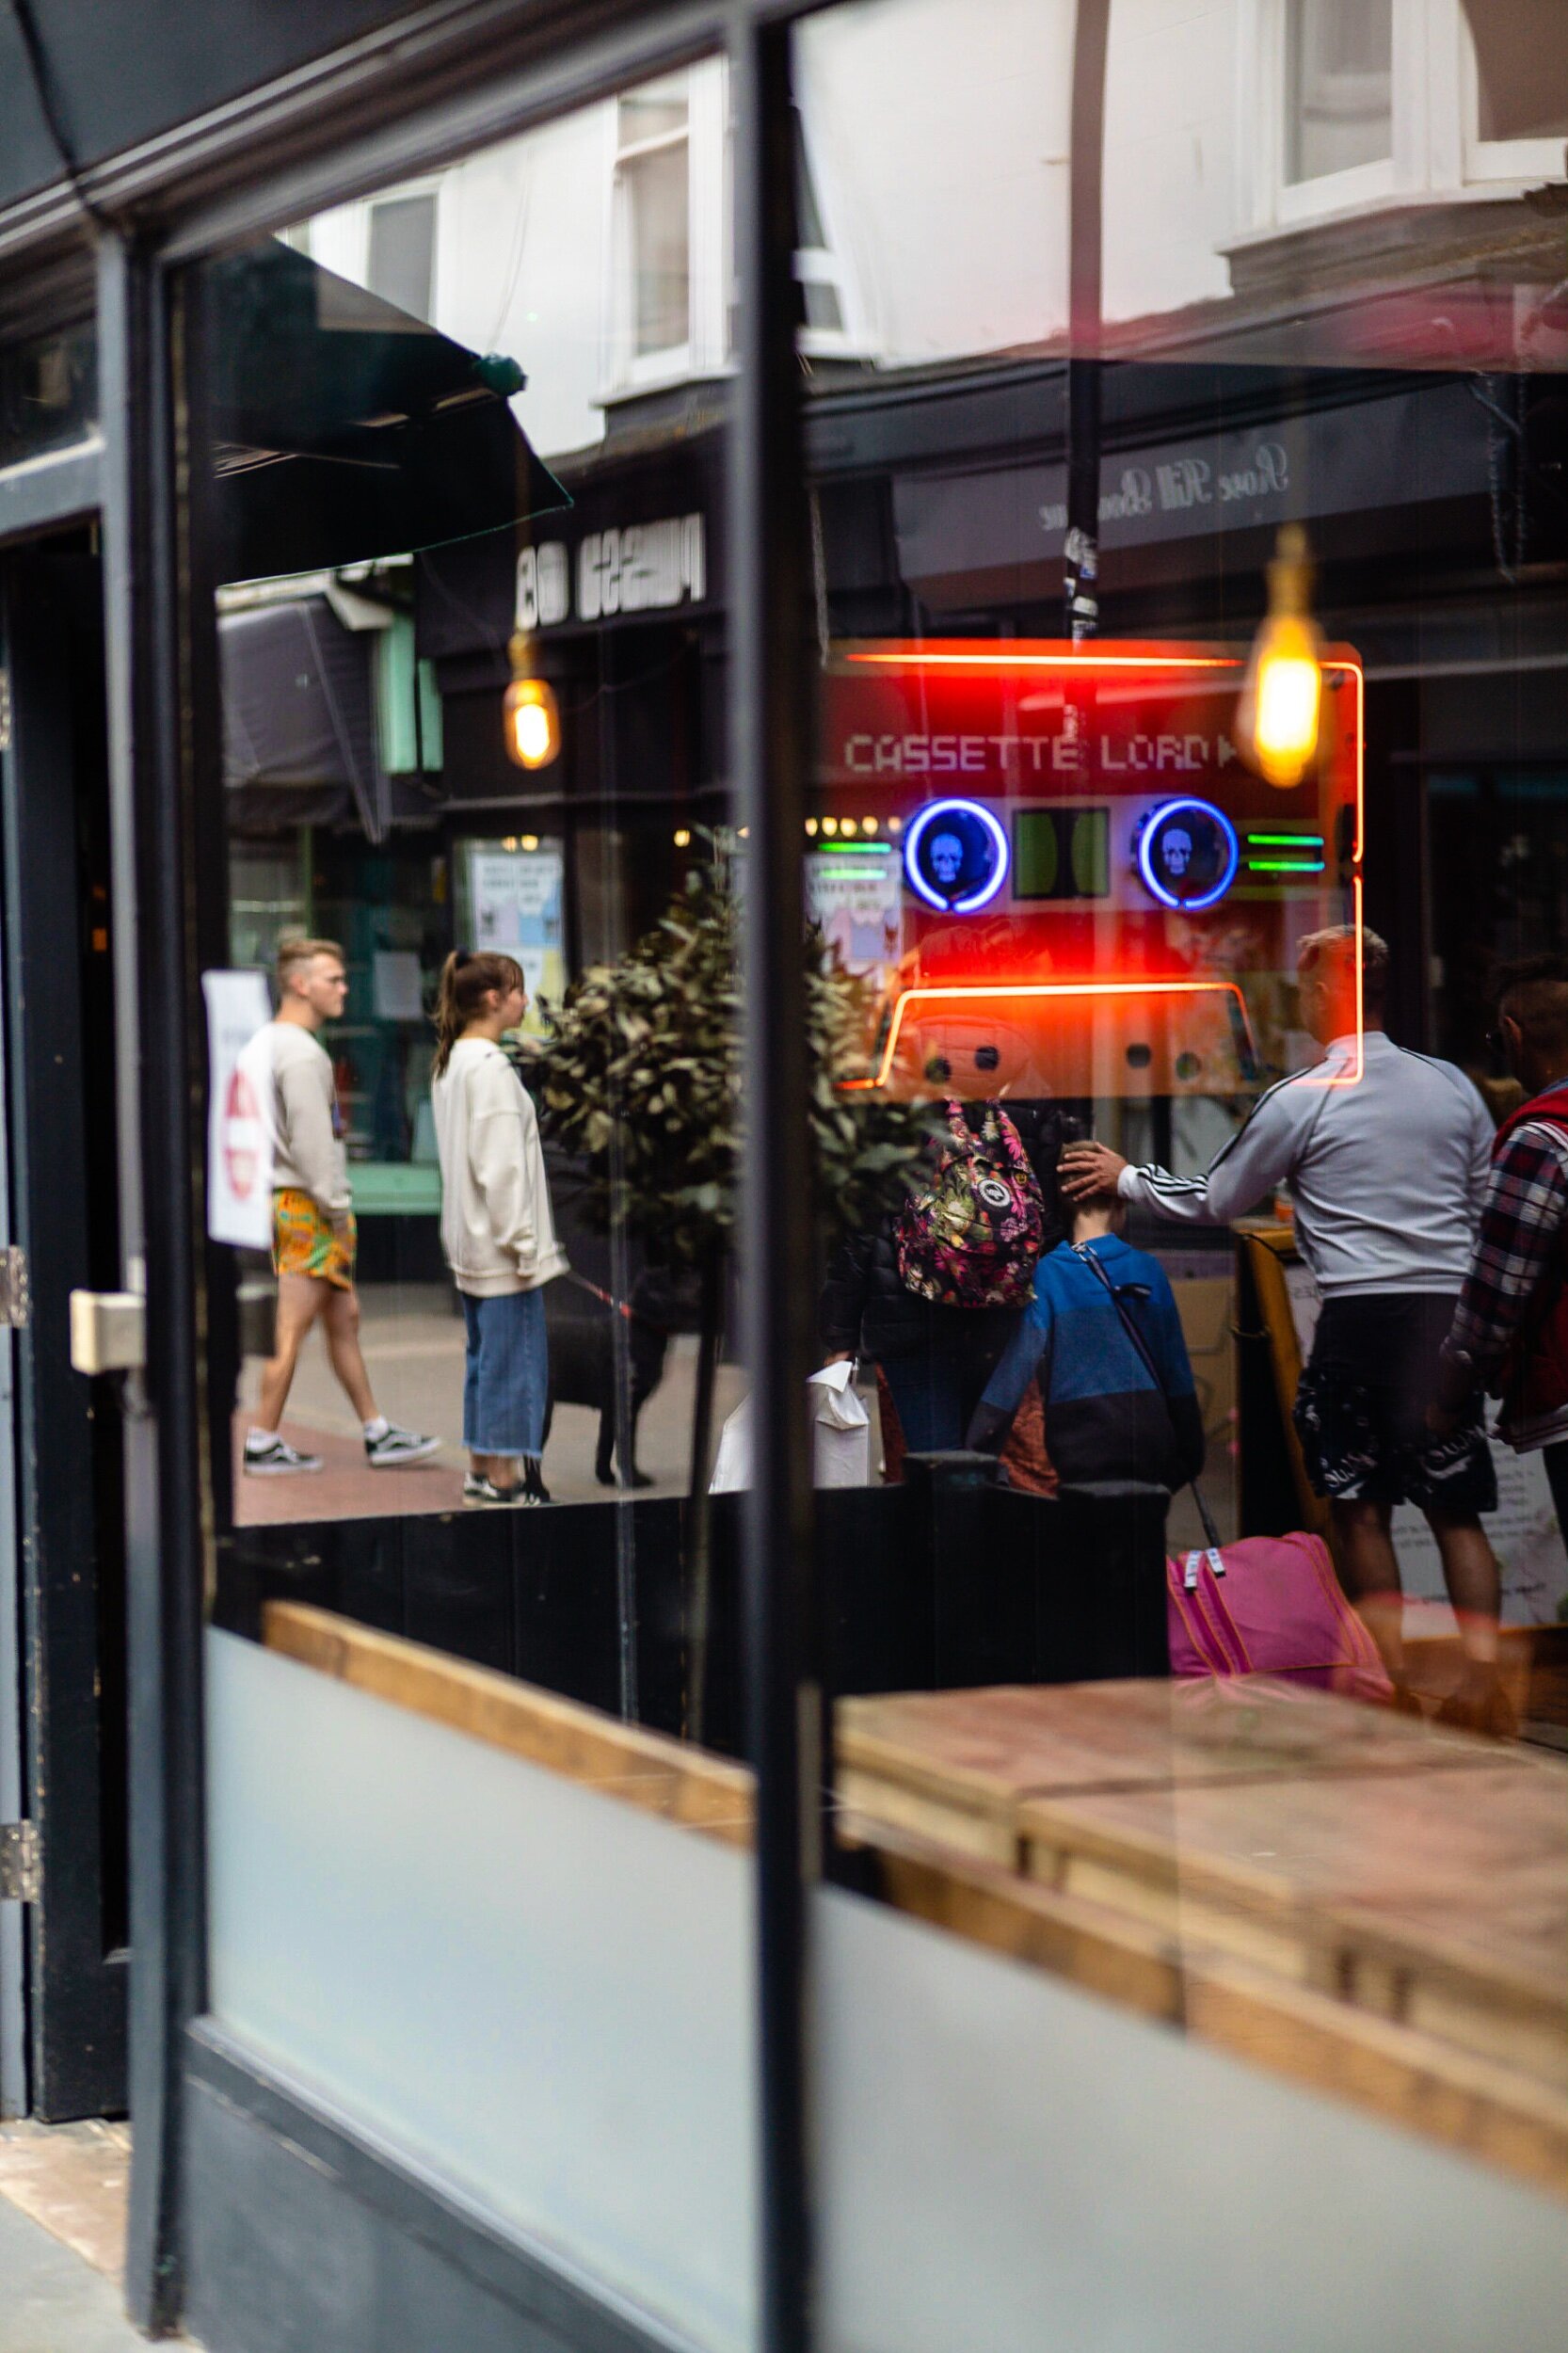
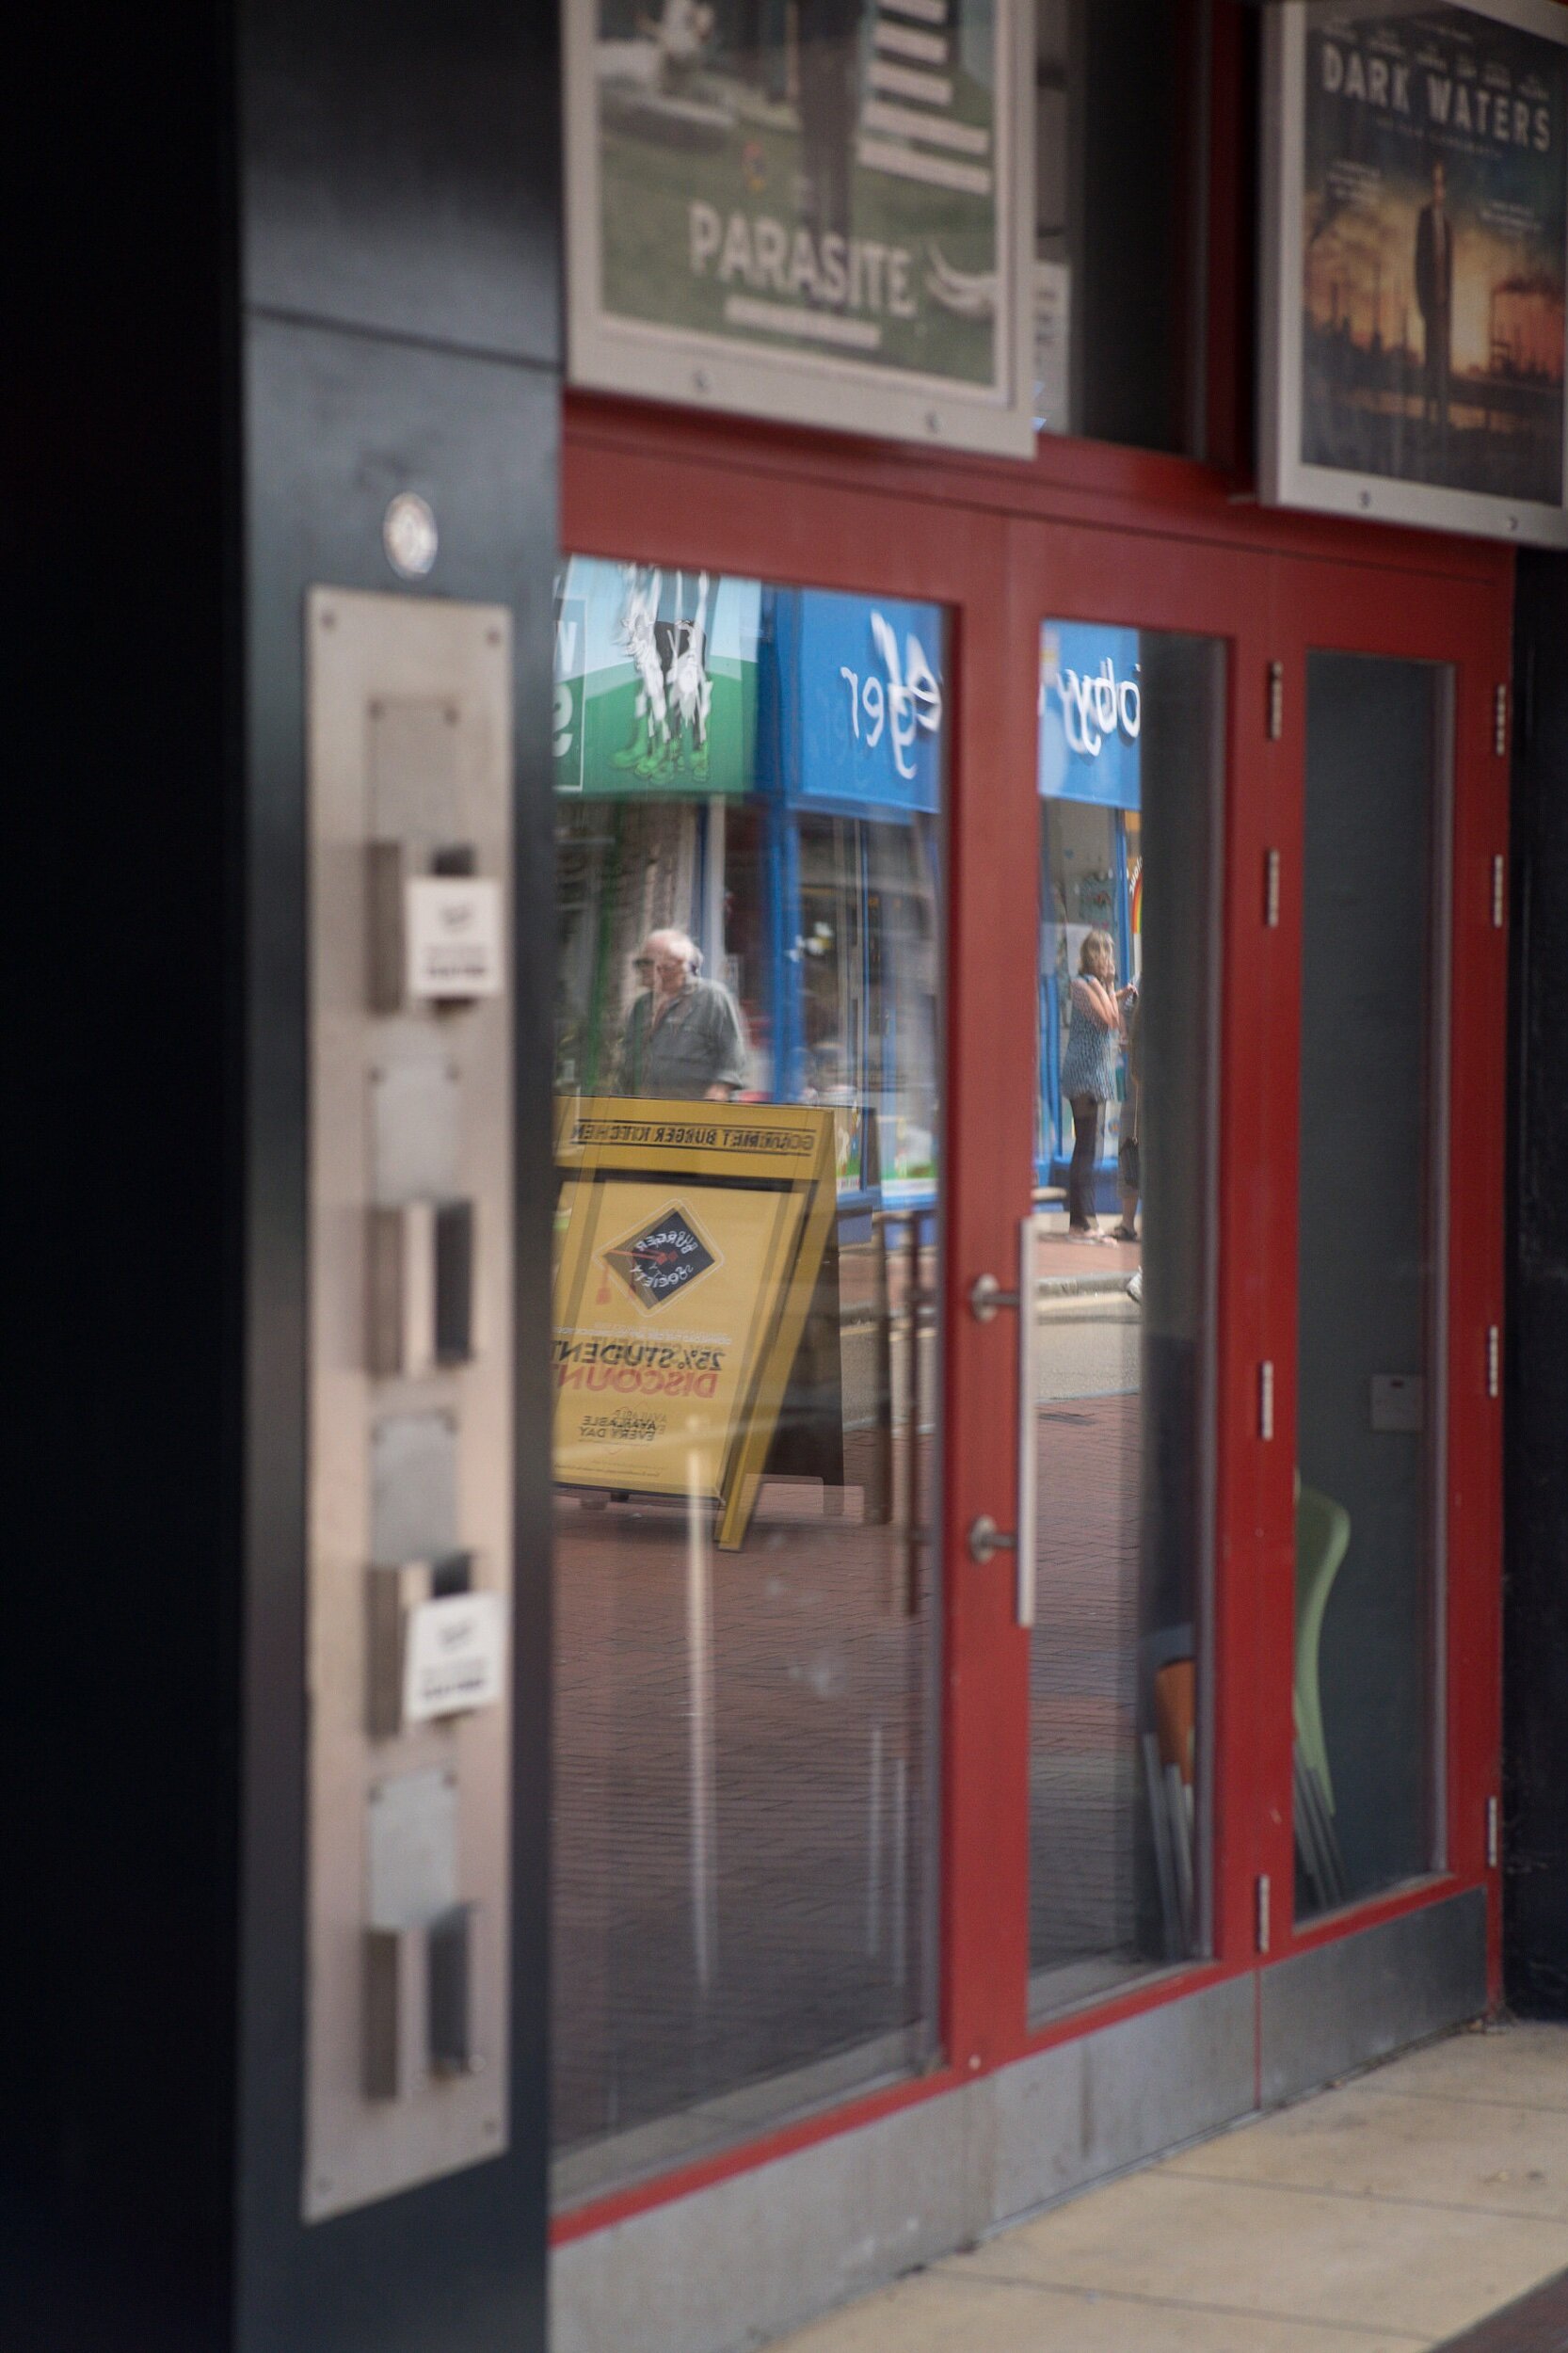
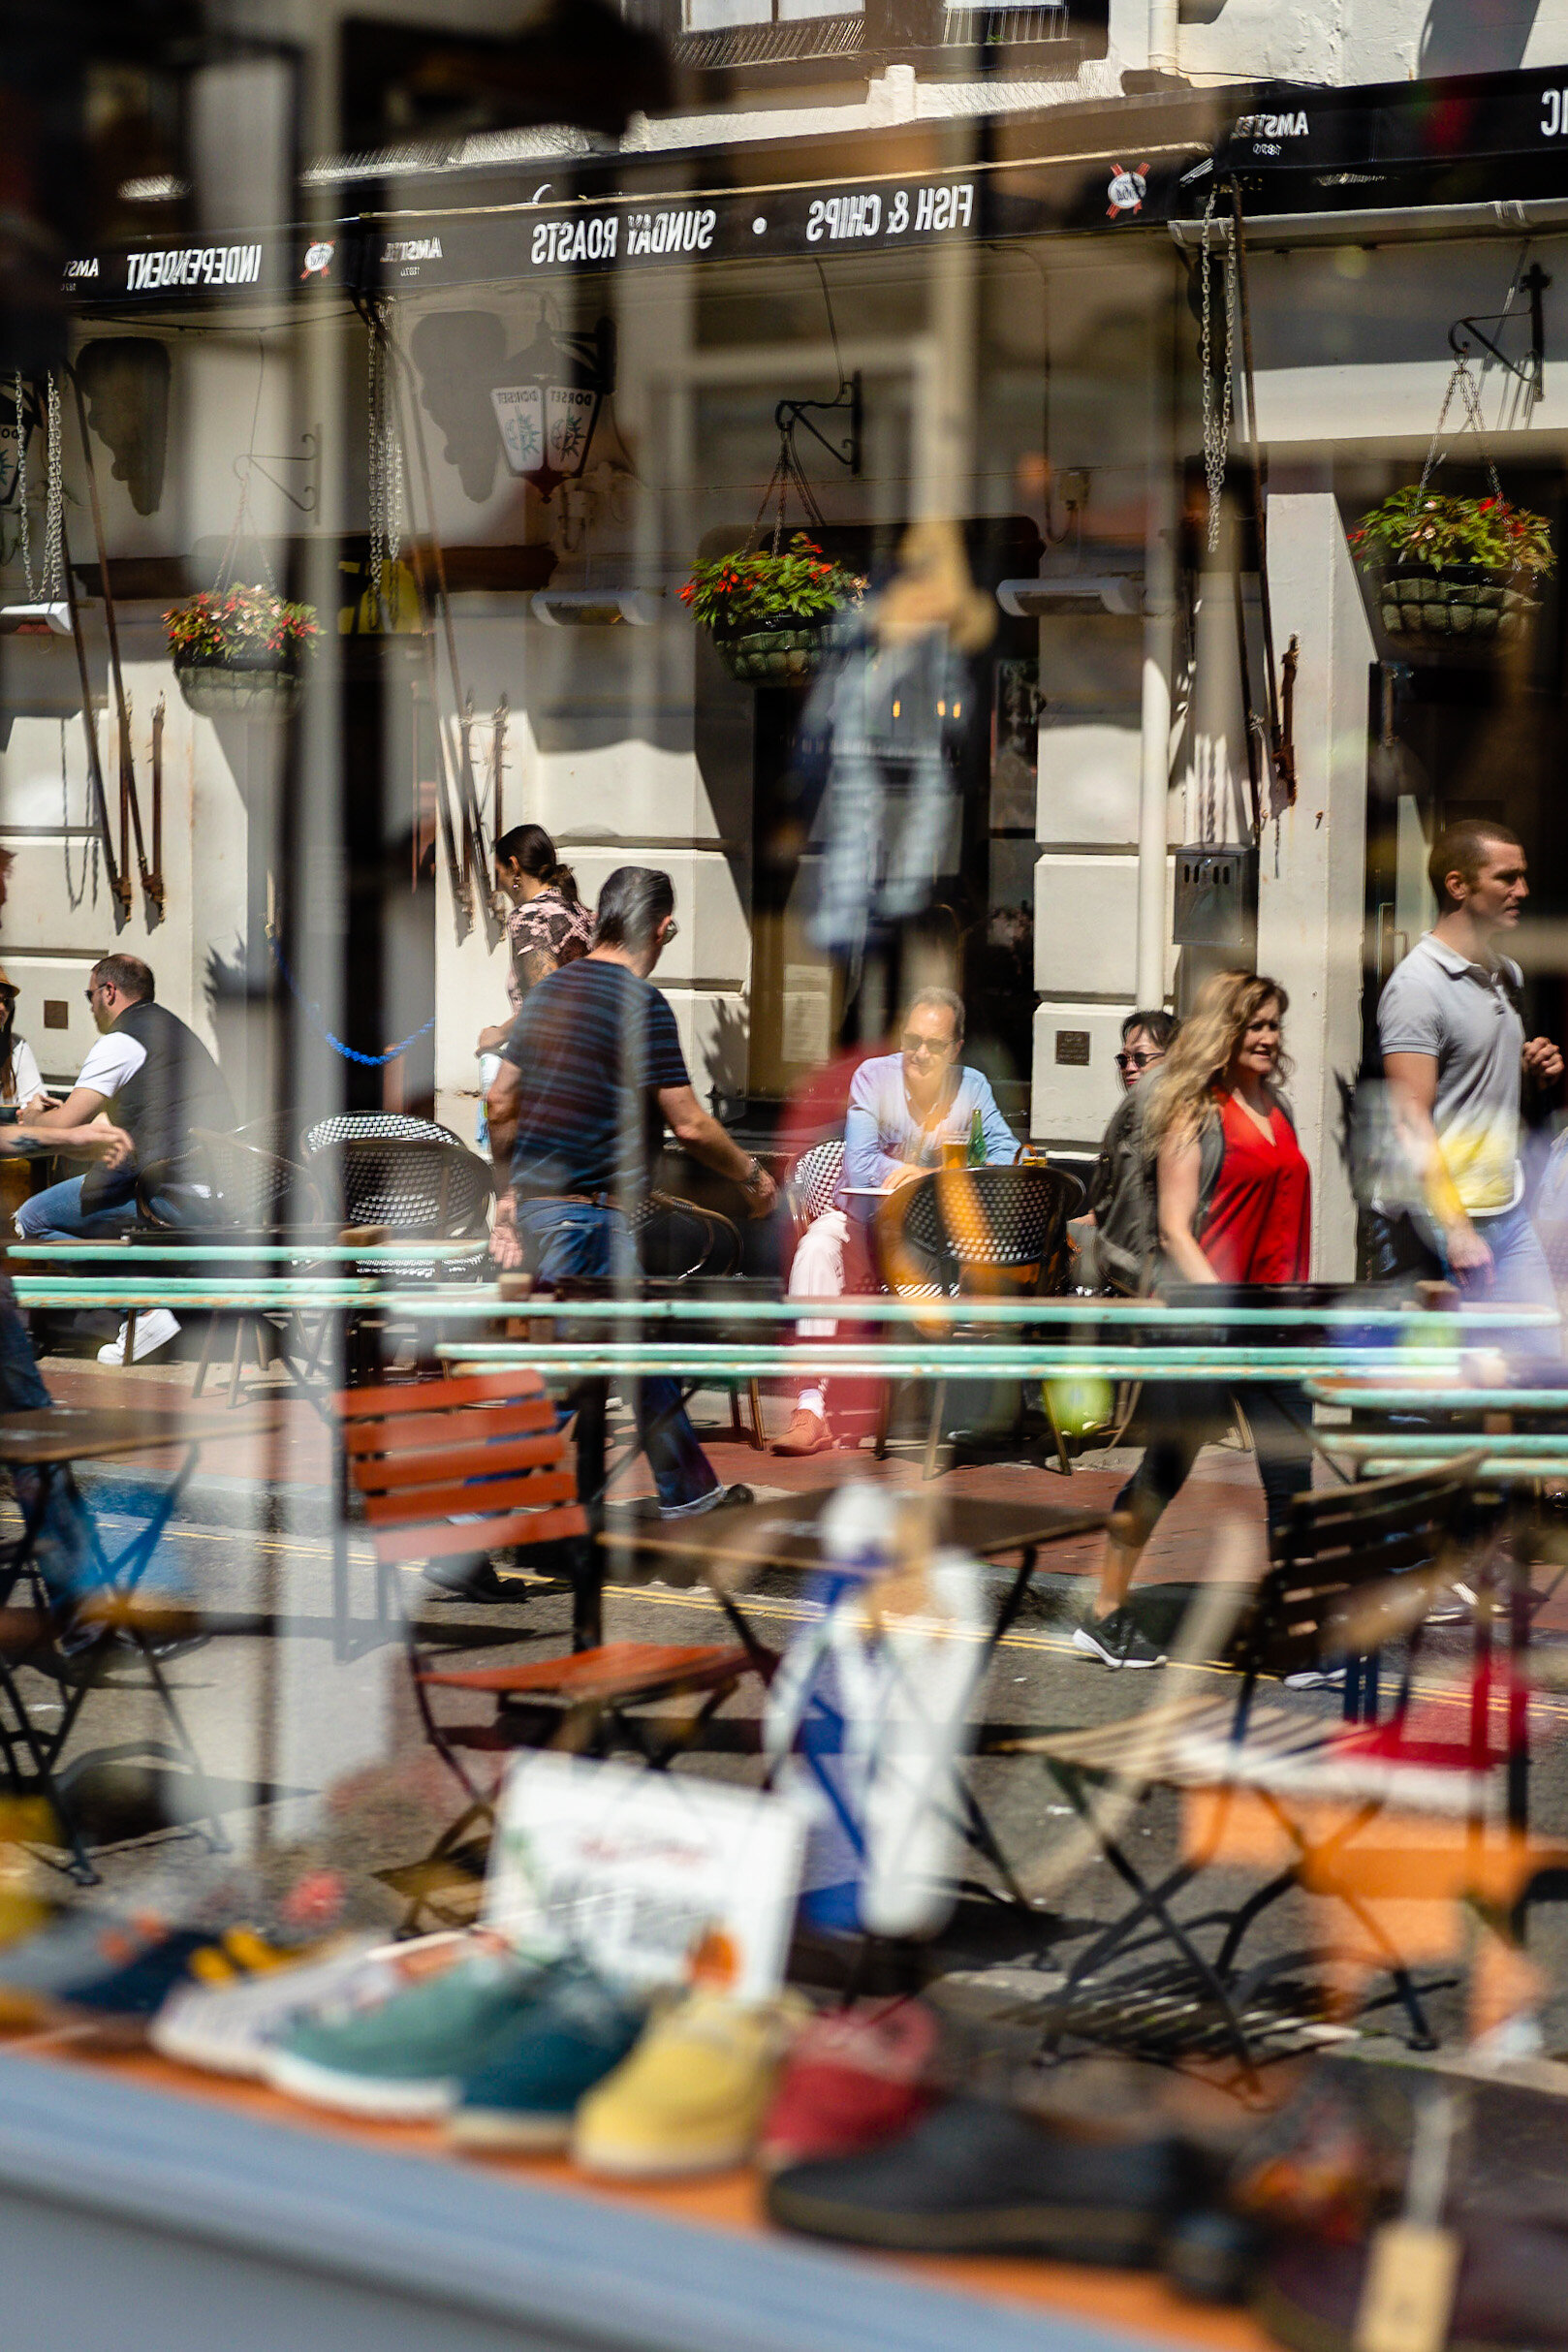
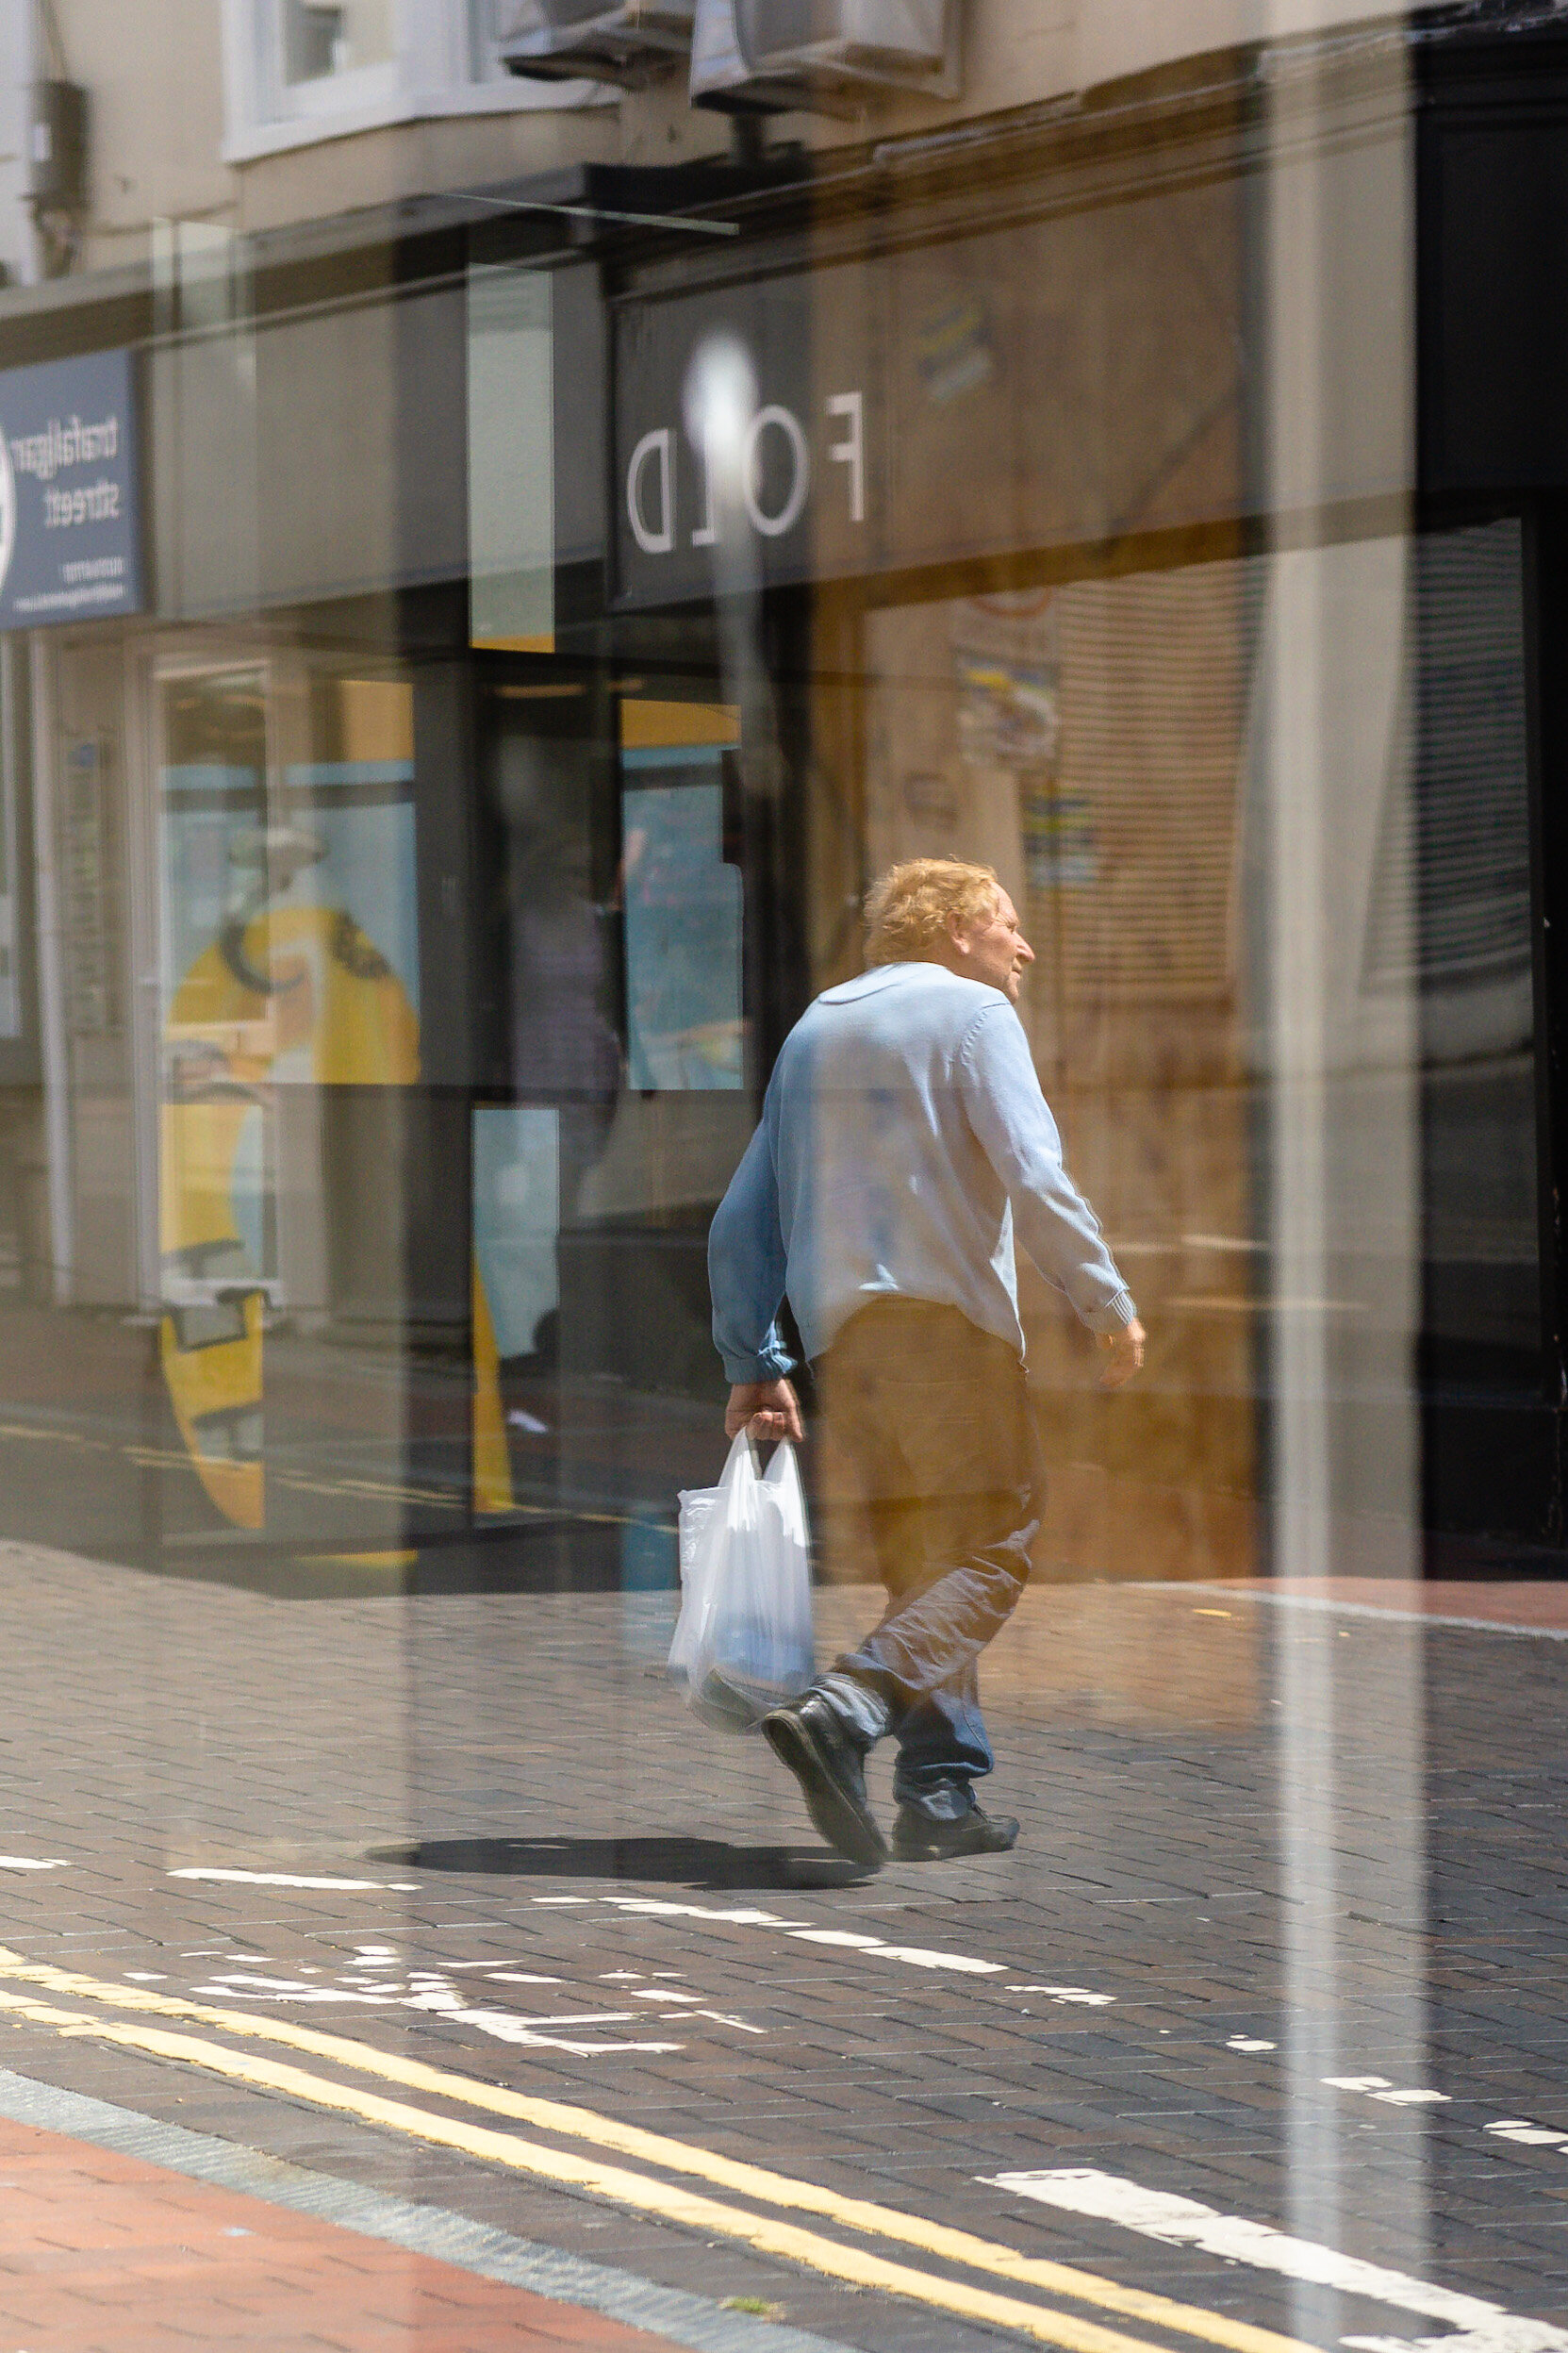
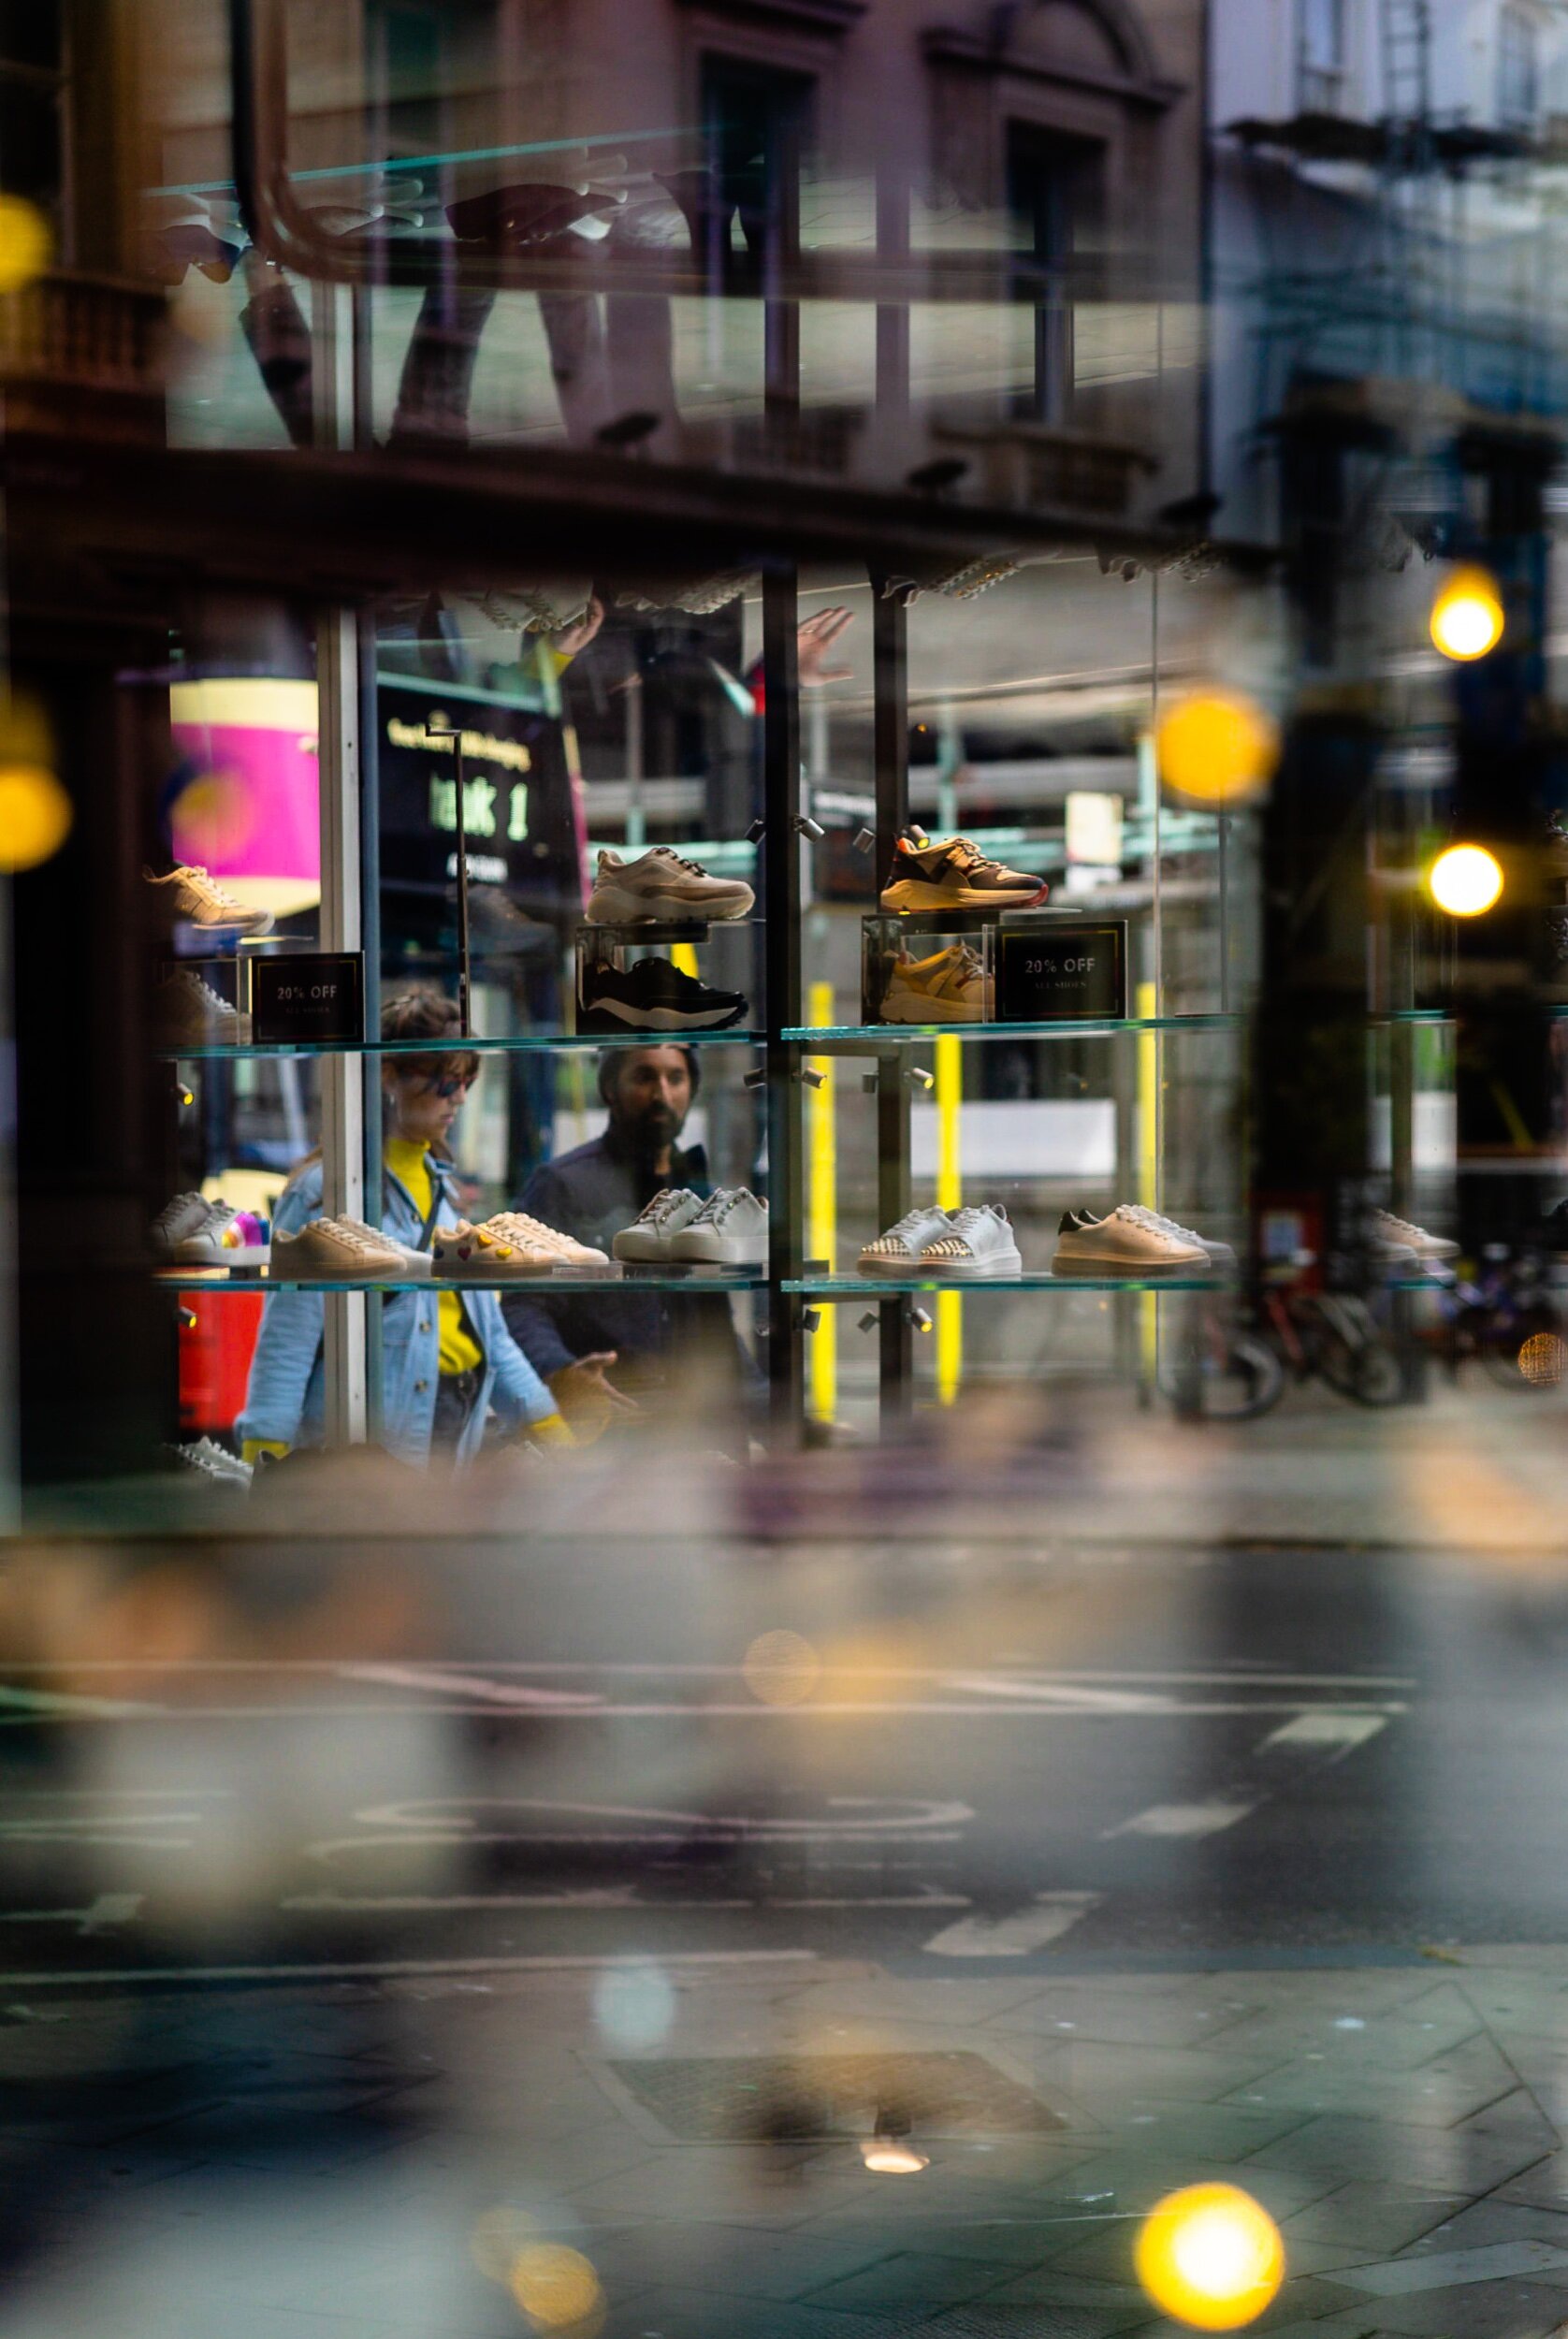
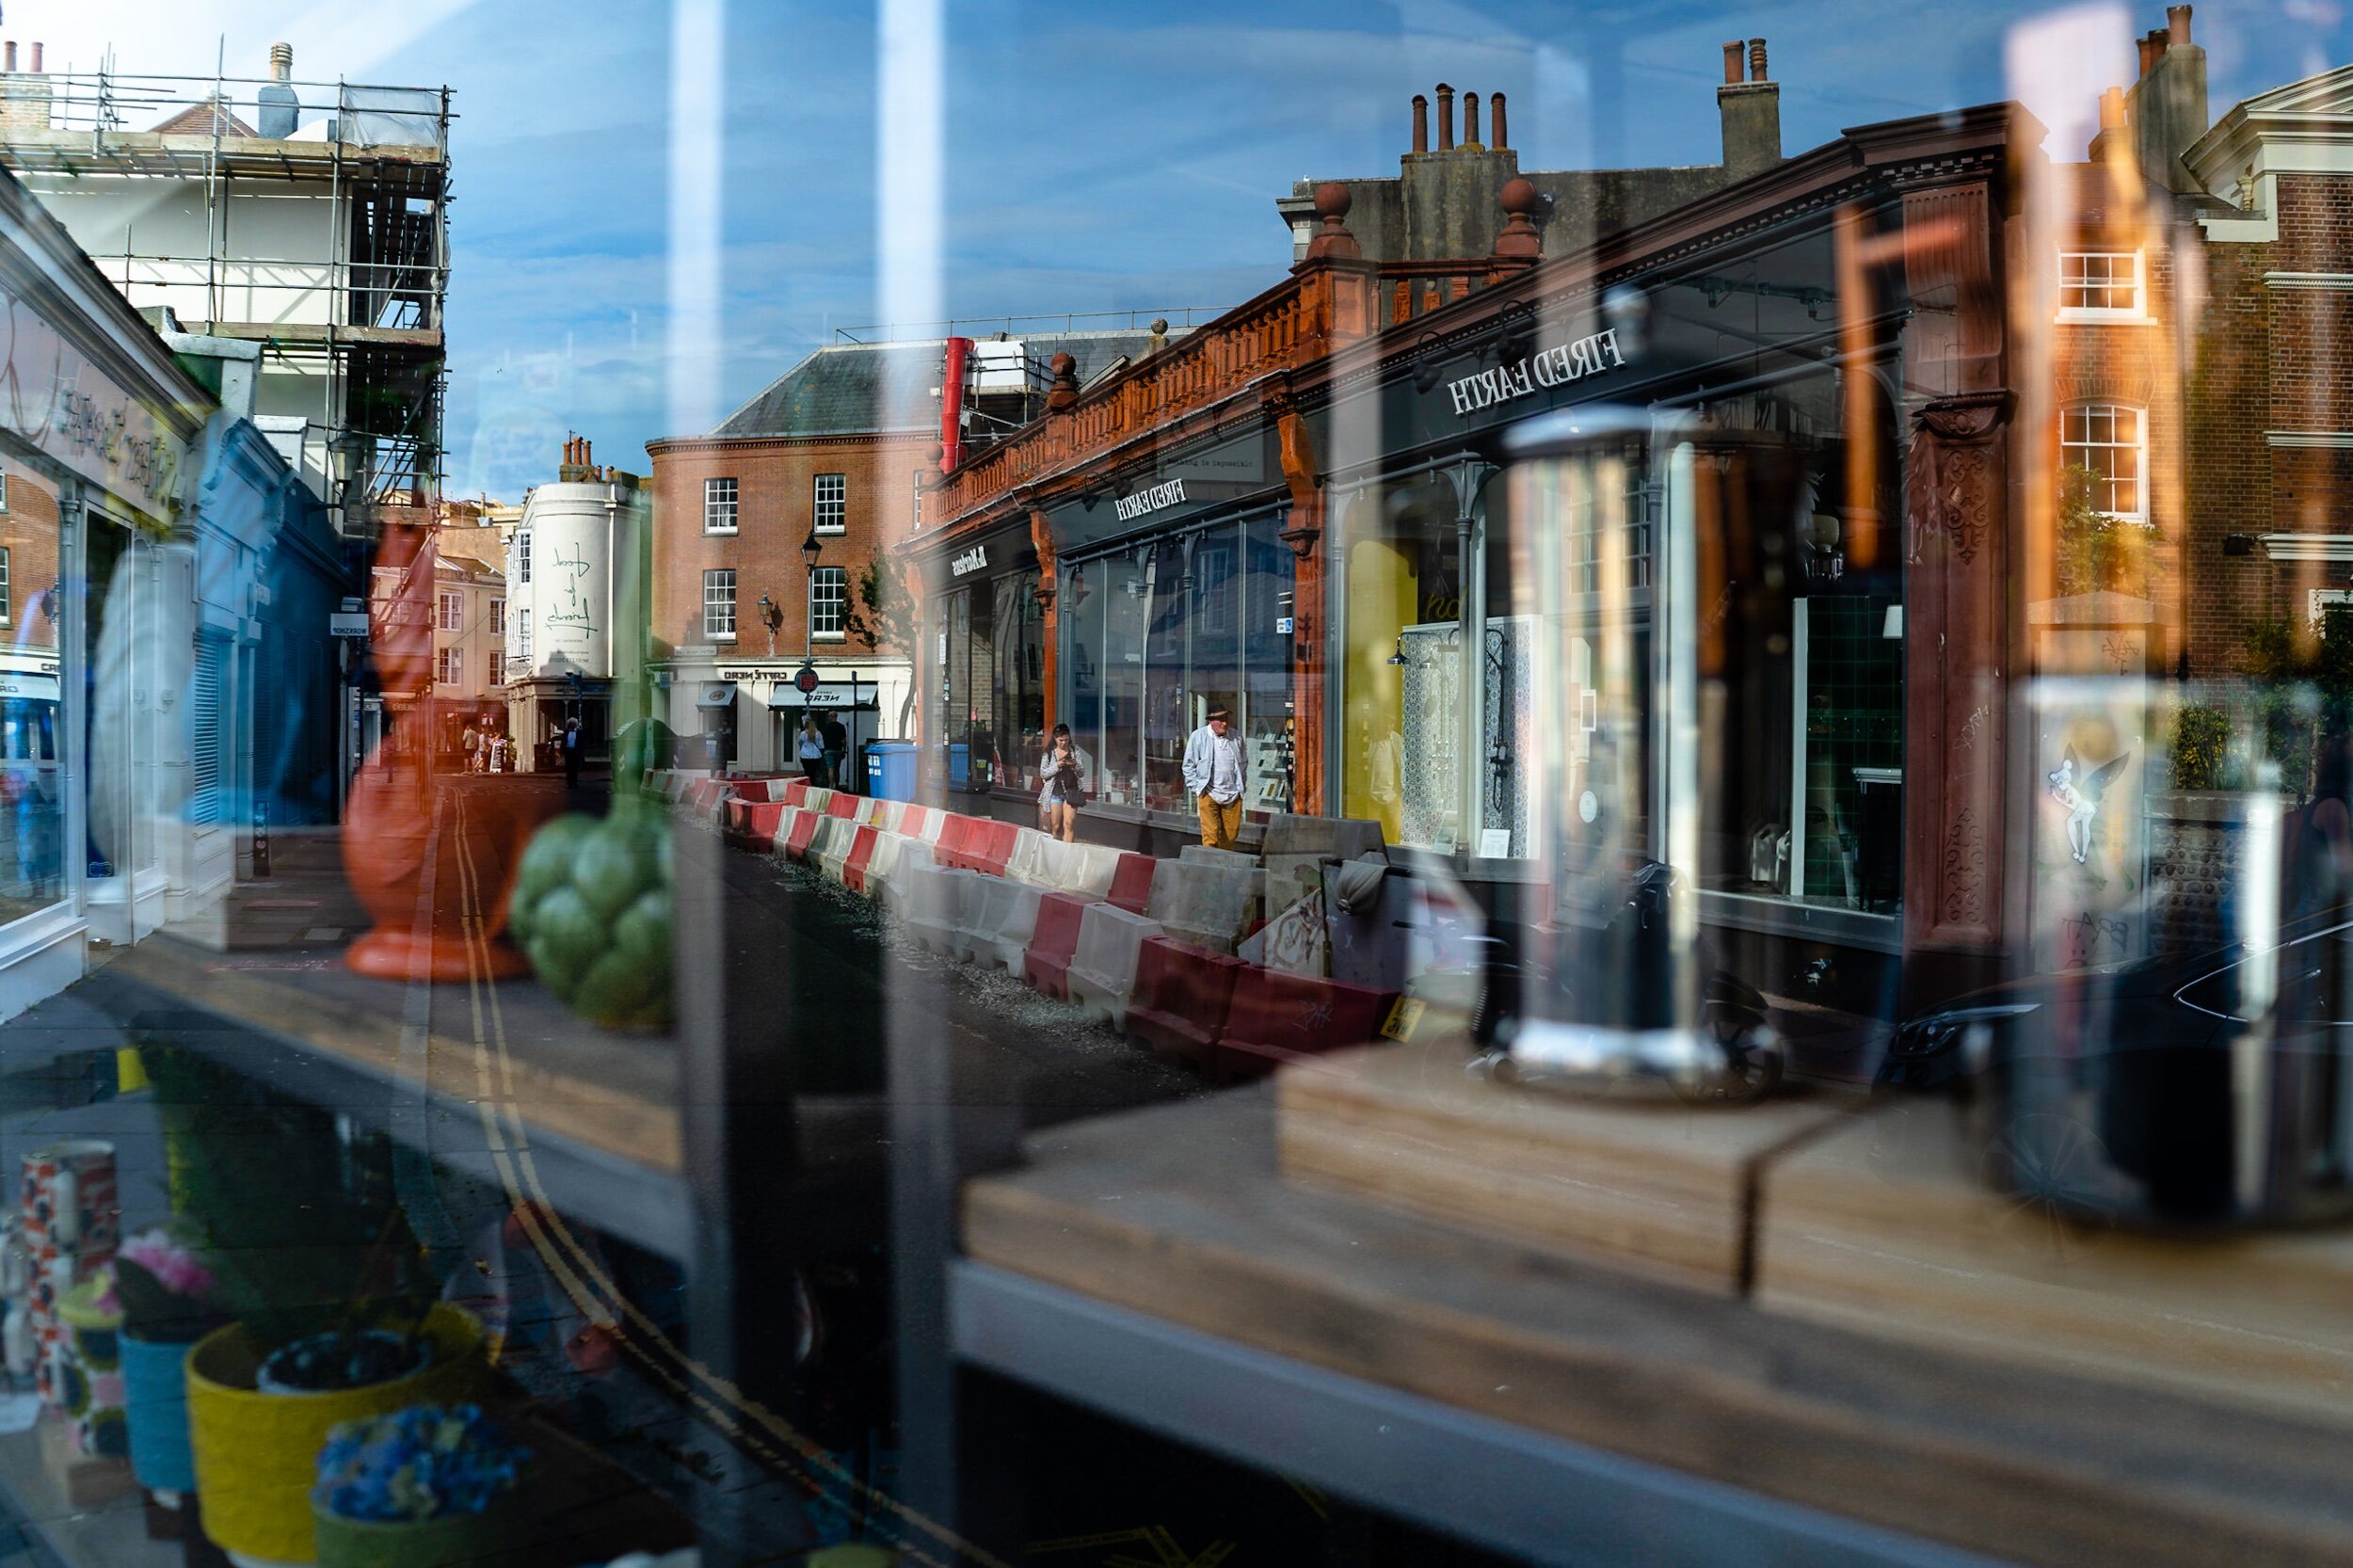
I discovered this creative side, as I started shooting images through the empty shops in Brighton whilst lockdown was in full effect. I quite like the abstract effect.


I never quite got the opportunity to explore the ‘nifty fifty’. I think this was possibly hindered by the fact that I had the 50mm on my Canon 7D, so whilst the lens rendered some beautiful photos, the bulk of the camera setup meant that I didn’t use it for street, it also had a crop factor sensor.
I started out originally taking street photography on my iPhone, which I understand was a 35mm equivalent, upgrading to the awesome Mark 1 Fuji x100 (also a 35mm), this was at the same time I switched to Android smartphones, which were all generally 28mm equivalent lens.
I felt obligated to shoot 28mm as this is considered a ‘purist’ street lens. The ‘tog has to get up real close and fill the frame. This is particularly the screens of the excellent Ricoh GR series of compact APS-c digital cameras. Nimble, stealthy and discreet.
I think my love for the grii is for another blog as is a comparison of the 35mm and 28mm.
I love the perspective of the 28mm ,but of late, I’m finding the ‘challenge’ of the 85mm, gives me a new leash of life with my street photography.
Whilst this won’t necessarily replace my core lens, its a necessary additional to the camera bag, that is a friendly GAS!
Until next time, keep snapping.
A selection of the images within this article are available for sale on the Website or Etsy Store, if you would like to enquire about something else, please click the email icon at the foot of this page.
Yes please, keep me posted when there’s a new blog
Instagram - Film